Table of Contents
Advertisement
Advertisement
Table of Contents

Related Manuals for Next Wave CNC SHARK HD500 Series


Summary of Contents for Next Wave CNC SHARK HD500 Series
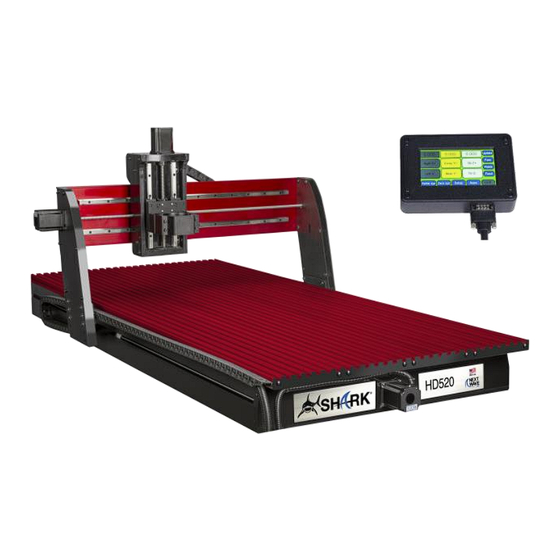
- Page 1 ® SHARK HD500/510/520 User’s Manual...
- Page 2 Copyright 2020 Next Wave CNC - All Rights Reserved. SHARK is the registered trademark of Next Wave CNC. Ready2Control is copyrighted by Next Wave CNC. Virtual Zero Unlimited is patented by Next Wave CNC. All other trademarks are the property of their respective owners.
-
Page 3: Table Of Contents
Table of Contents Page To Our Customers ………………………….…………………….… 4 System Requirements ……….………….…………..…..……..4 Product Warranty ..….…………….……………………………….… 5 Technical Support …….…………………….……..……………..…. 6 Safety .……….………………………………………..….…………… 7 Machine Assembly ……. ……………………………..….………… 10 Machine Registration …………………………………..….………… 20 VCarve software Installation ………….………..……..….………… 24 VCarve license registration ………….………..………….………… 32 Vectric User Portal account registration ……………..….…………... -
Page 4: To Our Customers
To Our Customers Thank you for purchasing a SHARK HD CNC from Next Wave CNC. Included with your purchase are software licenses for Ready2Control, Virtual Zero Unlimited, and VCarve Desktop (with the HD500 and HD510) or VCarve Pro (with the HD520). -
Page 5: Product Warranty
This warranty is void if the SHARK HD5 CNC or any portion of it is modified without the prior written permission from Next Wave CNC, or if the machine is located or has been used outside of the country where the machine was purchased. -
Page 6: Technical Support
Vectric information below. To locate the information, refer to the pages listed below. Controller Box Serial Number (page 21)_______________________________________ LCD Pendant Serial Number (page 21)_______________________________________ LCD Pendant Unlock Code (page 22)_______________________________________ Your VCarve User’s Name (page 35)_______________________________________ VCarve License Code (page 35)_______________________________________ SHARK HD500 Series User’s Manual... -
Page 7: Safety
Safety When operating machinery always wear the appropriate ear and eye protection and follow all safety instructions of the machine’s owner’s manual and related equipment manuals. Read safety and operating instructions before using your SHARK CNC. Take time to fully understand how to safely operate your SHARK CNC. - Page 8 1. The Stop button in the Run screen on the LCD Pendant. 2. The Emergency Stop switch on the front of the Control SHARK HD500 Series User’s Manual...
- Page 9 Emergency Stop (cont.) 3. The On/Off switch on the back of the Control Box 4. The On/Off switch on the surge-protected power strip. V. 12/20...
-
Page 10: Machine Assembly
• During assembly, lift the gantry by the rear beam or side legs. • Lift the assembled machine by edges of the aluminum table or under the front and rear legs. • DO NOT lift an assembled machine by the side covers or the gantry. SHARK HD500 Series User’s Manual... - Page 11 Machine Assembly (cont.) Step 5 Attach motor cables to back of control box (see page 18). Step 6 Step 7 Attach Pendant to Control Box Attach power cable to (see page 19). Control Box. (see page 19). IMPORTANT DO NOT plug in or power up your machine until the motor and Pendant cables are fully attached.
- Page 12 Step 1 Attach side covers Y-spar Step 1a Rotate side cover sand slide down over the Y-spar. Mounting screws Step 1b Attach the side covers with the mounting screws (4 per side). Do not over-tighten. SHARK HD500 Series User’s Manual...
- Page 13 Machine Assembly (cont.) Step 2 Attached Gantry Attach the gantry to the Y-spar using the included bolts and lock nuts (6 each side). Do not over-tighten. Attach the gantry using the top six holes on each leg (as shown above). This is the recommended "low gantry"...
- Page 14 Install cable carrier Step 3a Use a small tipped screwdriver to gently pry open the latch side of the crossbars on the cable carrier. Step 3b Loosen the sliding t-nuts that are installed on the cable carrier. SHARK HD500 Series User’s Manual...
- Page 15 Machine Assembly (cont.) Trim strip Step 3c Remove a few screws from the trim strip at the front left side of the table. Pull the trim back and slide the t-nuts and the cable carrier into the edge of the table. Step 3d Position the cable carrier inside the left gantry leg.
- Page 16 (For clarity, the gantry leg is not show in this picture. Step 3f Tighten the screws in the t-nuts to secure the cable carrier to the edge of the table. Place the cables in the cable carrier and close the crossbars. SHARK HD500 Series User’s Manual...
- Page 17 Machine Assembly (cont.) Step 3g Re-attached the front trim strip. An optional 2HP 110v spindle is available for your SHARK HD CNC. For information, contact your SHARK CNC dealer or visit www.NextWaveCNC.com Step 4 Install Router/Spindle mount. Loosely attach the mount with the socket head bolts (included).
- Page 18 NOTE: If you have the Spindle kit, DO NOT attach the VFD power cable to the back of the control box. It must be plugged directly into a wall socket or the power strip. SHARK HD500 Series User’s Manual...
- Page 19 Machine Assembly (cont.) Step 6 Attach the pendant cable between the Pendant and the control box. Step 7 Plug power cord into the switched surge-protected power strip to protect your tool and provide another method for shutting off the machine in case of an emergency. IMPORTANT –...
-
Page 20: Machine Registration
Failure to do so can cause damage to electrical components and is not covered by the warranty. Step 2 Once you power up your SHARK HD CNC, the opening screen will appear on the pendant. Click Continue. SHARK HD500 Series User’s Manual... - Page 21 Registration (cont.) Controller Box LCD Pendant serial number serial number XXXXX XXXXX Step 3 The Registration screen to appears next. It lists the serial numbers for your LCD Pendant and Control Box. Record these numbers on Page 6 of this manual. Step 4 Go to www.NextWaveCNC.com, click on the PRODUCT REGISTRAION tab...
- Page 22 Record your Unlock (Access) Code on page 6 of this manual. XXXX2 XXXX2 4XXX0 Step 7 Use the number keys on the Pendant to enter your Unlock (Access) Code. Press Submit. This unlocks the Pendant. SHARK HD500 Series User’s Manual...
- Page 23 Registration (cont.) Step 8 The Calibration screen appears next. Follow the on-screen direction to complete the calibration. The main screen (below) appears at the end of calibration process. Step 9 Your SHARK CNC is now unlocked. See the Pendant User’s manual for complete instruction on using your LCD Control Pendant.
-
Page 24: Vcarve Software Installation
License Code that’s printed inside the lid of the box (see picture on next page). And a second time with your personal Username, and a new License Code that is emailed to you from Vectric after the first registration. SHARK HD500 Series User’s Manual... - Page 25 Installing VCarve software (cont.) Summary of Installation process Insert VCarve USB drive into your computer. (page 26) Open USB drive in File Explorer and double click on the Start.exe file (page 26) Click on Design and Toolpath Software (page 27) Click on Install Software (page 27) Follow pop-up installation instructions (pages 28-31) Register VCarve using the supplied Username and...
- Page 26 Installing VCarve software (cont.) Step 1 Inset the thumb drive into your computer USB port Step 2 Double click on the “start.exe” file. This opens the information window. SHARK HD500 Series User’s Manual...
- Page 27 Installing VCarve software (cont.) Step 3 Click on the Design & Toolpath Software button to start the software install process. Step 4 Click on INSTALL SOFTWARE. This starts the VCarve installation process. You can return to this window later and install additional support and training materials.
- Page 28 Installing VCarve software (cont.) Step 5a If you receive this or a similar pop-up, click Yes to proceed with the installation process. Step 5b Select language and click OK SHARK HD500 Series User’s Manual...
- Page 29 Installing VCarve software (cont.) Step 5c Close other programs on your computer and click Next Step 5d Review License Agreement and click I Agree V. 12/20...
- Page 30 Installing VCarve software (cont.) Step 5e Match settings and click Next. Step 5f Accept default folder or pick a new one. Click Next to continue. Step 5g Accept default Start Menu folder and click Install. SHARK HD500 Series User’s Manual...
- Page 31 Installing VCarve software (cont.) Step 5h A progress bar appears during program installation. Step 5i Check the box and click on Finish Step 6a Check Manual button and then click Next. V. 12/20...
-
Page 32: Vcarve License Registration
User Name and License Code. To avoid confusion, the following characters are not used in the License Code:: 1, 0, O, L SHARK HD500 Series User’s Manual... - Page 33 Registering VCarve software (cont.) Step 6c Click Finish Step 7a Click Register Now. This launches the second “personal registration process. V. 12/20...
- Page 34 Registering VCarve software (cont.) Step 7b Complete the form and click Summit Registration Request button. SHARK HD500 Series User’s Manual...
- Page 35 Registering VCarve software (cont.) Step 7c Next you should see a confirmation notice. To Your Email Name Your User Name Your User Name Your License Code xxxxxxxxxxxxxxxxxxxxxxxxxxxxxxxxxxxxxxxxxxx Step 7d Next you should receive an email with your Personal Username and License Code V.
- Page 36 Registering VCarve software (cont.) Step 7e Return to VCarve and re-open the license code window using either the pop-up window or the dropdown menu. SHARK HD500 Series User’s Manual...
- Page 37 Registering VCarve software (cont.) Step 7f Select Manual and click Next Step 7g Enter or paste your Personal license information into the form. V. 12/20...
- Page 38 Registering VCarve software (cont.) Your Name shows here Step 7h This screen appears showing your name. Click Finish to continue. Step 7i Exit VCarve. SHARK HD500 Series User’s Manual...
- Page 39 Registering VCarve software (cont.) Step 7j Restart VCarve. Your Name shows here Step 7k The software is now registered to your personal name and email. Your name should now appear at the top of the VCarve window. V. 12/20...
-
Page 40: Vectric User Portal Account Registration
Login to V&Co button in the upper right corner Step 2 At the bottom of the Login screen click on Click here to sign up now! Follow the prompts to create an account. SHARK HD500 Series User’s Manual... - Page 41 Open a Vectric V&Co portal account (cont.) Opening a Vectric V&Co Portal account gives you easy access to software updates, free 2D and 3D clipart downloads and ready access to your license codes. V. 12/20...
-
Page 42: Vcarve Software Version Updates
Open VCarve and look for an update notice in the upper right corner. Click on it to launch the install window. Follow the prompts to complete the Update. Step 2 Follow the prompts to complete the Update. SHARK HD500 Series User’s Manual... - Page 43 Upgrading VCarve (cont.) Step 3. A Patch Successful notice appears after the update has completed. {Your Name} {Your Name} Step 4. Restart VCarve. The New Version number appears in the upper left corner. V. 12/20...
- Page 44 Explore and expand your creativity with these accessories from Next Wave CNC. Available from your local Next Wave CNC distributor or online at www.NextWaveCNC.com Z Zero Touch plate – Automate your Z zeroing process with accuracy and convivence. The standard model has a 2-inch diameter.
- Page 45 CNC Project Workflow It is important to recognize that unlike other wood working and machining tools, you just don’t walk up to a CNC with your material, hit the power button, and start cutting or carving your project. Rather you need to prepare project files on the computer and then “run”...
- Page 46 Z Zero Position and the XY Datum (Zero) Position. Step 1b For this project example we’re using the settings as shown at the right. Step 1c Click OK to save and exit the Job Setup window. SHARK HD500 Series User’s Manual...
- Page 47 CNC Project Workflow (cont.) Step 2 Use the drawing tools in VCarve to design your project. Learning to use the drawing tools in VCarve is one of the biggest parts of the CNC learning curve, but there are many resources available to help you learn VCarve.
- Page 48 All bits - Feed Rate 50-120 ipm All bits - Plunge Rate 50-80 ipm Straight bit – Step over 10% - 40% V-bits - Final pass 2% V-bit - Clearance pass 20% Ballnose bit - 3D finishing pass 7-11% SHARK HD500 Series User’s Manual...
- Page 49 CNC Project Workflow (cont.) Step 4 Preview your toolpaths. The Preview window in VCarve allows you to see your carved design before you cut it on the CNC. It’s a great way to see if you’re toolpaths are cutting where you want them to cut. If something doesn’t look right in the Preview Toolpaths window, it means that’s something is probably wrong with one or more of your toolpath settings and you should go back to the toolpath(s) and make...
- Page 50 Save your toolpaths to a thumb drive. Start by selecting the Post Processor that matches your machine. For your SHARK CNC select the Next Wave CNC (*.tap) post processor. Once you’ve selected a post processor from the list, it will become the default post processor for future projects.
-
Page 51: Cnc Workflow
CNC Project Workflow (cont.) Step 6 Mark the XY Datum (zero) position on your material and clamp it to the table of your CNC. For this project, the XY Datum position is the center of the board. It’s important to securely clamp your board to the table of the CNC. You don’t want it to move during cutting. - Page 52 The same applies to the X-axis and Y-axis. So be careful not to hit the hard stops after you zero the axes. SHARK HD500 Series User’s Manual...
- Page 53 CNC Project Workflow (cont.) Step 8 Zero the router bit to the material. Step 8a Use the XYZ keys to move the bit over to center mark on the board. Keep the tip of the bit a little bit above the material. You can adjust the jog speed by toggling the jog speed button.
- Page 54 Note that the Z position field changes as you lower the bit. Step 8c Press the Zero xyz button again. This zeros the X,Y, and Z axes (tip of the bit) to the surface of the material. All three axes are now calibrated. SHARK HD500 Series User’s Manual...
- Page 55 CNC Project Workflow (cont.) Step 8d Use the Up Z+ key to move the bit up about 0.5”. Remove the paper. The machine (router bit) is now zeroed to the material. Step 9 Load and Run TAP file Step 9a Insert the thumb drive into the LCD Pendant V.
- Page 56 CNC Project Workflow (cont.) Step 9b Press the USB key to open the file selection window Step 9c Press on the project .tap file name that you want to cut. SHARK HD500 Series User’s Manual...
- Page 57 CNC Project Workflow (cont.) Step 9d Preview the settings to make sure you’ve selected the correct TAP file and calibrated you CNC to match the VCarve file. Press Next to continue. Step 9e If the screen above appears, press OK to continue, unless you plan to use the Virtual Zero function.
- Page 58 NOTE: A new VFD digital control cable will be available from Next Wave CNC around mid to late 2021. The cable will connect the VFD directly to the Control Box and enable auto on/off and auto RPM control of the spindle.
- Page 59 CNC Project Workflow (cont.) Step 10 Press the Start button to run your project .tap cutting file. Your SHARK will start moving and cutting the project. Step 11 Sand and finish your project V. 12/20...
-
Page 60: Machine Maintenance
CNC retailer or online at: nextwaveCNC.com/shop Similar products are available at hardware stores. Make sure it is the dry type, so it doesn't attract dust and cause buildup. Linear Bearing Grease and 6mm Nozzle Kit Available at www.NextWaveCNC.com/shop SHARK HD500 Series User’s Manual... - Page 61 Maintenance (cont.) SHARK HD5 Series Guide Rail and Bearing Maintenance X and Z Rails Dust and debris build-up on the guide rails can have a negative impact on the performance of your machine, so it is important to keep them clean and lubricated.
- Page 62 Firmly push the nozzle against the bearing’s grease fitting and use the trigger to apply the grease. (It takes only a couple pulls for each application) 3. Move the machine to its travel limits to disperse lubricant. SHARK HD500 Series User’s Manual...
-
Page 63: Resources
Wave CNC products, please contact our support team at support@nextwaveCNC.com NWA Owners Only Forum https://forums.nextwaveCNC.com/ An online group of the CNC users geared around Next Wave CNC machine owners. The website has projects, ideas, showcase, and valuable support from users of all levels. CNC SHARK Talk User Forum www.cncSHARK talk.com... - Page 64 SHARK HD500/510/520 User’s Manual...
Need help?
Do you have a question about the SHARK HD500 Series and is the answer not in the manual?
Questions and answers
How to tram the HD520