Advertisement
Quick Links
Advertisement

Related Manuals for Nuu Garden SAS094-01-HS


Summary of Contents for Nuu Garden SAS094-01-HS
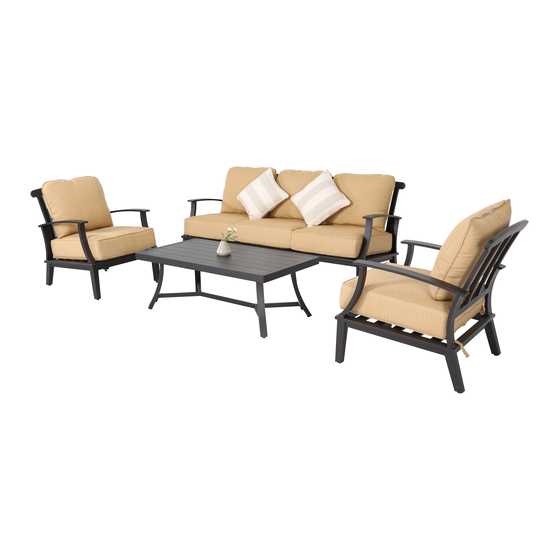
- Page 1 INSTRUCTION MANUAL 4PCS Aluminum Sofa Set SAS094-01-HS/SAS094-01-KF...
- Page 2 INTRODUCTION Thanks for purchasing and trusting NUUGARDEN with your home decorating plans. This product is a furniture designed and made by NUUGARDEN Corp. We are committed to R&D innovation and creating the most refined, diverse choice of outdoor collection. After unpacking and before every use, check whether the item shows any damages.
- Page 3 Images Part Qty. Number Sizes M6*20 M6*35 M6*55...
- Page 4 ASSEMBLY INSTRUCTIONS CAVEAT Note: Please do not tighten any bolt until all bolts have been put into right place. If you tighten one bolt, it maybe cause other bolts out of position. STEP 1 Attach the seat frame( B) to the left armrest (C) using 3 bolts (J35) and 3 washers (L15). Do not over tighten. Note: The front end of the seat frame is wider than the back end.
- Page 5 ASSEMBLY INSTRUCTIONS CAVEAT Note: Please do not tighten any bolt until all bolts have been put into right place. If you tighten one bolt, it maybe cause other bolts out of position. STEP 2 Attach seat frame (B) to the right armrest (D) using 3 bolts (J35) and 3 washers (L15). Do not over tighten.
- Page 6 ASSEMBLY INSTRUCTIONS CAVEAT Note: Please do not tighten any bolt until all bolts have been put into right place. If you tighten one bolt, it maybe cause other bolts out of position. STEP 3 Attach the narrow end of the seat frame (B) to the back frame (A) using 1 bolt(J20) and 1 washer(L15). Attach 2 armrests (C & D) to the back frame(A) using 4 bolts(J55) and 4 washers(L15). Do not over tighten.
- Page 7 ASSEMBLY INSTRUCTIONS CAVEAT Note: Please do not tighten any bolt until all bolts have been put into right place. If you tighten one bolt, it maybe cause other bolts out of position. STEP 4 Attach seat frame (B) to the middle tube (G) using 2 bolts (J20) and 2 washers (L15). Do not over tighten.
- Page 8 ASSEMBLY INSTRUCTIONS CAVEAT Note: Please do not tighten any bolt until all bolts have been put into right place. If you tighten one bolt, it maybe cause other bolts out of position. STEP 5 Upon completion of full assembly and bolted up-all screws can be tightened down. Put seat cushions (E) and backrest cushions (F) on the chair.
- Page 9 Images Part Qty. Number Sizes M6*55 M6*35...
- Page 10 ASSEMBLY INSTRUCTIONS CAVEAT Note: Please do not tighten any bolt until all bolts have been put into right place. If you tighten one bolt, it maybe cause other bolts out of position. STEP 1 Attach seat frame (B) to the left armrest (C) using 3 bolts (J35) and 3 washers (L15). Do not over tighten. Note: The front end of the seat frame is wider than the back end.
- Page 11 ASSEMBLY INSTRUCTIONS CAVEAT Note: Please do not tighten any bolt until all bolts have been put into right place. If you tighten one bolt, it maybe cause other bolts out of position. STEP 2 Attach seat frame (B) to the right armrest (D) using 3 bolts (J35) and 3 washers (L15). Do not over tighten.
- Page 12 ASSEMBLY INSTRUCTIONS CAVEAT Note: Please do not tighten any bolt until all bolts have been put into right place. If you tighten one bolt, it maybe cause other bolts out of position. STEP 3 STEP 3 Attach the back frame (A) to 2 armrests using 4 bolts (J55) and 4 washers (L15), Do not over tighten.
- Page 13 ASSEMBLY INSTRUCTIONS CAVEAT Note: Please do not tighten any bolt until all bolts have been put into right place. If you tighten one bolt, it maybe cause other bolts out of position. STEP 4 STEP Upon completion of full assembly and bolted up-all screws can be tightened down. Put the seat cushion (E) and the backrest cushion (F) on the chair.
- Page 14 Images Part Qty. Number Sizes M6*ø16 M6*25 M6*ø9.5...
- Page 15 ASSEMBLY INSTRUCTIONS CAVEAT Note: Please do not tighten any bolt until all bolts have been put into right place. If you tighten one bolt, it maybe cause other bolts out of position. STEP 1 Attach table top (A) to 4 legs (C) using 8 bolts (E), 8 washers(D) and 8 spring washers (F). Do not over tighten. Attach 4 legs (C) to legs connector (B) using 4 bolts (E), 4 washers (D) and 4 spring washers (F).
-
Page 16: Care And Maintenance
CARE AND MAINTENANCE Follow the instruction for the material of your special product to make sure that it stays in the best shape for as long as possible. The information below is only intended as a general guideline. For more information, please contact •... -
Page 17: Customer Service
CUSTOMER SERVICE Thanks for purchasing this NUUGARDEN furniture. We are here to help you maximize your enjoyment and appreciation of it. Please do not hesitate to contact our customer service when you have any questions regarding assembly or accessories. Add: 6366 Corley Road, Norcross, GA 30071. Tel: (800) 257-7108 Web: http://www.nuugarden.com E-mail: service@nuugarden.com... - Page 18 NUUGARDEN USA Nuu Garden Corp. Add: 6366 Corley Road, Norcross GA 30071. Tel: (800) 257-7108 Web: http://www.nuugarden.com E-mail: service@nuugarden.com...
Need help?
Do you have a question about the SAS094-01-HS and is the answer not in the manual?
Questions and answers