Table of Contents
Advertisement
Quick Links
Advertisement
Table of Contents

Related Manuals for Bosch WAT2876XES


Summary of Contents for Bosch WAT2876XES
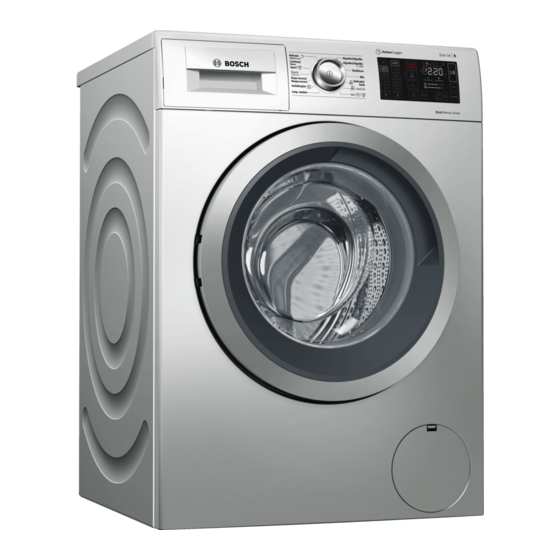
- Page 1 Washing machine WAT2876XES Instruction Manual and Installation Instructions...
- Page 2 Your new washing machine Caution! This signal word indicates a possibly You have chosen a Bosch washing dangerous situation. Not heeding the machine. caution can cause property and/or environmental damage. Please take a few minutes to read and become familiar with the advantages of Note/tip your washing machine.
-
Page 3: Table Of Contents
Contents e n I n s t r u c t i o n M a n u a l a n d I n s t a l l a t i o n I n s t r u c t i o n s Intended use. -
Page 4: Intended Use
Intended use Appliance settings ..36 Intended use Activating the setting mode ..36 Changing the signal volume ..36 This appliance is intended for private ■... -
Page 5: Safety Instructions
Safety instructions Do not allow children to Safety instructions ■ clean or maintain this appliance unsupervised. T he following safety information Keep children under 3 years S a f e t y i n s t r u c t i o n s and warnings are provided to ■... -
Page 6: Installation
Safety instructions Keep packaging, plastic film dangerous situation. Ensure and packing components away the following: from children. The mains voltage on your ■ power socket must match Warning the rated voltage specified Risk of poisoning! on the appliance Detergents and care products (identification plate). - Page 7 Safety instructions If you take hold of any of the Warning ■ appliance's protruding parts Risk of electric shock/fire/ (e.g. the appliance door) in material damage/damage to order to lift or move it, these the appliance! parts may break off and If the appliance's mains cable is cause injury.
-
Page 8: Operation
Safety instructions The appliance is secured for Caution! ■ transportation by transport Material damage/damage to locking devices. If the the appliance transport locking devices are If the water pressure is too ■ not removed before the high or too low, the appliance is operated, this appliance may not be able to may result in damage to the... - Page 9 Safety instructions Do not use cleaning agents that oxygen. Active oxygen can contain solvents. irritate the mucosa and cause eyes to water. Warning Do not open the door using the Risk of injury! emergency release if a If you support your weight/sit programme is running with ■...
-
Page 10: Cleaning/Maintenance
Safety instructions If you pour the wrong Repairs and any other work ■ ■ quantity of detergent or on the appliance must only cleaning agent into the be conducted by our appliance, this may result in customer service or by an material damage or damage electrician. -
Page 11: Environmental Protection
Environmental protection For safety reasons, use Environmental genuine spare parts and protection accessories only. P ackaging/used appliance Caution! E n v i r o n m e n t a l p r o t e c t i o n Material damage/damage to Dispose of packaging in an the appliance... -
Page 12: Positioning And Connecting
Positioning and connecting The more display segments are Positioning and visible, the higher the respective consumption. connecting This enables you to compare the consumption levels of the different I ncluded with the appliance programmes when choosing your P o s i t i o n i n g a n d c o n n e c t i n g programme settings and decide on Check the machine for transport Note:... -
Page 13: Safety Instructions
Positioning and connecting leaks and water damage, you must P Water supply hose on standard/Aqua- follow the instructions in this section. Secure models *depending on the model Notes In addition to the safety information ■ In addition, a hose clamp ( 24 - 40 mm listed here, the local water and diameter, available from specialist electricity supplier may have special... -
Page 14: Installing The Appliance In A Kitchenette
Positioning and connecting Installing the appliance in a kitchenette Warning Danger of death! There is a risk of electric shock if you touch live components. Do not remove the appliance covering Unscrew and remove all four transport brace screws. plate. Remove the sleeves. -
Page 15: Hose And Cable Lengths
Positioning and connecting Hose and cable lengths Observe the following when connecting the machine: Left-hand connection ■ Notes Only operate the washing machine ■ using cold mains water. Do not connect the machine to the ■ mixer tap of an unpressurised hot- water boiler. -
Page 16: Water Outlet
Positioning and connecting sucked back into the appliance and may damage the appliance/fabrics. Make sure that: The plug does not block drainage ■ from the wash basin. The end of the drain hose is not ■ immersed in the drained water. The water drains away quickly ■... -
Page 17: Levelling
Positioning and connecting Only pull out the mains cable by the ■ plug and never by the cable, as this could damage it. Never unplug the mains plug during ■ operation. Observe the following information and ensure that: Levelling Notes The mains voltage and voltage ■... -
Page 18: Before Using The Appliance For The First Time
Positioning and connecting Before using the appliance for Transportation the first time e.g. when moving home The washing machine was thoroughly Preparatory work: tested before leaving the factory.To Turn off the water tap. remove any water that may be left over Reduce the water pressure in the from the test, run the first wash cycle supply hose. -
Page 19: Familiarising Yourself With Your
Familiarising yourself with your appliance Familiarising yourself with your appliance Washing machine F a m i l i a r i s i n g y o u r s e l f w i t h y o u r a p p l i a n c e Service flap Detergent drawer ~ Page 32 Controls... -
Page 20: Controls
Familiarising yourself with your appliance Controls 8 Touch display ( Main switch This shows you the programme You can use the # button to information and selection options switch the appliance on and off. for settings, and you can select 0 Programme selector the settings by touching the You can turn the programme... - Page 21 Familiarising yourself with your appliance Indicators and buttons on the Display for set- Setting control panel tings Speed SpeedPerfect EcoPerfect +1, +2, +3, off Water&Rinse+; + additional rinse cycles ë Easy-Iron Prewash Rinse Stop = no final spin E 3 sec Childlock/control panel lock Memory programme â...
-
Page 22: Laundry
Laundry Some examples of soiling levels can Laundry be found on ~ Page 23 – Light: Do not prewash, select the P repare the laundry SpeedPerfect setting if L a u n d r y necessary Caution! – Normal Damage to the appliance/fabrics –... -
Page 23: Detergent
Detergent Saving energy and detergent Detergent For light and normal soiling, you can C orrect selection of detergent save energy (lower washing D e t e r g e n t temperature) and detergent. The care label is crucial for selecting the correct detergent, temperature and Saving Soiling/note... -
Page 24: Overview Of Programmes
Overview of programmes Overview of programmes P rogrammes on the programme selector O v e r v i e w o f p r o g r a m m e s Programme/type of laundry/information Settings Programme name Max. load Brief explanation of the programme and the fabrics for which it is Temperature that can be selected (' suitable. - Page 25 Overview of programmes Programme/type of laundry/information Settings Delicates / Silk“ max. 2.0 kg For delicate, washable items, e.g. made of silk, satin, synthetic or ' - 40 °C blended fabrics (e.g. silk blouses, silk scarves) 2 - 800 rpm Use a detergent that is suitable for machine-washing deli- Note: Eco, Speed, ë, T, Q, $, cate fabrics or silk.
- Page 26 Overview of programmes Programme/type of laundry/information Settings Drum CleanÛ 0 kg The cleaning programme, combined with an active oxygen phase 90 °C followed by a washing programme, thoroughly cleans and cares 1200 rpm for the drum and outer tub, and eliminates odours. ActiveOxygen Run the programme, e.g.: before using the appliance for the first time,...
- Page 27 Overview of programmes Programme/type of laundry/information Settings *** Duvet6 max. 2.5 kg (Down max. 2.0 kg) Machine-washable items stuffed with synthetic fibres, such as pil- ' - 60 °C lows, quilts and bedspreads; also suitable for items stuffed with 2 - 1200 rpm down Eco, Speed, ë, $, Note:...
-
Page 28: Activeoxygen Refresh Ø
Overview of programmes ActiveOxygen Refresh Ø Starching Laundry should not be treated Note: with fabric softener. ActiveOxygen Refresh Ø is an innovative programme that is designed Liquid starch can be used to stiffen to refresh laundry and remove odours fabrics particularly in the Rinse and (e.g. -
Page 29: Programme Default Settings
Programme default settings Ready in time Programme default After selecting a programme, the settings programme duration is displayed, e.g. 1:51 (in h:min (hours:minutes)). T he programme default settings are P r o g r a m m e d e f a u l t s e t t i n g s displayed and can be changed in the Before the programme starts, you can move the time at which the programme... -
Page 30: Memory Programme
Additional programme settings Memory programme Additional programme settings â You can save a selected programme with your favourite settings here. You can find an overview of all of the A d d i t i o n a l p r o g r a m m e s e t t i n g s additional settings that can be selected To store: depending on the programme on the... -
Page 31: Water&Rinse
Operating the appliance The washing's residual moisture Note: Operating the is increased. appliance Water&Rinse+ P reparing the washing O p e r a t i n g t h e a p p l i a n c e ë machine Adjustment values: The washing machine must be... -
Page 32: Change The Programme Default Settings
Operating the appliance In appliances with a drum light: Placing laundry into the drum The drum is lit after switching on the Warning appliance, after opening and closing the Danger of death! door and after starting a programme. Items of laundry pretreated with The light switches off automatically. -
Page 33: Start The Programme
Operating the appliance machine. If necessary, immediately wipe Dispenser i Softener, starch, away spray residue and other residues/ do not exceed max. droplets with a damp cloth. Dispenser I Detergent for prewash Dosing Pull out the detergent drawer as far Dose the detergents and care products as possible. -
Page 34: Childlock/Operation Lock
Operating the appliance Information on the following programme Adding laundry steps and settings, which can be After starting the programme, you can changed during the programme add or remove laundry if necessary. sequence, light up at half brightness. To do this, touch the control panel A. Note: Foam detection The indicator flashes. -
Page 35: Cancel The Programme
Operating the appliance Switch the appliance on again if If the Û display flashes, this Note: necessary. The è and Ø symbols will informs you to run the Drum Clean flash. If the symbols are off, the door programme or any other programme at can be opened. -
Page 36: Appliance Settings
Appliance settings Changing the brightness of Appliance settings the touch display Y ou can change the following settings Touch œ again. The display for the A p p l i a n c e s e t t i n g s in the control and display panel: touch display's brightness B and the preset brightness light up. -
Page 37: Sensors
Sensors Sensors Cleaning and maintenance A utomatic load sensing S e n s o r s Warning The automatic load sensing function C l e a n i n g a n d m a i n t e n a n c e Danger of death! adapts the water consumption ideally to There is a risk of electric shock if you... -
Page 38: Machine Housing/Control Panel
Cleaning and maintenance Machine housing/control panel Wipe the housing and the control ■ panel with a soft, damp cloth. Remove the detergent residue ■ immediately. Do not clean with a water jet. Take the auxilary drain hose out of ■ the holder. -
Page 39: The Drain Hose At The Siphon Is Blocked
Cleaning and maintenance To prevent unused detergent Note: from flowing straight into the drain during the next wash: Pour 1 litre of water into the left-hand compartment and start the programme Drain. The drain hose at the siphon is blocked b) For standard and Aqua-Secure models, clean the filter on the rear of the appliance:... -
Page 40: Faults And What To Do About Them
Faults and what to do about them. Do not open the door using the Faults and what to do emergency release if a programme is running with active oxygen. about them. Wait until there is no active oxygen in the drum. E mergency release F a u l t s a n d w h a t t o d o a b o u t t h e m . - Page 41 Faults and what to do about them. Indicator Cause/remedy è flashes Slowly: The door cannot currently be locked or unlocked. Waiting time ■ required. Quickly: Close the door because water can flow out from the laundry. ■ è and the ActiveOx- The door cannot be opened due to programme-related technical reasons.
-
Page 42: Faults And What To Do About Them
Faults and what to do about them. Faults and what to do about them. Faults Cause/remedy Water is leaking from the Attach the drain hose correctly or replace it. ■ machine. Tighten the threaded joint on the supply hose. ■ Water not flowing in. - Page 43 Faults and what to do about them. Faults Cause/remedy Odours in the washing Run the Drum Clean or Cottons 90 °C programme without laundry. machine. Add standard washing powder or a detergent that contains bleach. Note: To prevent foaming, only use half the amount of detergent recommended by the detergent manufacturer.
-
Page 44: After-Sales Service
After-sales service Faults Cause/remedy A flashes when the The door is unlocked. It is possible to add laundry. appliance is paused and è is off. If you cannot rectify a fault yourself (after switching the machine off and then on again) or a repair is required: Switch off the appliance and pull the mains plug out of the socket. -
Page 45: Consumption Rates
Consumption rates Consumption rates E nergy and water consumption, programme duration and C o n s u m p t i o n r a t e s residual moisture for the main washing programmes (approximate values) Programme Load Energy consump- Water con- Programme du- tion*... -
Page 46: Technical Data
Technical data Technical data Aqua-Stop warranty D imensions: O nly for appliances with Aqua-Stop T e c h n i c a l d a t a A q u a - S t o p w a r r a n t y 850 x 600 x 590 mm In addition to warranty claims against (height x width x depth) - Page 48 Free and easy registration – also on mobile phones: www.bosch-home.com/welcome Looking for help? You´ll find it here. Expert advice for your Bosch home appliances, need help with problems or a repair from Bosch experts. Find out everything about the many ways Bosch can support you: www.bosch-home.com/service Contact data of all countries are listed in the attached service directory.
Need help?
Do you have a question about the WAT2876XES and is the answer not in the manual?
Questions and answers