Table of Contents
Advertisement
Advertisement
Table of Contents

Related Manuals for Bosch WAT28620AU


Summary of Contents for Bosch WAT28620AU
- Page 1 Washing machine WAT28620AU Instruction Manual and Installation Instructions...
- Page 2 Your new washing machine Display rules : Warning! You have chosen a Bosch washing machine. This combination of symbol and signal word indicates a possibly dangerous Please take a few minutes to read and situation. Not heeding the warning can become familiar with the advantages of cause death or injuries.
-
Page 3: Table Of Contents
Contents e n I n s t r u c t i o n M a n u a l a n d I n s t a l l a t i o n I n s t r u c t i o n s Intended use. - Page 4 Intelligent dosing system..35 Consumption values ..50 Familiarising yourself with i-DOS . . . 35 Information for test institute ..51 i-DOS Detergent drawer..35 Technical data .
-
Page 5: Intended Use
Intended use Intended use Safety instructions T he following safety information This appliance is intended for private ■ I n t e n d e d u s e S a f e t y i n s t r u c t i o n s and warnings are provided to domestic use only. -
Page 6: Installation
Safety instructions Do not allow children to Keep packaging, plastic film ■ clean or maintain this and packing components away appliance unsupervised. from children. Keep children under 3 years ■ Warning and pets away from this Risk of poisoning! appliance. Detergents and care products Do not leave the appliance ■... - Page 7 Safety instructions dangerous situation. Ensure Warning the following: Risk of electric shock/fire/ material damage/damage to The mains voltage on your the appliance! ■ power socket must match If the appliance's mains cable is the rated voltage specified altered or damaged, this may on the appliance result in electric shock, short (identification plate).
- Page 8 Safety instructions If you take hold of any of the Caution! ■ appliance's protruding parts Material damage/damage to (e.g. the appliance door) in the appliance order to lift or move it, these If the water pressure is too ■ parts may break off and high or too low, the cause injury.
-
Page 9: Operation
Safety instructions The appliance is secured for Do not use cleaning agents that ■ transportation by transport contain solvents. locking devices. If the Warning transport locking devices are Risk of injury! not removed before the If you support your weight/sit appliance is operated, this ■... -
Page 10: Cleaning/Maintenance
Safety instructions drawer is opened while the Cleaning/Maintenance appliance is in operation. Warning Rinse eyes/skin thoroughly if Risk of death! they/it come(s) into contact The appliance is powered by with detergents or care electricity. There is a risk of products. If accidentally electric shock if you come into swallowed, seek medical contact with live components. -
Page 11: Environmental Protection
Environmental protection Do not use cleaning agents that Clean the appliance with ■ contain solvents. nothing but water and a soft, damp cloth. Warning Remove any detergent, ■ Risk of electric shock/material spray or other residues damage/damage to the immediately. appliance! If moisture penetrates the appliance, this may cause it to... -
Page 12: Positioning And Connecting
Positioning and connecting The selectable temperatures apply ■ Positioning and to the care labels on the textiles. The temperatures in the machine may connecting deviate from this so that you get the optimum mix of energy-saving and I ncluded with the appliance washing results. -
Page 13: Safety Instructions
Positioning and connecting Water supply hose on aquaStop Caution! models Water damage The connection points for the water Water drain hose supply hose and water drain hose are Elbow for securing the water under high water pressure. To prevent drain hose* leaks and water damage, you must Water supply hose on standard/ follow the instructions in this section. -
Page 14: Installation On A Platform With Drawer
Positioning and connecting Installation on a platform with Keep the screws and sleeves in Note: a safe place. drawer Platform order no.: WMZ 20490, WZ 20490, WZ 20510, WZ 20520 Installing the appliance in a kitchenette Warning Take the hoses out of the holders. Danger of death! There is a risk of electric shock if you touch live components. -
Page 15: Hose And Cable Lengths
Positioning and connecting Hose and cable lengths Notes Only operate the washing machine ■ Left-hand connection using cold mains water. ■ Do not connect the machine to the ■ mixer tap of an unpressurised hot- water boiler. Do not use a used supply hose. Only ■... -
Page 16: Water Outlet
Positioning and connecting Water outlet Connection Connect the water supply hose to the Warning tap (26.4 mm = ¾") and to the Risk of scalding! appliance (not necessary for Aqua-Stop When washing at high temperatures, models as this is permanently installed): there is a risk of scalding if you come Model: Standard into contact with hot detergent solution... -
Page 17: Levelling
Positioning and connecting Check the alignment of the washing Connection machine with a spirit level, and Drainage into a siphon adjust it if necessary. Change the ■ The connection point must be height by turning the appliance feet. secured using a hose clamp with a All four appliance feet must stand diameter of 24–40 mm (available firmly on the ground. -
Page 18: Before Washing For The First Time
Positioning and connecting The mains plug fits the socket. Preparatory work: ■ The cable cross-section is adequate. Check the machine. ■ The earthing system is properly Fill the w and M dispensers. ■ installed. ~ Page 37 The mains cable is only replaced by Remove the protective film from the ■... -
Page 19: Transportation
Positioning and connecting Transportation Insert all four sleeves. Clip the mains cable securely in the E.g. when moving house holders. Insert the transportation securing bolts and tighten them with Preparatory work: a wrench (WAF 13). Turn off the tap. Release the water pressure in the supply hose: ~ "Filter in the water supply blocked"... -
Page 20: Familiarising Yourself With Your
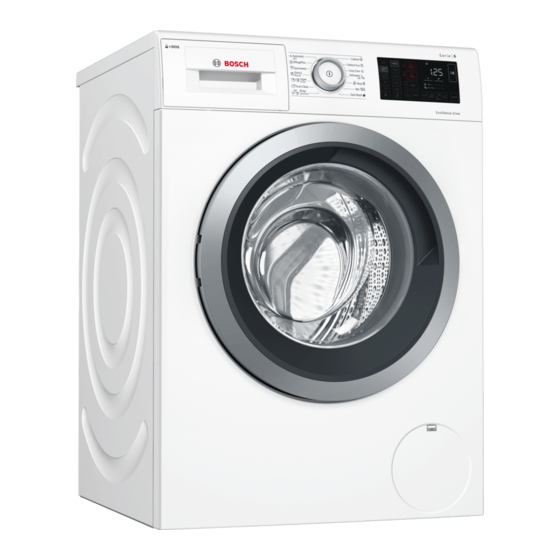
Familiarising yourself with your appliance Familiarising yourself with your appliance Washing machine F a m i l i a r i s i n g y o u r s e l f w i t h y o u r a p p l i a n c e Service flap Detergent drawer ~ Page 33 Controls... -
Page 21: Controls
Familiarising yourself with your appliance Controls Content of the touch display ( Main switch You can use the # button to The display on this appliance responds switch the appliance on and off. to touch (touch display).You can 0 Programme selector activate settings by pressing lightly on You can turn the programme the touch-sensitive buttons in boxes. - Page 22 Familiarising yourself with your appliance Indicators, symbols and buttons Indicators and Setting on the control panel symbols for set- ting values 90°, 60° ü, 40° ü, 30°, 20°, — Temperature in °C; — = cold 1400*, 1200, 800, 600, 400, 2 Spin speed;...
- Page 23 Familiarising yourself with your appliance Indicators, symbols and buttons Indicators and Setting on the control panel symbols for set- ting values Start/Pause For changing the setting values N, M Where there are multiple setting values, pressing and holding Note: N, M will allow you to automatically scroll through all the setting val- ues to the last value.
-
Page 24: Laundry
Laundry Some examples of soiling levels can Laundry be found on ~ Page 25. – Light: Do not prewash, select the P repare the laundry SpeedPerfect setting if L a u n d r y necessary Caution! – Normal Damage to the appliance/fabrics –... -
Page 25: Dyeing/Bleaching
Detergent Dyeing/bleaching Detergent for woollens ■ Suitable for wool Dye should only be used in normal Wool programme/ household quantities. Salt may damage cold - max. 40 °C stainless steel. Always follow the dye manufacturer's instructions. Saving energy and detergent Do not use the washing machine to For light and normal soiling, you can bleach clothes. -
Page 26: Programme Overview
Programme overview Programme overview P r o g r a m m e o v e r v i e w Programmes and fabrics Maximum Use softener? load size Cottons i 8 kg/5 kg* Hard-wearing items made from cotton, linen or blended fabrics. When used for a light load (* max. - Page 27 Programme overview Rinse / Spin / Drain ' / 0 / [ Yes when using the Rinse pro- Combined programme: Rinses and then spins the laundry, and gramme then pumps out the water. Notes The Rinse programme, after which the laundry is spun and ■...
-
Page 28: Possible Program Settings
Programme overview Sportswear w 2 kg Clean the compart- Sportswear and leisurewear made from synthetic or microfibre ment for manual fabrics or fleece. dosing in the deter- Use an Easy-Care programme to wash heavily soiled laun- Note: gent drawer dry. before washing. -
Page 29: Programme Default Settings
Programme default settings Programme Shirts/Blouses ‹ Ú Ú Ú Ú Ú Ú Ú Sportswear w Ú Ú Ú Ú Ú Ú Ú AllergyPlus ; 1400* Ú Ú Ú Ú Ú Ú Ú Ú Automatic 40° p 1400 Ú Ú Ú Can be activated/deactivated Ú... -
Page 30: Memory Programme
Additional programme settings and counted down until the washing Additional programme programme starts. The duration of the programme is then displayed. settings The programme duration is Note: You can find an overview of all of the automatically adjusted when the A d d i t i o n a l p r o g r a m m e s e t t i n g s additional settings that can be selected programme is running. -
Page 31: Reduced Ironing
Additional programme settings Reduced Ironing Select i-DOS or pour the detergent into the manual dosing compartment in accordance with the manufacturer's instructions. Reduces creasing thanks to a special Select the Cottons i 30 °C spin sequence followed by fluffing and program and press the A button. -
Page 32: Operating The Appliance
Operating the appliance In appliances with drum interior Operating the lighting: appliance The drum is lit after switching on the appliance, after opening and closing the P reparing the washing door and after starting a programme. O p e r a t i n g t h e a p p l i a n c e The light switches off automatically. -
Page 33: Placing Laundry Into The Drum
Operating the appliance Placing laundry into the drum For programmes in which automatic dosing is not possible or not desired (in which case, intelligent dosing is Warning deactivated), you can add suitable Danger of death! detergent to the compartment in the Items of laundry pretreated with detergent drawer for manual dosing. -
Page 34: Child Lock 3 Sec./Operation Lock
Operating the appliance Child lock 3 sec./operation Notes Do not leave the door open for too lock ■ long when adding laundry as water from the laundry may leak out. E 3 sec. For safety reasons, the door remains ■ You can lock the washing machine to locked when the water level or prevent the functions you have set from... -
Page 35: Programme End
Intelligent dosing system Selecting the Reduced Ironing Q ■ Intelligent dosing setting and then touching A or Turning the programme selector to system ■ Drain and then touching A. F amiliarising yourself with i- I n t e l l i g e n t d o s i n g s y s t e m Programme end End lights up in the display panel and i-DOS Intelligent dosing system... -
Page 36: Before Setting Up I-Dos
Intelligent dosing system Before setting up i-DOS Automatic dosing can be activated or deactivated for each of the designated Follow the manufacturer's instructions wash programmes separately. when choosing your detergent and care Automatic dosing can also be activated product. We recommend using easy- or deactivated once the programme has pour, all-purpose, universal and colour started, although this depends on which... -
Page 37: I-Dos Setting The Dosage
Intelligent dosing system If both dispensers are filled with detergent/care product you are using, Note: liquid detergent, only the dispenser that the water hardness and/or the degree was activated by choosing the i-DOS of soiling. button is used during the wash cycle. Adjusting the basic dosage i-DOS Setting the dosage Press and hold ý... -
Page 38: Manual Dosing
Intelligent dosing system Open the dispenser lids. When refilling the dispensers, Note: always use the same type of liquid detergent or fabric softener. Do not mix different types of liquid detergent or fabric softener, as this can form lumps that may block the i-DOS pump unit. -
Page 39: Emptying The I-Dos Detergent Drawer, Cleaning The I-Dos Detergent Drawer And Its Housing, Cleaning The I-Dos Pump Unit
Intelligent dosing system Emptying the i-DOS detergent Dosing and adding detergent drawer, cleaning the i-DOS Find out the optimum dosage for Note: detergent drawer and its detergent and care product. housing, cleaning the i-DOS Pull out the detergent drawer. pump unit Switch off the appliance. - Page 40 Intelligent dosing system Unclip the rear detergent drawer lid Clean the drawer, inside surface and and remove it. lids with a soft, damp cloth or a hand shower. Empty the detergent drawer. Dry the drawer, lids and pump unit and put them back together. Clean the pump unit with a damp cloth.
-
Page 41: Appliance Settings
Appliance settings Push in the detergent drawer. Adjustment values: quiet Medium loud very loud Exit setting mode or: Touch œ again. The display for the operating signals C and the preset volume light up. Touch N or M to change the adjustment value (as above). -
Page 42: Exiting Setting Mode
Sensors Exiting setting mode VoltCheck depending on the model To exit and save the settings: Wait for approx. 15 minutes or ■ The colon in the ready in // (Ready in) / Touch œ one last time or ■ / Finished in display: Switch off the appliance. -
Page 43: Machine Housing/Control Panel
Cleaning and maintenance be obtained via our website or from Caution! customer services. ~ Page 52 Damage to the appliance Cleaning agents that contain solvents, The drain pump is blocked, e.g. cleaning solvent, can damage surfaces and components in the emergency draining machine. -
Page 44: The Drain Hose At The Siphon Is Blocked
Cleaning and maintenance Refit the pump cover and screw it on Re-attach the drain hose and secure tightly.The handle must be the connection point using the hose positioned vertically. clamp. Filter in the water supply blocked Release water pressure in the supply hose: a) Turn off the tap. -
Page 45: Faults And What To Do About Them
Faults and what to do about them. Wait until the drum has stopped turning. Faults and what to do Caution! about them. Water damage Any escaping water may cause water E mergency release damage. F a u l t s a n d w h a t t o d o a b o u t t h e m . E.g. - Page 46 Faults and what to do about them. Display Cause/remedy r is flashing The appliance is not being supplied with water: Turn the tap on fully, ■ The supply hose is kinked/trapped, ■ Clean the filter if necessary. ~ Page 44 ■...
-
Page 47: Faults And What To Do About Them
Faults and what to do about them. Faults and what to do about them. Faults Cause/remedy Water is leaking from the Attach the drain hose correctly or replace it. ■ machine. Tighten the threaded connection on the supply hose. ■ The programme has Not a fault –... - Page 48 Faults and what to do about them. Faults Cause/remedy Foam is leaking from the Automatic dosing: i-DOS Check the dosage settings and, if required, reduce ■ detergent drawer. the basic dosage. ~ "i-DOS Setting the dosage" on page 37 If required, use a different liquid detergent/fabric softener. Manual dosing: Have you used too much detergent? Use less detergent in ■...
- Page 49 Faults and what to do about them. Faults Cause/remedy The programme is taking Not a fault – the unbalanced load detection system is eliminating an imbal- ■ longer than usual. ance by repeatedly redistributing the laundry. Not a fault – the foam detection system is active; this adds an additional ■...
-
Page 50: Consumption Values
Consumption values Consumption values ( approximate values) C o n s u m p t i o n v a l u e s Programme Load Energy consump- Water consump- Programme dura- tion* tion* tion* Cottons 20 °C 8 kg 0,35 kWh 86 l 3 ^ h... -
Page 51: Information For Test Institute
Consumption values Information for test institute Items Instruction Pre-treatment of new Run two empty runs of Cottons i 90 °C with 1400 rpm: appliance The 1st run with 50g IEC B detergent and 50g anti sudsing agent, the 2nd run without detergent and sudsing agent. -
Page 52: Technical Data
Technical data Technical data After-sales service I f you cannot rectify a fault yourself, D imensions: T e c h n i c a l d a t a A f t e r - s a l e s s e r v i c e 850 x 600 x 590 mm contact customer services. -
Page 53: Aqua-Stop Warranty
Aqua-Stop warranty Aqua-Stop warranty O nly for appliances with Aqua-Stop A q u a - S t o p w a r r a n t y In addition to warranty claims against the vendor based on the purchase agreement and to our appliance warranty, we will provide compensation under the following conditions: If water damage is caused due to a... - Page 56 Free and easy registration – also on mobile phones: www.bosch-home.com/welcome Looking for help? You´ll find it here. Expert advice for your Bosch home appliances, need help with problems or a repair from Bosch experts. Find out everything about the many ways Bosch can support you: www.bosch-home.com/service Contact data of all countries are listed in the attached service directory.
Need help?
Do you have a question about the WAT28620AU and is the answer not in the manual?
Questions and answers