Table of Contents
Advertisement
Quick Links
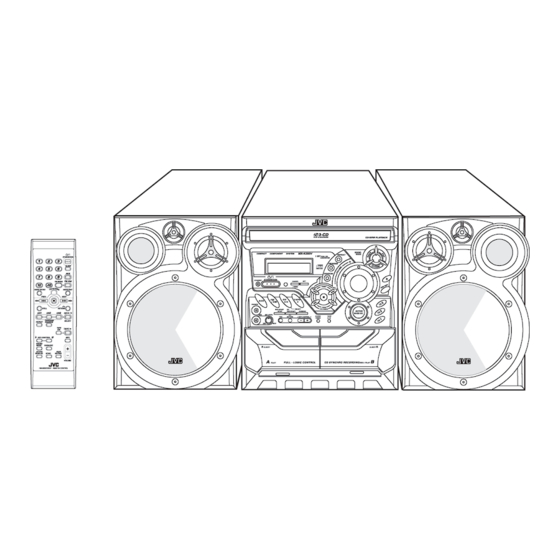
COMPACT COMPONENT SYSTEM
MX-K350V
Consists of CA-MXK350V and SP-MXK350V
CA-MXK350V SP-MXK350V
STANDBY/ON
SLEEP
AUX
FM MODE
FM /AM
VIDEO INTRO
HIGHLIGHT
PREV.
NEXT
STILL
RETURN
1
2
3
CD
CD
CD
CD
PROGRAM
SELECT
REPEAT
/RANDOM
TAPE
TAPE
A/B
KEY CONTROL
MPX
SOUND
MODE
KARAOKE
ACTIVE
FADE
BASS EX.
ECHO
MUTING
VOLUME
SP-MXK350V
INSTRUCTIONS
3-CD
PLAY & EXCHANGE
CD-R/RW PLAYBACK
SOUND
COMPACT
COMPONENT
SYSTEM
MX-K350V
REPEAT
MODE
1 BIT
DUAL D/A
CONVERTER
PROGRAM
RANDOM
STANDBY/ON
STANDBY
CANCEL
SET
/ DEMO
PREV.
PRESET
NEXT
FM
CD
TAPE
AUX
/ AM
PHONES
TUNING
SELECT
VCD NUMBER
REC START
CD
/ STOP
REC START
DUBBING
ACTIVE
BASS EX.
MIC
MIC LEVEL
PBC
RETURN
KEY CONTROL
CLOCK
TAPE
/TIMER
A / B
MIN
MAX
EJECT
EJECT
A
B
FULL - LOGIC CONTROL
CD SYNCHRO RECORDING
PLAY
REC / PLAY
CA-MXK350V
SP-MXK350V
For Customer Use:
Enter below the Model No. and Serial No.
which are located either on the rear, bot-
tom or side of the cabinet. Retain this
information for future reference.
Model No.
Serial No.
LVT0864-001B
44-1148-1
[US]
Advertisement
Table of Contents

Related Manuals for JVC MX-K350V


Summary of Contents for JVC MX-K350V
- Page 1 COMPACT COMPONENT SYSTEM MX-K350V Consists of CA-MXK350V and SP-MXK350V CA-MXK350V SP-MXK350V STANDBY/ON SLEEP FM MODE FM /AM VIDEO INTRO HIGHLIGHT PREV. NEXT STILL RETURN PROGRAM SELECT REPEAT /RANDOM TAPE TAPE KEY CONTROL SOUND MODE KARAOKE ACTIVE FADE BASS EX. ECHO...
-
Page 2: Important For Laser Products
CAUTION To reduce the risk of electrical shocks, fire, etc.: 1. Do not remove screws, covers or cabinet. 2. Do not expose this appliance to rain or moisture. IMPORTANT FOR LASER PRODUCTS / REPRODUCTION OF LABELS / 1 CLASSIFICATION LABEL, PLACED ON EXTERIOR SURFACE CLASS 1 LASER PRODUCT DANGER 1. - Page 3 Caution: Proper Ventilation To avoid risk of electric shock and fire, and to prevent damage, locate the apparatus as follows: 1 Front: No obstructions and open spacing. 2 Sides/ Top/ Back: No obstructions should be placed in the areas shown by the dimensions below. 3 Bottom: Place on the level surface.
-
Page 4: Introduction
❏ The controls and operations have been redesigned to make them very easy to use, freeing you to just enjoy the music. • With JVC’s COMPU PLAY you can turn on the System and automatically start the Radio, Cassette Deck, or CD Player with a single touch. -
Page 5: Table Of Contents
Table of Contents Introduction ...1 Features... 1 How This Manual Is Organized... 1 IMPORTANT CAUTIONS... 1 Table of Contents ...2 Getting Started ...3 Accessories ... 3 Set the VOLTAGE SELECTOR Switch ... 3 How To Put Batteries In the Remote Control... 3 Using the Remote Control ... -
Page 6: Getting Started
Getting Started Accessories Make sure that you have all of the following items, which are supplied with the System. AM Loop Antenna (1) Remote Control (1) Batteries (2) FM Wire Antenna (1) Video Cord (1) AC Plug Adaptor (1) If any of these items are missing, contact your dealer immediately. Set the VOLTAGE SELECTOR Switch To avoid damaging the System, set the voltage before plugging in the System. -
Page 7: Using The Remote Control
• Before attaching a 75 ohm coaxial lead (the kind with a round wire going to an outdoor antenna), disconnect the supplied FM Wire Antenna. 3-CD PLAY & EXCHANGE CD-R/RW PLAYBACK SOUND COMPACT COMPONENT SYSTEM MX-K350V REPEAT MODE 1 BIT DUAL D/A CONVERTER PROGRAM RANDOM STANDBY/ON... -
Page 8: Connecting The Am Antenna
Getting Started Connecting the AM Antenna Rear Panel of the Unit • Even when connecting an outside AM antenna, keep the indoor AM loop connected. CAUTION: • To avoid noise, keep antennas away from the System, the connecting cord and the AC power cord. Connecting the Speakers 1. -
Page 9: Connecting A Tv
COMPU Play JVC’s COMPU PLAY feature lets you control the most frequently used System functions with a single touch. With One Touch Operation you can play a CD, a tape, turn on the radio, or listen to an external equipment with a single press of the play button for that function. -
Page 10: Basic Operations
STANDBY/ON STANDBY “GOOD BYE” is displayed and the display goes out, except for the clock display. The STANDBY indicator lights up. (The display is dimmed.) COMPACT COMPONENT SYSTEM MX-K350V % STANDBY/ON Display STANDBY/ON STANDBY STANDBY indicator CANCEL % STANDBY/ON / DEMO... -
Page 11: Fade-Out Muting (Fade Muting)
Fade-out Muting (FADE MUTING) You can mute the output with one touch operation. To muting the output, press the FADE MUTING button on the Remote Control. The output is faded out. To release muting, press the FADE MUTING button once again. -
Page 12: Using The Tuner
Using the Tuner Numeric keys FM/AM FM MODE * When the System is in use, the display shows other items as well. For simplicity, we show here only the items described in this section. You can listen to FM and AM stations. Stations can be tuned in manually, automatically, or from preset memory storage. -
Page 13: Presetting Stations
Select a station using one of the following methods. • Manual Tuning Briefly press the 22 or ¡ button on the Unit to move from frequency to frequency until you find the station you want. • Auto Tuning If you hold down the 22 or ¡ button on the Unit for 1 second or more and then release it, the frequency changes down, or up, automatically until a station is found. -
Page 14: Using The Cd Player (Digital Audio Cds, Mp3 Discs)
Using the CD Player (Digital Audio CDs, MP3 Discs) Numeric keys ¢ CD 6 CD1-CD3 REPEAT PROGRAM /RANDOM * When the System is in use, the display shows other items as well. For simplicity, we show here only the items described in this section. The CD Player has the rotational disc tray that can accommodate 3 CDs. -
Page 15: To Load Cds
Example of indication: When CD door has ejected once and then CD-1 is pressed. (DISC1 is selected) Shows that this disc number is selected. Shows that the disc is rotating. One Touch Play The power comes on, and operations are done automatically. ❏... -
Page 16: Basics Of Using The Cd Player-Normal Play
Using the CD Player (Digital Audio CDs, MP3 Discs) Basics of Using the CD Player- Normal Play To Play CDs Load CDs. Press one of the Disc button (CD1-CD3) you want to play. The selected disc number (e.g. “CD-1”) appears on the dis- play. -
Page 17: Random Play
Press one of the Disc button (CD1-CD3) to select the CD you want to program. The display will change to the Program Entry display. Disc number Track number Select the track you want to program. Using the Unit While the display is blinking, press the 4 or ¢ button to select the track, then press the SET button within 10 seconds. -
Page 18: Repeating Tracks
Using the CD Player (Digital Audio CDs, MP3 Discs) Repeating Tracks You can repeat all tracks or individual track, as many times as you like. Press the REPEAT button. The Repeat indicator changes with each press of the button, as fol- lows: ALL= 1CD = 1 = Blank display = (back to the beginning) REPEAT ALL: In Normal Play mode, repeats all the tracks on... -
Page 19: Using The Video Cd Player (Video Cds)
CD is ejected or changed, or other source (e.g. FM/AM) is selected, or when the system is turned off. 3-CD PLAY & EXCHANGE CD-R/RW PLAYBACK ¢ SOUND SYSTEM MX-K350V REPEAT MODE 1 BIT DUAL D/A CONVERTER PROGRAM RANDOM CANCEL... -
Page 20: Playing Video Cds With Pbc Function (Vcd 2.0)
Using the Video CD Player (Video CDs) Playing Video CDs with PBC Function (VCD 2.0) The System provides a Playback Control (PBC) function which utilizes a procedure (menu selection) programmed in a video CD. What is the Playback Control (PBC) function? The PBC function allows you to enjoy the following features. -
Page 21: Playing Video Cds With Pbc Functions Without Using The Pbc Function (Pbc Off)
Moving Moving Moving picture picture picture A selection menu is displayed when you start playing a video CD with the PBC function. The selection menu shows a list of numbers for selection. Some video CDs may show moving pictures or a di- vided screen. - Page 22 Using the Video CD Player (Video CDs) Display the Time You can view the playing or remain time on the TV screen. Press the ON SCREEN button on the Remote Control. Each time you press the button. The on-screen display mode is changed as follows: The display automatically changes SINGLE ELAPSED 00:05...
-
Page 23: Using The Cassette Deck (Listening To A Tape)
Using the Cassette Deck (Listening to a Tape) STANDBY/ON SLEEP FM MODE FM /AM VIDEO INTRO HIGHLIGHT PREV. NEXT ¢ STILL RETURN PROGRAM SELECT REPEAT /RANDOM TAPE TAPE TAPE 3 KEY CONTROL TAPE A/B SOUND MODE KARAOKE ACTIVE FADE BASS EX. ECHO MUTING VOLUME... -
Page 24: Using The Cassette Deck (Recording)
Using the Cassette Deck (Recording) ¢ TAPE A/B TAPE 3 * When the System is in use, the display shows other items as well. For simplicity, we show here only the items described in this section. Recording onto a cassette from any of the sound sources is simple. Just place a tape in Deck B, have the source ready, make one or two settings, and you’re ready to record. -
Page 25: Standard Recording
Standard Recording This is the basic method for recording any source. The System also has special ways for recording CD to tape, and tape to tape, which save you time and effort, as well as give you some special effects. However, when you need to add a selection to a tape you have made, or are combining selections from several sources on one tape, use the method described below;... -
Page 26: Using An External Equipment
Using an External Equipment Listening to the External Equipment You can listen to the external equipment such as MD recorder, cas- sette deck, or other auxiliary. ❏ First, make sure that the external equipment is properly connect- ed to the System. (See page 6.) Set the volume level to the minimum posi- tion. -
Page 27: Using The Timers
• Each setting step must be completed within approx. two minutes. Otherwise, the setting is cleared and must be re- peated from the beginning. • The clock may gain or lose one to two minutes per month. MX-K350V COMPACT COMPONENT SYSTEM... -
Page 28: Setting The Daily Timer
Using the Timers Setting the Daily Timer Once you have set the Daily Timer, the timer will be activated at the same time every day. The Timer indicator ( ) on the display shows that the Daily Tim- er you have set is in effect. You can set the Daily Timer whether the System is turned on or off. -
Page 29: Setting The Rec (Recording) Timer
Preparation for each music source: Perform the following operation according to the music source you have selected. Then, the System enters Volume Setting mode. When selecting TUNER FM or TUNER AM: Press the 4 or ¢ button to select the preset station number, then press the SET button. - Page 30 Using the Timers Using the Unit You can set the time in the same way as for setting the Daily Tim- Insert a blank or erasable tape into the Deck B and wind past the tape leader. Press the CLOCK/TIMER button until “ON TIME”...
-
Page 31: Setting The Sleep Timer
Setting the SLEEP Timer Use the Sleep Timer to turn the System off after a certain number of minutes when it is playing. By setting the Sleep Timer, you can fall asleep to music and know that your System will turn off by it- self rather than play all night. -
Page 32: Using The Microphone
CD. • Monaural sources. • Poorly dubbed tapes. • Sources recorded with dusts, strong echo, a chorus, or only a few instruments. 3-CD PLAY & EXCHANGE CD-R/RW PLAYBACK SOUND MX-K350V SYSTEM REPEAT MODE 1 BIT DUAL D/A CONVERTER PROGRAM RANDOM... -
Page 33: Microphone Mixing
To Apply Digital Echo Press the ECHO button on the Remote Control. The Echo indicator ( ) comes on. To cancel the ECHO, press the ECHO button again. The Echo indicator goes off. No echo is applied. An echo is applied. •... -
Page 34: Care And Maintenance
Care And Maintenance Handle your CDs and tapes carefully, and they will last a long time. Compact Discs • Only CDs bearing these marks can be used with this System. However, contin- ued use of irregular shape CDs (heart- shape, octagonal, etc.) can damage the Recordable System. -
Page 35: Troubleshooting
Troubleshooting • If you are having a problem with your System, check this list for a possible solution before calling for service. • If you cannot solve the problem from the hints given here, or the System has been physically damaged, call a qualified person, such as your dealer, for service. - Page 36 Mains (AC) Line Instruction (not applicable for Europe, U.S.A., Canada, Australia, and U.K.) IMPORTANT for mains (AC) line BEFORE PLUGGING IN, do check that your mains (AC) line voltage corresponds with the position of the voltage selector switch provided on the outside of this equipment and, if different, reset the voltage selector switch, to prevent from a damage or risk of fire/electric shock.
Need help?
Do you have a question about the MX-K350V and is the answer not in the manual?
Questions and answers