Denon PRIME 4 User Manual
Hide thumbs
Also See for PRIME 4:
- User manual (107 pages) ,
- Quick start manual (45 pages) ,
- Quick start manual (16 pages)
Table of Contents
Advertisement
Quick Links
Advertisement
Table of Contents

Related Manuals for Denon PRIME 4


Summary of Contents for Denon PRIME 4
- Page 1 User Guide English Manual Version v2.3.0...
-
Page 2: Table Of Contents
Support ....................5 Product Registration ..................5 Devices & File Analysis ..............6 Configuration ..................6 Features ..................7 PRIME 4 ..................... 7 Top Panel ......................7 Front Panel ...................... 12 Rear Panel ...................... 12 PRIME 2 .................... 14 Top Panel ......................14 Front Panel ...................... - Page 3 Operation ................24 Touchscreen Overview ..............24 Performance View ................... 24 Track Overview & Waveform ..................24 Central Library Preview ....................28 Toolbar..........................28 Library View ....................29 Platter Display Overview ..............31 Performing ..................32 Loading Tracks ....................32 Searching &...
- Page 4 Control Center ................. 40 Parameters ..................... 40 PRIME 4 ..........................40 PRIME 2 ..........................41 PRIME GO ........................42 User Profile...................... 43 Settings ......................45 PRIME 4 ..........................45 PRIME 2 ..........................47 PRIME GO ........................48 Source ......................50 Wi-Fi ........................
-
Page 5: Introduction
Introduction Thank you for purchasing your PRIME hardware. At Denon DJ, we know how serious music is to you. That’s why we design our equipment with only one thing in mind—to make your performance the best it can be. We’re honored and excited to play a part in your musical &... -
Page 6: Devices & File Analysis
Devices & File Analysis All PRIME hardware can play music files from USB drives, SD cards, or other connected PRIME media players. Make sure you are using only the supported file systems (for USB drives or SD cards) and file formats (for music files) listed below. -
Page 7: Features
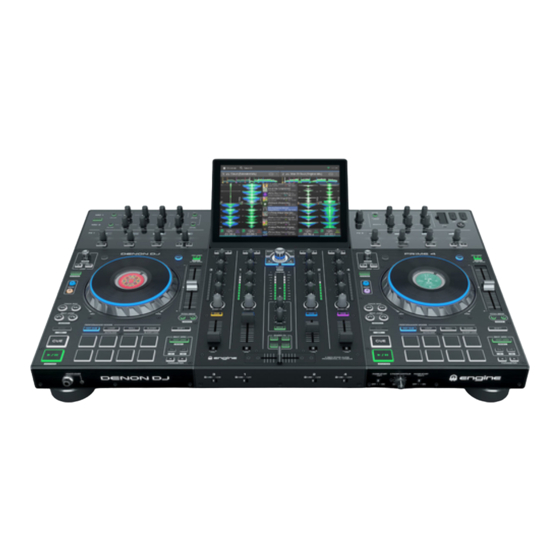
40 41 42 43 40 41 42 43 1. Touchscreen: This full-color multi-touch display shows information relevant to PRIME 4's current operation. Touch the touchscreen (and use the hardware controls) to control the PRIME 4 interface. See Touchscreen Overview for more information. - Page 8 8. Channel FX: Use these buttons to route audio from the corresponding channel to the Effect 1 or 2 module. 9. Channel Level: Turn this knob to adjust the level of the pre-fader, pre-EQ audio signal for the channel. 10. Channel Level Meters: These LEDs display the audio signal level of the channel.
- Page 9 22. Platter: This capacitive, touch-sensitive platter controls the audio playhead when the wheel is touched and moved. When the Vinyl button is on, move the platter to “scratch” the track as you would with a vinyl record. When the Vinyl button is off (or if you are touching only the side of the platter), move the platter to temporarily adjust the track’s speed.
- Page 10 32. Pitch Fader: Move this fader to adjust the speed (pitch) of the track. You can adjust its total range with the Pitch Bend buttons. When you select another Deck with the Deck select buttons, the position of the Pitch Fader may not match the Pitch setting for the previous Deck.
- Page 11 55 56 57 57 57 58 62 63 64 67 68 66 66 55 56 57 57 47. FX On: Press these buttons to enable or disable FX 1 and FX 2. 48. FX Select: Turn these knobs to select the active effect for FX 1 and FX 2. 49.
-
Page 12: Front Panel
This connection sends and receives MIDI messages to and from the computer. 5. Link Port: Use a standard Ethernet cable to connect this port to a computer. PRIME 4 will send time, BPM, and other track data to the compatible StagelinQ lighting and video software over this connection. - Page 13 Use the Mic 1 and Mic 2 Level knobs on the top panel to control the volume level. ® 16. Kensington Lock Slot: Use this slot to secure PRIME 4 to a table or other surface.
-
Page 14: Prime 2
PRIME 2 Top Panel 51 52 53 1. Touchscreen: This full-color multi-touch display shows information relevant to PRIME 2's current operation. Touch the touchscreen (and use the hardware controls) to control the PRIME 2 interface. See Touchscreen Overview for more information. 2. - Page 15 8. Channel Level: Turn this knob to adjust the level of the pre-fader, pre-EQ audio signal for the channel. 9. Channel Level Meters: These LEDs display the audio signal level of the channel. 10. Channel EQ: Turn these knobs to boost or cut the high, mid-range, and low frequencies for the channel.
- Page 16 25. Stop Time: Controls the rate at which the track slows to a complete stop ("brake time") when you pause it by pressing Play/Pause. 26. Vinyl: Press this button to activate/deactivate a “vinyl mode” for the platter. When activated, you can use the platter to “scratch” the track as you would with a vinyl record.
- Page 17 51 52 53 42. FX On: Press these buttons to enable or disable FX 1 and FX 2. Press and hold Shift and press either of these buttons to show or hide the FX bar. 43. FX Select: Turn these knobs to select the active effect for FX 1 and FX 2. 44.
-
Page 18: Front Panel
Front Panel 1. Headphones (1/4”, 1/8”) (6.35 mm, 3.5 mm): Connect your 1/4” or 1/8” (6.35 mm or 3.5 mm) headphones to this output for cueing and mix monitoring. The headphone volume is controlled using the Phones Level knob. 2. Crossfader Assign: Routes the audio playing on the corresponding channel to either side of the crossfader (A or B), or bypasses the crossfader and sends the audio directly to the program mix (center, Thru). -
Page 19: Prime Go
PRIME GO Top Panel 31 32 33 40 41 16 17 18 19 16 17 18 19 11 12 11 12 1. Touchscreen: This full-color, multi-touch display shows information relevant to PRIME GO's current operation. Touch the touchscreen (and use the hardware controls) to control the PRIME GO interface. - Page 20 8. Shift: Press and hold this button to access secondary functions of other controls. 9. Master Level Meters: These LEDs display the audio signal level of the master mix (sent out of the Master Outputs). 10. Sweep FX: Turn this knob to control the active Sweep FX A or FX B. Available selections are Filter and Wash Out.
- Page 21 22. Sync: Press this button to activate sync. When Key Lock is activated, the track’s key will remain the same even if you adjust its speed. Key Sync: When a track is playing back, press and hold this button to activate key sync to that track.
- Page 22 32 33 40 41 29. Battery Charging Indicator: This LED is solid green while charging. When charging is complete, the LED will turn off. 30. FX On: Press this button to enable or disable the selected effect. Hold Shift and press FX On to show or hide the FX bar. 31.
-
Page 23: Front Panel
Front Panel 2 3 4 5 1. Headphones (1/4”, 1/8”) (6.35 mm, 3.5 mm): Connect your 1/4” or 1/8” (6.35 mm or 3.5 mm) headphones to this output for cueing and mix monitoring. The headphone volume is controlled using the Phones Level knob. 2. -
Page 24: Operation
Tap the time to switch between the elapsed time and remaining time. Tap the key when Key Lock is on to change the key. Hold Shift and press View to toggle between vertical and horizontal waveforms. For PRIME 4, you can also toggle between two-deck and four-deck waveform views. - Page 25 Four Deck Vertical Waveform View Four Deck Vertical Waveform View without Library with Library Two Deck Horizontal Waveform View Four Deck Horizontal Waveform View Four Deck Horizontal Waveform View With Two Visible Waveforms With Four Visible Waveforms...
- Page 26 PRIME 2 Track Overviews Toolbar Loop Sync Lead Status Playhead Hot Cue Point Beat Points Sync Track Waveforms Tempo Time Remaining/ Elapsed Track Progress Horizontal Waveform View...
- Page 27 PRIME GO Track Overviews Loop Toolbar Key Lock Beat Points Playhead Hot Cue Point Sync Tempo Time Remaining/ Track Waveforms Elapsed Track Progress Horizontal Waveform View...
-
Page 28: Central Library Preview
Central Library Preview Tap to Preview Track Tap and Drag to Quickly Scroll Swipe Left to Swipe Right to Load to Left Deck Load to Right Deck Swipe up or down to browse tracks. Tap and drag the scroll bar to quickly browse through tracks. Swipe right to load a track to the right active deck. -
Page 29: Library View
Library View Use the full Library View to view your music library and load a track to the deck. You can also search through playlists, add tracks to the Prepare list, and search through your tracks using sorting and filtering features. Important: Visit enginedj.com/downloads to download the Engine DJ software. - Page 30 Standard/Expanded Track View Swipe Right to Load Tap and Hold to Show Info Tap and Drag to Quickly Scroll Double-tap to Load to a Selected Deck Tap to Preview Track Swipe Left to Prepare Tap the list icon at the top of the display to toggle between standard and expanded list views. Swipe a list up or down to browse through it (e.g., your list of playlists or your list of tracks).
-
Page 31: Platter Display Overview
2. Add this file to the Engine Library folder of an external storage drive with an Engine database. 3. The next time you use the drive with PRIME 4 or PRIME 2, the logo file will populate on the platter display. -
Page 32: Performing
Performing Loading Tracks Swipe Right or Left to Load To load a track to a deck, do any of the following: • In the Central Library Preview, swipe the track to the left or right to load the track to the active deck on that side. -
Page 33: Searching & Filtering Tracks
Searching & Filtering Tracks To search, tap the Search field and use the keyboard Tap to Select Search Criteria that appears in the display. The search results can be based on the following criteria: title, artist, album, Tap to Search length, key, comment, BPM, genre, label, year, date added or filename. -
Page 34: Editing Playlists
Editing Playlists Tap the edit button at the top of the display while Tap to Enable Tap to Select viewing the playlist screen. While editing is active, you Editing Tracks can do any of the following: To make a new playlist, tap + Create Playlist in Playlist view. -
Page 35: Playlist Deck
When using PRIME 4, the playlist deck will always be on Deck 4, and enabling the Zone Out while active will isolate the Playlist Deck to these outputs. If you have an LC6000 PRIME unit connected to PRIME 4’s Rear USB Port 4, this unit will be used to control the playlist deck. -
Page 36: Playback & Cueing
Needle Lock. To scan quickly through the track, press and hold Shift and press the Track Skip buttons (PRIME 4 and PRIME 2) or press and hold Shift and rotate the platter (PRIME GO). Alternatively, drag your finger left or right through the waveform overview on the display. -
Page 37: Looping & Beat-Jumping
To double or halve the length of a loop, turn the Auto Loop knob while the loop is enabled. To beat-jump through a track, press one of the Beat Jump buttons (PRIME 4 and PRIME 2), or press and hold Shift and turn the Auto Loop knob when there is no enabled loop (PRIME GO). -
Page 38: Pad Modes
The eight performance pads on each deck have different functions in each pad mode. The Parameter / buttons will make adjustments specific to each pad mode. To enter each pad mode, press the corresponding button: • PRIME 4/PRIME 2: Hot Cue, Loop, Roll, or Slicer. • PRIME GO: Hot Cue, Loop, or Roll. Hot Cue Mode In Hot Cue Mode, you can use each pad to jump to an assigned hot cue point. -
Page 39: Roll Mode
Slicer Modes In Slicer Mode (PRIME 4 and PRIME 2 only), the eight pads represent eight sequential beats—“slices”—in the beatgrid. When you press Slicer, you automatically activate an eight-beat loop. The currently playing slice is represented by the currently lit pad; the light will “move through the pads” as it progresses through the eight-slice phrase. -
Page 40: Control Center
– This screen is used for working with the SoundSwitch Engine Lighting integration. Parameters PRIME 4 Quantize: Tap this to enable or disable quantization. When enabled, time-based features like triggering cues and loops will snap to the beat-grid according to the Cue/Loop Quantization setting in your User Profile. -
Page 41: Prime 2
PRIME 2 Quantize: Tap this to enable or disable quantization. When enabled, time-based features like triggering cues and loops will snap to the beat-grid according to the Cue/Loop Quantization setting in your User Profile. Continue: Tap this to enable or disable continuous playback, which will keep playing the next track when the active track has ended. -
Page 42: Prime Go
PRIME GO Quantize: Tap this to enable or disable quantization. When enabled, time-based features like triggering cues and loops will snap to the beat-grid according to the Cue/Loop Quantization setting in your User Profile. Continue: Tap this to enable or disable continuous playback, which will keep playing the next track when the active track has ended. -
Page 43: User Profile
User Profile Press the Save To My Drive button to save your settings to a connected drive. User profiles can be loaded when a media device with an Engine DJ profile is connected to your PRIME hardware. Playback • Track Start Position: This setting determines where the beginning of a track is after it loads. Select the actual start of the file (Track Start) or the automatically detected beginning of an audio signal (Cue Position). - Page 44 -8%, the track time will increase so it is 8% longer. • Track End Warning: This setting determines how long before the end of a track PRIME 4 will warn you that it is nearing the end.
-
Page 45: Settings
PRIME 4 Device • Deck 3/4: This determines whether this PRIME 4 will use both deck layers (On) or just one (Off). • Wi-Fi: This determines whether Wi-Fi connectivity is enabled (On) or disabled (Off). Tap the gear icon to open the Wi-Fi settings. - Page 46 This page displays the product name, current firmware version, and other device information. • Update Firmware Version: If you are not running the latest firmware, tap Reboot to restart PRIME 4 in Update Mode, which enables you to update its firmware. Follow the firmware update instructions included with the firmware update package you downloaded.
-
Page 47: Prime 2
PRIME 2 Device • Wi-Fi: This determines whether Wi-Fi connectivity is enabled (On) or disabled (Off). Tap the gear icon to open the Wi-Fi settings. See Control Center > Wi-Fi for more information about the Wi-Fi menu. • Time/Date: This displays the current local time and date. Tap Sync Time when connected to the internet to automatically sync the time. -
Page 48: Prime Go
• Send Anonymous Usage Statistics: This determines whether or not your usage statistics will be sent occasionally to us, enabling us to improve the PRIME experience. • Legal: Tap here to view the Denon DJ EULA and patent list. PRIME GO Device Settings •... - Page 49 • Settings: Tap Reset to default to restore the default factory settings for your device. • Send Anonymous Usage Statistics: This determines whether or not your usage statistics will be sent occasionally to us, enabling us to improve the PRIME experience. • Legal: Tap here to view the Denon DJ EULA and patent list.
-
Page 50: Source
Source The Source menu allows you to select a connected media device, streaming service, or cloud service for use with your PRIME hardware. All connected media sources will be shown in the top part of the display, and available streaming and cloud service partners at the bottom of the display. -
Page 51: Record
Record Select the media device destination that you will use to save your recording. The currently selected source device will show Source next to its name. Once you have selected the recording device, you can begin recording your session. Tap Start to begin recording. The timer on the touchscreen will show the total length of time recorded. -
Page 52: Engine Lighting
Engine Lighting The Engine Lighting page allows you to control connected lighting devices such as DMX fixtures and Smart Lights using SoundSwitch to seamlessly sync your music and lights. To enable Engine Lighting, make sure the Engine Lighting option under Services in the hardware Settings menu is set to On. -
Page 53: Preferences
Preferences Tap the Preferences tab at the top of the touchscreen to open the Engine Lighting preferences. General • Engine Lighting Status: This setting displays the current connection status to Engine Lighting devices. When Running is shown, Engine Lighting is active. Tap Stop to deactivate Engine Lighting. Tap Start to reactivate. •... -
Page 54: Appendix
1. Make sure your PRIME 4 or PRIME 2 hardware is powered off. 2. Locate the SATA drive panel in the center of the bottom panel of your PRIME 4 or PRIME 2 hardware. Use a Phillips-head screwdriver to remove the screws (don’t lose them!), and remove the SATA drive panel. -
Page 55: Fx Parameters
FX Parameters PRIME 4 Echo Parameter Value Range This effect adds echoes of the original signal. Feedback 0–100 Frequency <60 Hz – <18.2 kHz, All Bands, >60 Hz – >18.2 kHz Beats 1/32, 1/16, 1/8, 1/4, 1/2, 3/4, 1, 2, 4, 8 Dry/Wet 0–100... - Page 56 Flanger Parameter Value Range This effect adds a slightly delayed copy of the original signal Frequency <60 Hz – <18.2 kHz, All Bands, to create a comb-filter effect (often referred to as resembling >60 Hz – >18.2 kHz a jet plane engine). Beats 1/32, 1/16, 1/8, 1/4, 1/2, 3/4, 1, 2, 4, 8 Dry/Wet...
- Page 57 Beat Break Parameter Value Range This effect samples the 4 beats of each bar of the original Pattern See below signal and replays them (within the same bar) according to a Frequency <60 Hz – <18.2 kHz, All Bands, preset pattern, creating a “stuttering,” “breakbeat” effect. >60 Hz –...
-
Page 58: Prime 2/Prime Go
PRIME 2/PRIME GO Echo Parameter Value Range This effect adds echoes of the original signal. Beats 1/64, 1/32, 1/16, 1/8, 1/4, 1/2, 3/4, 1, 2, 4, 8, 16, 32 Feedback 0–100 Wet/Dry 0–100 Delay Parameter Value Range This effect adds repeated instances of the original signal Beats 1/64, 1/32, 1/16, 1/8, 1/4, 1/2, 3/4, 1, that decay over time. - Page 59 Phaser Parameter Value Range This effect adds a copy of the original signal with its phase Beats 1/64, 1/32, 1/16, 1/8, 1/4, 1/2, 3/4, 1, shifted slightly to create a subtle, modulatory effect. 2, 4, 8, 16, 32 Wet/Dry 0–100 Crush Parameter Value Range...
-
Page 60: Technical Specifications
Technical Specifications PRIME 4 Digital Audio Bit Depth 24-bit Sampling Rate 44.1 kHz SD/SDHC/SDXC card, USB mass-storage devices (flash Supported Media Type memory, 2.5" internal SATA, external HDD) File Systems exFAT, FAT32 Audio File Formats AAC/M4A, AIF/AIFF (44.1–192 kHz, 16–32 bit), ALAC, FLAC, MP3 (32–320 kbps), MP4, Ogg Vorbis, WAV... - Page 61 Connections Audio Outputs 2 XLR outputs (master left/right, balanced) 1 RCA output pair (master left/right, unbalanced) 2 XLR outputs (booth left/right, balanced) 2 XLR outputs (zone left/right, balanced) 1 1/4” (6.35 mm) stereo output (headphones) 1 1/8” (3.5 mm) stereo output (headphones) Audio Inputs 2 RCA input pairs (line-level, unbalanced) 2 RCA input pairs (phono- or line-level, unbalanced)
-
Page 62: Prime 2
PRIME 2 Digital Audio Bit Depth 24-bit Sampling Rate 44.1 kHz SD/SDHC/SDXC card, USB mass-storage devices (flash Supported Media Type memory, 2.5" internal SATA, external HDD) File Systems exFAT, FAT32 AAC/M4A, AIF/AIFF (44.1–192 kHz, 16–32 bit), ALAC, Audio File Formats FLAC, MP3 (32–320 kbps), MP4, Ogg Vorbis, WAV (44.1–... - Page 63 Full color LED-backlit display with touch interface Displays Main 7" / 178 mm (diagonal) Full-color LED-backlit display Jog Wheel 2.2" / 56 mm (diagonal) Power Connection Voltage 100–240 VAC, 50/60 Hz Consumption 34W (with smartphone charging from USB4 port) 32W (without smartphone charging) Dimensions 25.39”...
-
Page 64: Prime Go
PRIME GO Bit Depth Digital Audio 24-bit Sampling Rate 44.1 kHz SD/SDHC/SDXC card, USB mass-storage devices Supported Media Type (flash memory, external HDD) File Systems exFAT, FAT32 AAC/M4A, AIF/AIFF (44.1–192 kHz, 16–32 bit), Audio File Formats ALAC, FLAC, MP3 (32–320 kbps), MP4, Ogg Vorbis, WAV (44.1–192 kHz, 16–32 bit) 20 Hz –... - Page 65 Built-in rechargeable Lithium-Ion battery Battery Type Battery Life Up to 4 hours Up to 2 hours Recharge Time DC, Center Positive Power Connection 19V 3.42A Voltage 30W (maximum) Consumption Dimensions 16.2” x 10.8” x 2.1” (width x depth x height) 411 x 274 x 53 mm 8.11 lbs.
-
Page 66: Trademarks & Licenses
Trademarks & Licenses Denon is a trademark of D&M Holdings Inc., registered in the U.S. and other countries. Denon DJ products are produced by inMusic Brands, Inc. Kensington and the K & Lock logo are registered trademarks of ACCO Brands. - Page 67 denondj.com enginedj.com...
Need help?
Do you have a question about the PRIME 4 and is the answer not in the manual?
Questions and answers