Denon PRIME 2 User Manual
Hide thumbs
Also See for PRIME 2:
- Quick start manual (37 pages) ,
- User manual (67 pages) ,
- User manual (107 pages)
Table of Contents
Advertisement
Advertisement
Table of Contents

Subscribe to Our Youtube Channel
Related Manuals for Denon PRIME 2


Summary of Contents for Denon PRIME 2
- Page 1 User Guide English Manual Version v1.0...
-
Page 2: Table Of Contents
Table of Contents Introduction ................5 Box Contents ..................5 Support ....................5 Product Registration ..................5 Setup ..................6 Devices & File Analysis ..............7 Configuration ..................7 Features ..................8 Top Panel ................... 8 Front Panel ..................12 Rear Panel .................. - Page 3 Operation ................13 Touchscreen Overview ..............13 Performance View ................... 13 Track Overview & Waveform ..................13 Central Library Preview ....................15 Library View ....................16 Platter Display Overview ..............17 Performing ..................17 Loading Tracks ....................17 Searching & Filtering Tracks ................18 Editing Crates and Playlists ................
- Page 4 Appendix ................29 SATA Drive Installation ..............29 FX Parameters ................. 30 Technical Specifications ..............32 Trademarks & Licenses ..............33...
-
Page 5: Introduction
Introduction Thank you for purchasing the PRIME 2. At Denon DJ, we know how serious music is to you. That’s why we design our equipment with only one thing in mind—to make your performance the best it can be. We’re honored and excited to play a part in your musical &... -
Page 6: Setup
Setup Important: Occasionally, we may update PRIME 2’s firmware to add exciting new features and improvements. Visit denondj.com to check for available firmware updates, especially after you update your software (firmware updates may address new software features). 1. Visit denondj.com and log into your account. -
Page 7: Devices & File Analysis
• On PRIME 2, load the track: When you load a track to play, PRIME 2 will automatically analyze it (if it has not already been analyzed). This may take a moment to complete, depending on the length of the track. You can start playing the track from the beginning immediately, though you will need to wait a moment for the analysis to finish. -
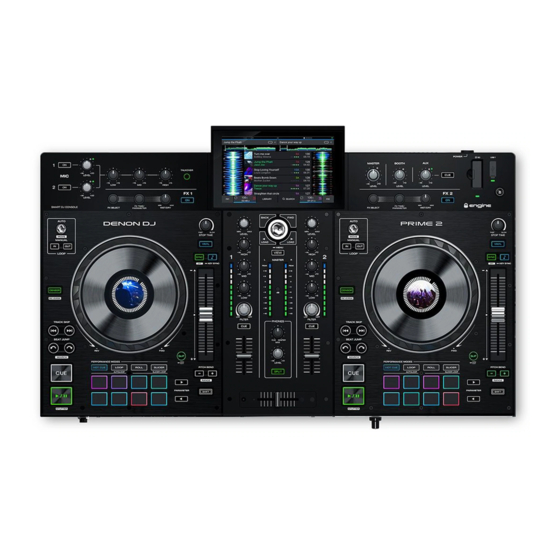
Page 8: Features
51 52 53 1. Touchscreen: This full-color multi-touch display shows information relevant to PRIME 2's current operation. Touch the touchscreen (and use the hardware controls) to control the PRIME 2 interface. See Operation > Touchscreen Overview for more information. 2. Browse Knob: Turn this knob to navigate through lists. Press the knob to move forward in the touchscreen or select a track to load on either deck. - Page 9 8. Channel Level: Turn this knob to adjust the level of the pre-fader, pre-EQ audio signal for the channel. 9. Channel Level Meters: These LEDs display the audio signal level of the channel. 10. Channel EQ: Turn these knobs to boost or cut the high, mid-range, and low frequencies for the channel.
- Page 10 25. Stop Time: Controls the rate at which the track slows to a complete stop ("brake time") when you pause it by pressing Play/Pause. 26. Vinyl: Press this button to activate/deactivate a “vinyl mode” for the platter. When activated, you can use the platter to “scratch”...
- Page 11 53. Aux Cue: Press this button to send the aux signal to the headphones’ cue channel. 54. SD Card Slot: Insert a standard SD card to this slot. When you select Note: Although PRIME 2 can play that SD card as a source, you can use the touchscreen to select and tracks that have not been analyzed load tracks from your SD card.
-
Page 12: Front Panel
Reconnect your power source to return to normal operation. 2. Power Button: Press this button to power PRIME 2 on. Power on PRIME 2 only after you have connected all of your input devices and before you power on your amplifiers and loudspeakers. -
Page 13: Operation
Operation Touchscreen Overview Performance View Track Overview & Waveform Track Overviews Toolbar Loop Beat Points Hot Cue Points Playhead Sync Track Waveforms Tempo Time Remaining/ Elapsed Track Progress Swipe left or right on the track overview to scan through the track while the track is paused. Note: You can use this feature during playback if Needle Lock is off. - Page 14 Toolbar The toolbar at the top of the touchscreen will show the current quantize status, continue status and recording status. Swipe down from this area to open the mini-menu, where you can quickly adjust the following parameters: • Quantize: Tap this to enable or disable quantization. When enabled, time-based features like triggering cues and loops will snap to the beat-grid according to the Cue/Loop Quantization setting in the Preferences.
-
Page 15: Central Library Preview
Central Library Preview Swipe Left to Swipe Right to Load to Left Deck Load to Right Deck Tap and Drag to Quickly Scroll Tap to Search Tap to Open Library View Swipe up or down to browse tracks. Tap and drag the scroll bar to quickly browse through tracks. Swipe right to load a track to the right deck. -
Page 16: Library View
Use the six icons on the left side to navigate while in Library View: • Source Toggle: If you have more than one source device connected to PRIME 2, tap this icon to toggle between your connected sources or integrated services. -
Page 17: Platter Display Overview
Platter Display Overview Normally, the platter display shows the following information: • the current position of the playhead. • the album artwork of the current track, or your custom artwork. The platter display temporarily shows the following information: • the current size of an auto loop after you turn the Auto Loop knob. •... -
Page 18: Searching & Filtering Tracks
Searching & Filtering Tracks To search, tap the Search field and use the keyboard Tap to Select Search Criteria that appears on the touchscreen. The search results can be based on the following criteria: title, artist, Tap to Search album, length, key, comment, BPM, genre, label, year, date added or filename. -
Page 19: Editing Crates And Playlists
Editing Crates and Playlists Tap the edit button at the top of the touchscreen while Tap to Enable Tap to Select viewing the crates or playlist screen. While editing is Editing Tracks active, you can do any of the following: To make a new crate, tap + Create Crate in Crates view. -
Page 20: Playback & Cueing
Playback & Cueing To play or pause a track, press Play/Pause (/). To scratch a track, move the platter when the Vinyl button is set to On and audio is playing. To set the initial cue point, press Shift+Cue at the desired location during playback. -
Page 21: Looping & Beat-Jumping
Looping & Beat-Jumping To create and activate an auto loop, press the Auto Loop knob. To set the auto loop length, turn the Auto Loop knob to select the number of beats: 1/32, 1/16, 1/8, 1/4, 1/2, 1, 2, 4, 8, 16, 32, or 64. Note: You can set the default Auto Loop size in the Preferences menu. -
Page 22: Pad Modes
Pad Modes The 8 performance pads on each deck have different functions in each pad mode. The Parameter / buttons will make adjustments specific to each pad mode. To enter each pad mode, press the corresponding button: Hot Cue, Loop, Roll, or Slicer. Hot Cue Mode In Hot Cue Mode, you can use each pad to jump to an assigned hot cue point. -
Page 23: Roll Mode
Roll Mode In Roll Mode, you can press and hold each pad to trigger a “loop roll” of a certain length while the track’s timeline continues (the lower half of the waveform on the touchscreen will continue moving forward). When you 1/8- 1/4T- 1/4-... -
Page 24: Menu
Off to cue multiple channels at a time. Integration • Tap one of the listed Denon DJ partners to enable its integration with PRIME 2. When enabled, tap the Source Toggle icon in Library View to switch sources. - Page 25 • Reset all settings to default: Press Reset to restore the default factory settings for your device. Update Tap Reboot to restart PRIME 2 in Update Mode, which enables you to update its firmware. Follow the firmware update instructions included with the firmware update package you downloaded.
-
Page 26: Preferences
Preferences Press the Save To My Drive button to save your settings to a connected drive. User profiles can be loaded when a media device with an Engine Prime profile is connected to PRIME 2. Playback • Track Start Position: This setting determines where the beginning of a track is after it loads. Select the actual start of the file (Track Start) or the automatically detected beginning of an audio signal (Cue Position). - Page 27 -8%, the track time will increase so it is 8% longer. • Track End Warning: This setting determines how long before the end of a track PRIME 2 will warn you that it is nearing the end by flashing the track overview on the touchscreen.
-
Page 28: Source
Rec next to its name. Tap the computer icon at the top of the touchscreen to switch PRIME 2 to computer mode. In computer mode, you can use PRIME 2 to send and receive MIDI messages to and from your computer. -
Page 29: Appendix
1. Make sure your PRIME 2 hardware is powered off. 2. Locate the SATA drive panel in the center of the bottom panel of your PRIME 2 hardware. Use a Phillips-head screwdriver to remove the screws (don’t lose them!), and remove the SATA drive panel. -
Page 30: Fx Parameters
FX Parameters Echo Parameter Value Range This effect adds echoes of the original signal. Beats 1/64, 1/32, 1/16, 1/8, 1/4, 1/2, 3/4, 1, 2, 4, 8, 16, 32 Feedback 0–100 Wet/Dry 0–100 Delay Parameter Value Range This effect adds repeated instances of the original signal Beats 1/64, 1/32, 1/16, 1/8, 1/4, 1/2, 3/4, 1, that decay over time. - Page 31 Phaser Parameter Value Range This effect adds a copy of the original signal with its phase Beats 1/64, 1/32, 1/16, 1/8, 1/4, 1/2, 3/4, 1, shifted slightly to create a subtle, modulatory effect. 2, 4, 8, 16, 32 Wet/Dry 0–100 Crush Parameter Value Range...
-
Page 32: Technical Specifications
Technical Specifications Digital Audio Bit Depth 24-bit Sampling Rate 44.1 kHz SD/SDHC/SDXC card, USB mass-storage devices (flash Supported Media Type memory, 2.5" internal SATA, external HDD) File Systems exFAT, FAT32 Audio File Formats AAC/M4A, AIF/AIFF (44.1–192 kHz, 16–32 bit), ALAC, FLAC, MP3 (32–320 kbps), MP4, Ogg Vorbis, WAV (44.1–... -
Page 33: Trademarks & Licenses
Specifications are subject to change without notice. Trademarks & Licenses Denon is a trademark of D&M Holdings Inc., registered in the U.S. and other countries. Denon DJ products are produced by inMusic Brands, Inc. Kensington and the K & Lock logo are registered trademarks of ACCO Brands. - Page 34 denondj.com...
Need help?
Do you have a question about the PRIME 2 and is the answer not in the manual?
Questions and answers