Denon Prime 4 Quick Start Manual
Hide thumbs
Also See for Prime 4:
- User manual (107 pages) ,
- Quick start manual (45 pages) ,
- Quick start manual (9 pages)
Table of Contents
Advertisement
Quick Links
Advertisement
Table of Contents

Related Manuals for Denon Prime 4


Summary of Contents for Denon Prime 4
- Page 1 Draft 04. Do not distribute. Quickstart Guide English ( 3 – 17 ) Guía de inicio rápido Español ( 18 – 32 ) Guide d’utilisation rapide Français ( 33 – 47 ) Guida rapida Italiano ( 48 – 62 ) Schnellstart-Anleitung Deutsch ( 63 –...
-
Page 3: Box Contents
Quickstart Guide (English) Introduction Thank you for purchasing the Prime 4. At Denon DJ, we know how serious music is to you. That’s why we design our equipment with only one thing in mind—to make your performance the best it can be. - Page 4 5. Plug all devices into power sources, and turn on devices in proper order: • When starting a session, turn on (1) input sources, (2) Prime 4, (3) output devices. • When ending a session, turn off (1) output devices, (2) Prime 4, (3) input sources.
-
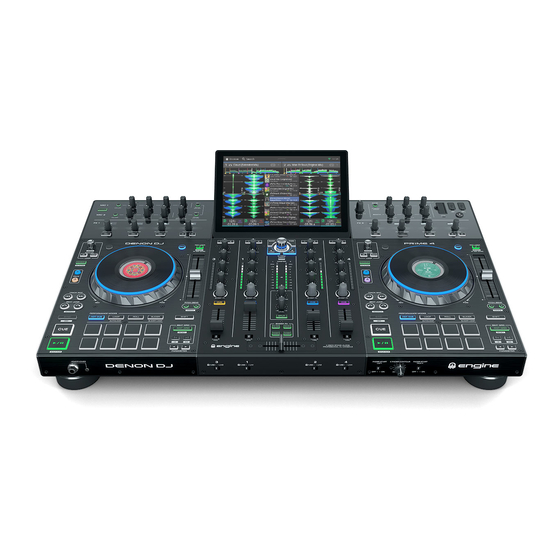
Page 5: Top Panel
40 41 42 43 40 41 42 43 1. Touchscreen: This full-color multi-touch display shows information relevant to Prime 4's current operation. Touch the touchscreen (and use the hardware controls) to control the Prime 4 interface. Tip: If you adjust the angle of the touchscreen, use the stand on its back panel to secure it in place. - Page 6 14. Channel Fader: Use this fader to adjust the channel’s volume level. 15. Crossfader Assign: Routes the audio playing on the corresponding channel to either side of the crossfader (L or R), or bypasses the crossfader and sends the audio directly to the program mix (center, Thru). 16.
- Page 7 29. Play/Pause: This button pauses or resumes playback. 30 31 30. Vinyl: Press this button to activate/deactivate a “vinyl mode” for the platter. When activated, you can use the platter to “scratch” the track as you would with a vinyl record. 31.
- Page 8 USB flash drive. Important: You must use the Engine software to configure the music library on your SD Card or USB flash drive before connecting them to Prime 4. See the complete User Guide at denondj.com to learn how to do this.
-
Page 9: Front Panel
This connection sends and receives MIDI messages to and from the computer. 5. Link Port: Use a standard Ethernet cable to connect this port to a computer. Prime 4 will send time, BPM, and other track data to your software over this connection. This connection can also be used to connect to the Engine Prime software, allowing you to use the computer and software as a media device. -
Page 10: Basic Operation
Use the Mic 1 and Mic 2 Level knobs on the top panel to control the volume level. ® 16. Kensington Lock Slot: Use this slot to secure Prime 4 to a table or other surface. Basic Operation Important: Download the full Prime 4 User Guide from denondj.com. -
Page 11: Contenido De La Caja
Guía de inicio rapido (Español) Introducción Gracias por comprar el Prime 4. En Denon DJ, sabemos que usted se toma la música en serio. Por eso es que diseñamos nuestros equipos con una sola cosa en mente—hacer que pueda tocar su mejor interpretación. -
Page 12: Instalación
6. Plug all devices into power sources, and turn on devices in proper order: • When starting a session, turn on (1) input sources, (2) Prime 4, (3) output devices. • When ending a session, turn off (1) output devices, (2) Prime 4, (3) input sources. - Page 13 Características Panel superior...
- Page 14 Panel frontal Panel trasero...
-
Page 15: Funcionamiento Básico
Funcionamiento básico Importante: Descargue la guía del usuario completa de Prime 4 de denondj.com.
Need help?
Do you have a question about the Prime 4 and is the answer not in the manual?
Questions and answers