Table of Contents
Advertisement
S W E D E N
PROFESSIONAL SERIES
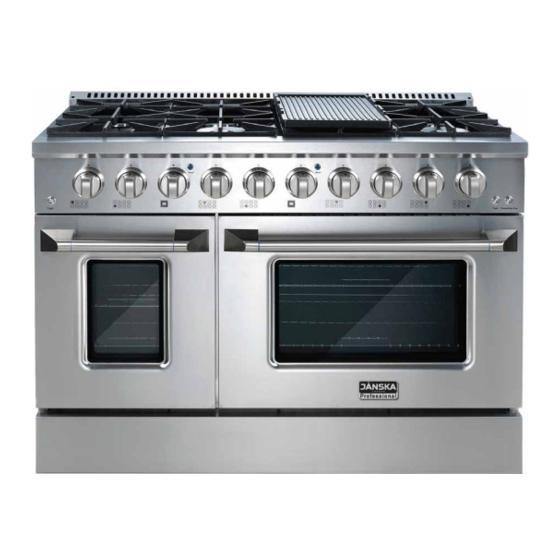
48" FREESTANDING
GAS RANGE
Models: GR-670B (SS), GR-670B (G),
GR-670B (WP), GR-670B (BLP), GR-670B (BKP)
U S E R M A N U A L
Your satisfaction is guaranteed. If you are not completely satisfied
with our Professional Series 48" Freestanding Gas Range and the
results it brings, we insist that you let us know. We'll help make the
Gas Range work for you, or we'll refund your money.
Advertisement
Table of Contents

Subscribe to Our Youtube Channel
Related Manuals for JANSKA PROFESSIONAL GR-670B


Summary of Contents for JANSKA PROFESSIONAL GR-670B
- Page 1 S W E D E N PROFESSIONAL SERIES 48" FREESTANDING GAS RANGE Models: GR-670B (SS), GR-670B (G), GR-670B (WP), GR-670B (BLP), GR-670B (BKP) U S E R M A N U A L Your satisfaction is guaranteed. If you are not completely satisfied with our Professional Series 48"...
- Page 2 GAS WARNING IF THE INFORMATION IN THIS MANUAL IS NOT FOLLOWED EXACTLY, A FIRE OR AN EXPLOSION MAY OCCUR, CAUSING PROPERTY DAMAGE, PERSONAL INJURY OR POSSIBLE DEATH. DO NOT STORE OR USE GASOLINE, A LIQUID PROPANE CYLINDER OR OTHER FLAMMABLE VAPORS AND LIQUIDS IN THE VICINITY OF THIS APPLIANCE. ANY LIQUID PROPANE CYLINDER NOT CONNECTED FOR USE SHALL NOT BE STORED IN THE VICINITY OF THIS OR ANY OTHER APPLIANCE.
-
Page 3: Table Of Contents
CONTENTS IMPORTANT SAFEGUARDS HANDLING AND UNPACKING CORRECT USAGE CHILDREN TECHNICAL SAFETY COOKING SAFETY PARTS RANGE INSTALLATION DIMENSIONS CLEARANCES HOOD / COMPOSITE OVERLAY INSTALL LEVELING ANTI-TIP BRACKET ELECTRIC POWER SUPPLY REQUIREMENTS GROUNDING WIRING DIAGRAM GAS SUPPLY REQUIREMENTS CONNECT RANGE TO GAS SUPPLY COMPONENT PART ASSEMBLY BEFORE FIRST USE COOKTOP OPERATION... -
Page 4: Important Safeguards
This User Manual contains important information on how to install and set up your new range, safe use, and maintenance, as well as insights into the product features. READ ALL INSTRUCTIONS BEFORE INSTALLING AND OPERATING YOUR JANSKA PROFESSIONAL SERIES 48" FREESTANDING GAS RANGE FOR THE FIRST TIME. IF... -
Page 5: Children
CHILDREN • Children should not be left alone or unattended in an area where the appliance is in use. • Never allow children to sit or stand on any part of the appliance. • Do not store items of interest to children above or at the back of the appliance. Children climbing on the appliance to reach these items could be injured. - Page 6 Gas must be installed by a qualified service technician in accordance with all applica- ble codes and requirements of the authority having jurisdiction. Before proceeding with any conversion, ensure the gas supply is shut off and the electrical power to the range is disconnected.
-
Page 7: Cooking Safety
yellow tipping should be restricted to the primary flame kernels only. Properly adjust- ed burners, indicated by a bluish rather than a yellow flame, will minimize incomplete combustion. Exposure to those substances can be minimized by venting with an open window or use of a ventilation fan or hood. •... - Page 8 • The Burner Grates supplied with the appliance must always be used. Never place cookware directly on the burner itself. • Do not operate a Burner for an extended period of time without cookware on the Burner Grates. The finish of the grates might chip without cookware to absorb the heat.
- Page 9 • Use an extinguisher ONLY if: - You know you have a Class A, B or C extinguisher, and you already know how to operate it. - The fire is small and contained in the area where it started. - The fire department is being/has been called. - You can fight the fire with your back to an exit.
-
Page 10: Parts
PARTS Standard Double Burner Burner Griddle Burner Top Vent Gate Control Panel Oven 2 Light Button Oven 1 Light Button Convection Fan Button Cool Air Intake Pressure Regulator Oven 1-18’’ Conventional Front Vent Panel Oven 2-30’’ Conventional Convection/Broil INCLUDES: 4 Cast Iron Burner Grates 1 Porcelain Enameled Cast Iron Double-Sided Griddle 6 Standard Burner Caps 2 Double Burner Caps... - Page 11 Oven 1-18’’ Oven 2-30’’ Conventional Conventional/Convection/Broil NG Orifice LP Orifice Burner BTU/H Position BACK LEFT (B/L) 9,000 1.36 SEMI-RAPID FRONT LEFT (F/L) 6,000 1.07 0.74 AUXILIARY BACK MIDDLE LEFT (B/M/L) 12,000 1.57 SEMI-RAPID FRONT MIDDLE LEFT (F/M/L) 20,000 1.36*2+0.73 0.89*2+0.53 DOUBLE FLAME BACK MIDDLE RIGHT (B/M/R) 9,000...
-
Page 12: Range Installation
RANGE INSTALLATION • WARNING: Do not lift or carry the range by the oven handles. • Remove and recycle packaging and keep out of reach of children. • Before installing the range, you must locate and secure the included Anti-Tip Bracket Set for your range. -
Page 13: Clearances
• Make sure the wall coverings, countertop, and cabinets around the appliance can withstand heat up to 200º F (93°C) generated by the appliance. • Deep fat fryers must not be installed directly next to gas cooktops. Gas flames can ignite splattering oil. -
Page 14: Hood / Composite Overlay Install
• The minimum distance from the side of the range above the countertop to combus- tible sidewalls must be at least 13 inches. • The minimum horizontal distance between overhead cabinets installed to either side of the appliance shall not be less than the nominal width of the appliance. •... -
Page 15: Anti-Tip Bracket
ANTI-TIP BRACKET To prevent the range from tipping forward, the anti-tip brackets must be installed. Failure to install the Anti-Tip Bracket will allow the range to tip over if excessive weight is placed on an open door or if a child climbs upon it. Serious injury might result from spilled hot liquids or from the range itself. -
Page 16: Electric Power Supply Requirements
ELECTRIC POWER SUPPLY REQUIREMENTS • Your range must be electrically grounded in accordance with local codes or, in the absence of local codes, in accordance with the National Electrical Code (ANSI/NFPA 70, latest edition). A copy of this standard may be obtained from the National Fire Protection Association. -
Page 17: Wiring Diagram
WARNING: DO NOT cut or remove the grounding prong from the power cord. • Where a standard two-prong wall receptacle is encountered, it is the responsibility and obligation of the customer to have it replaced with a properly grounded three-prong wall receptacle by a licensed electrician. •... -
Page 18: Gas Supply Requirements
GAS SUPPLY REQUIREMENTS • Installation and service must be performed by a qualified installer. • The range has been equipped and adjusted for use with natural gas (NG) at manu- facture. • For use with liquid propane (LP) gas, the range must be properly adjusted by a qual- ified installer. -
Page 19: Connect Range To Gas Supply
CONNECT RANGE TO GAS SUPPLY IMPORTANT: The range must be connected to a regulated gas supply. The supply line must be equipped with an approved external gas shut-off valve located near the range in an accessible location. Do not block access to the shut-off valve. •... -
Page 20: Component Part Assembly
COMPONENT PART ASSEMBLY BURNER ASSEMBLY Align the small ignitor hole/indentation of the Burner Head to fit around the Ignit- er and place on the Burner Base. Center the Burner Cap/s on top of the Burner Head. The Burner Cap must be in a flat, horizontal position. - Page 21 BURNER GRATES • There are 4 Cast Iron Burner Grates. Secure the grates vertically, side-by-side on top of the burners. • Improper installation of the grates may result in scratching of the cooktop and/or poor combustion. • Always use the Burner Grates, and never place cookware directly on the Burners. GRIDDLE The Griddle can be placed on the Reversible Griddle...
-
Page 22: Before First Use
BURNER KNOB REPLACEMENT Some Gas Range models include an alternative set of Burner Knobs that can be used to replace the original knobs based on personal preference. (A) Standard Burner (B) Small 18” Oven (C) Large 30” Oven Ignite HI – SIM 150-450 150-500 BROIL To remove the original knobs,... - Page 23 IMPORTANT: The oven and broiler should be turned on to burn off the manufacturing oils. Turn Oven 1 to 450°F and Oven 2 to 500°F for 20 to 30 minutes. Then turn Oven 2 to ‘BROIL’ for the same length of time. You may wish to turn on the ventilator above your range at this time.
-
Page 24: Cooktop Operation
COOKTOP OPERATION BEFORE USING BURNERS • Select the cookware to match the burner. (Large Diameter = Large Burner, Small Diameter = Small Burner) • Using oversized cookware may cause the flames to spread out and may cause damage. The proper cookware size will also improve efficiency. •... - Page 25 COOKTOP BURNER IGNITION To light the surface burners, push and turn the corre- sponding Burner Control Knob counterclockwise to the ‘HI’ position. You will hear a clicking noise – the sound of the electric spark igniting the burner. IMPORTANT: When one burner is turned to the ‘HI’ position, all the burners will spark.
- Page 26 2. Keep the Knob pushed in and ignite the escaping gas-air mixture with a utility lighter (that is a minimum 6” in length). 3. When lit, keep pushed in and turn the knob to the desired setting. IMPORTANT: If the flame is blown out during a power failure, turn the knob immedi- ately to OFF, as the burner will not automatically relight and gas may escape.
-
Page 27: Griddle Operation
WARNING: NEVER USE THIS APPLIANCE AS A SPACE HEATER TO HEAT OR WARM THE ROOM. DOING SO MAY RESULT IN CARBON MONOXIDE POISONING AND OVERHEATING. GRIDDLE OPERATION The Griddle offers a versatile cooking surface to cook many food items and allows for easy flipping with no side edges. - Page 28 WARNING: Oven Vent Do not block the Top Vent of the range, nor the ducts of the door for cool air intake and exhaust. It is important that the flow of hot air from the oven and fresh air into the oven burner never be interrupted.
- Page 29 CONVECTION – OVEN 2 The convection function can be set on Oven 2 only. Heat is transferred from the heat- ing element in the bottom of the oven cavity to the oven cavity itself. The convection fan in the rear of the oven then circulates the heat. This convection process provides more even heat distribution throughout the oven cavity.
- Page 30 • Preheating Preheating is suggested when searing rare steaks. (Remove any broiler pan before preheating with the infrared broiler as foods will stick on hot metal.) Preheat for approximately 2 minutes, or when the burner is deemed hot. Preheating is not neces- sary when broiling meat well-done.
-
Page 31: Care And Cleaning
CARE AND CLEANING The range and its components should be cleaned after each use to avoid build up of food residue and possible staining or discoloring. Only clean the parts listed in the following instructions. WARNING: To avoid the risk of burns or electrical shock, ensure that all burner controls are in the OFF position and that all components are completely cool before cleaning. - Page 32 • Do not use stainless steel cleaner, as these parts are not stainless steel. • If necessary, use a soft kitchen brush or toothbrush to clean stains and ports of the Burner Head. • Dry thoroughly before reassembly. Any wet ports will prevent the flame from ignit- ing.
- Page 33 Oven Gasket Removable Bottom Oven Panel OVEN DOOR • Clean with a solution of mild liquid dish soap and warm water and a damp sponge. Rinse well. • Do not allow excess water to run into any holes or slots in the door, including around the glass frame.
-
Page 34: Troubleshooting
• Do not use any cleaning product containing chlorine bleach. • Dry the components with a soft, lint-free cloth. TOP VENT • The stainless-steel top vent can be removed by unscrewing. • Use a non-abrasive stainless-steel cleaner to spray on any grease build up on the underside of the vent. - Page 35 Plug on range is not Make sure the unit is properly completely inserted in the connected to the power electrical outlet. supply. Burners do not light or do not burn evenly Remove the burner heads Burner ports/holes on the and clean them. Check the side of the burner may be igniter area for burned-on clogged.
-
Page 36: Specifications
Oven Fan: 120V, 60Hz, 0.53 Amp Oven Lights: 120V, 60Hz, 0.2 Amp, 25 W Your purchase comes with a 100% satisfaction guarantee from Janska If you are not happy with the product for any reason, please contact us at support@janskaus.com with your...
Need help?
Do you have a question about the PROFESSIONAL GR-670B and is the answer not in the manual?
Questions and answers
My large oven is not heating. I believe it’s a faulty igniter. It’s not 1 year old yet. Its model GR-670B. 48” gas range.
Common causes of heating issues in the JANSKA PROFESSIONAL GR-670B gas range include:
1. Burner ports or holes are clogged.
2. Burner heads or caps are not properly positioned.
3. Cooktop is operated with the wrong type of gas.
4. Regulator is not installed, is faulty, or is set incorrectly.
5. Igniter area has burned-on food or grease.
6. Plug is not completely inserted in the electrical outlet.
7. Unit is not properly connected to the power supply.
This answer is automatically generated