Table of Contents
Advertisement
Available languages
Available languages
Quick Links
Advertisement
Chapters
Table of Contents

Related Manuals for ICONE SMART.E


Summary of Contents for ICONE SMART.E
- Page 1 MANUALE D’USO E MANUTENZIONE USE AND MAINTENANCE MANUAL...
- Page 3 Gentile cliente ICON.E, Grazie per averci scelto e benvenuto nella grande famiglia V-ITA Group S.p.A. Il nostro scooter elettrico SMART.E è un veicolo ben studiato e sviluppato, i cui componenti hanno superato rigorosi test per garantire prestazioni elevate e una qualità superiore, per darvi un prodotto sicuro e affidabile.
-
Page 5: Table Of Contents
4.1 Batteria 4.2 Caricabatterie 4.3 Ricarica delle batterie Regolazione e manutenzione 5.1 Regolazioni 5.2 Procedure di manutenzione ordinaria Guasti comuni e risoluzione dei problemi Dati tecnici Informazioni sul servizio assistenza Certificato della e-Scooter ICONE Scheda di garanzia Verbale di consegna... -
Page 6: Informazioni Generali
1. Informazioni generali 1.1. Simbologia All’interno del manuale sono richiamate informazioni particolarmente importanti sulle quali è necessario soffermarsi con più attenzione. Ogni segnale è costituito da un diverso simbolo per rendere evidente il contenuto del testo che lo segue e per facilitare la collocazione degli argomenti nelle diverse aree. Questo simbolo indica un’avviso generico per la sicurezza. -
Page 7: Identificazione
1.3 Identificazione Le matricole di identificazione vengono incise sul telaio e sul carter motore. Vanno sempre indicate nelle richieste di parti di ricambio. E’ consigliabile verificare la corrispondenza delle matricole del veicolo con quelle riportate sui documenti dello stesso. L’alterazione delle matricole di identificazione può far incorrere in gravi sanzioni penali. -
Page 8: Comandi E Strumenti
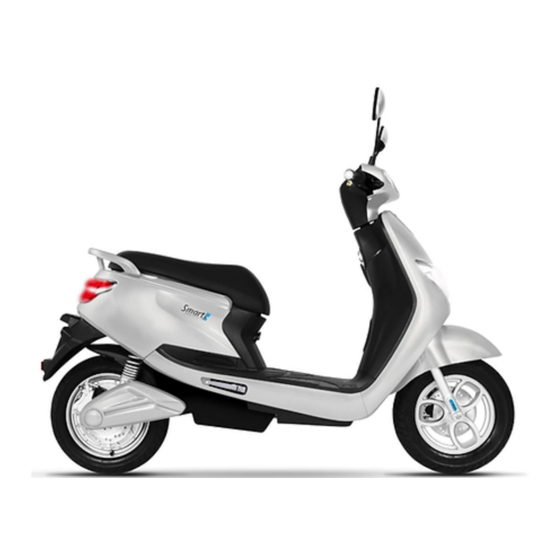
2. Comandi e strumenti 2.1. Vista generale dello scooter Acceleratore Specchietto retrovisore Sella Indicatore di direzione Presa di ricarica Leva freno Ammorizzatore posteriore Gruppo ottico anteriore Pedana passeggero Parafango anteriore Freno a disco posteriore Forcella ammortizzata Cavalletto centale Freno a disco anteriore... - Page 9 Display Comandi Porta USB Maniglione passeggero Commutatore a chiave Gruppo ottico posteriore Gancio portaborse Illuminazione targa Vano portaoggetti Portatarga Blocco apertura sella Catarifrangente posteriore Cavalletto laterale Blocco motore...
-
Page 10: Posizione Comandi E Strumenti
2.2. Posizione comandi e strumenti Strumentazione Leva freno integrale Leva freno posteriore Acceleratore Pulsante faro abbagliante Pulsante cambio marcia Pulsante frecce direzionali Pulsante luci di posizione Pulsante clacson Commutatore a chiave Pulsante retromarcia... - Page 11 Gruppo comandi sinistro Leva freno posteriore Tirare la leva sulla parte sinistra dello sterzo per azionare il freno a disco posteriore. Pulsante faro abbagliante Premere per azionare la luce abbagliante. Pulsante frecce direzionali Premere il pulsante a sinistra/destra per azionare i lampeggiatori di sinistra/destra.
- Page 12 Gruppo comandi destro Leva freno anteriore Tirare la leva sulla parte destra dello sterzo per azionare il freno a disco anteriore. Acceleratore Ruotare la manopola per regolare la velocità dello scooter. Pulsante luci di posizione Premere il pulsante a sinistra per attivare le luci (a led) di posizione.
- Page 13 Commutatore a chiave Il commutatore a chiave abilita o disabilita il sistema ed il bloccasterzo. Lo scooter viene fornito di una chiave principale e di un suo duplicato che possono essere utilizzati sia per azionare il commutatore a chiave, sia per l’apertura della sella.
-
Page 14: Strumentazione
2.3. Strumentazione Stato di carica batteria Spie luminose Tachimetro Selettore marce Chilometraggio totale Spie luminose Indicatore di guasto batteria Indicatore di guasto acceleratore Indicatore di guasto motore Indicatore di retromarcia Indicatore di cavalletto aperto Indicatore di abbaglianti in funzione Indicatore di frenata Indicatore di frecce direzionali Indicatore di guasto centralina Indicatore di ricarica in corso... - Page 15 Indicatore di guasto batteria La spia dell’indicatore di guasto batteria è di colore rosso. In caso si accenda è consigliabile recarsi presso un Rivenditore autorizzato per il controllo e la soluzione del problema. Indicatore di guasto motore La spia dell’indicatore di guasto motore è di colore arancione. In caso si accenda è...
- Page 16 Tachimetro Il tachimetro indica la velocità corrente. Il valore appare in chilometri orari (km/h) Contachilometri Il contachilometri indica la distanza percorsa complessivamente dal vostro veicolo. Stato di carica batteria Lo stato di carica batteria indica il livello di carica del veicolo. Ready Si accende dopo l’accensione del veicolo a seguito di un check.
-
Page 17: Uso
3. Uso 3.1. Controlli prima della partenza Prima di utilizzare lo scooter è sempre buona norma effettuare alcuni controlli: • verificare lo stato di carica delle batterie; • verificare il funzionamento del fanale anteriore, del fanale posteriore, degli indicatori di direzione e della luce porta targa;... - Page 18 Evitare partenze effettuate con il cavalletto centrale abbassato: quando la ruota posteriore prende contatto con il terreno non deve girare per evitare una partenza brusca. Su strade sconnesse, in caso di pioggia, neve o su strada scivolosa è necessario ridurre la velocità ed aumentare la distanza di sicurezza da altri veicoli, guidando con prudenza.
-
Page 19: Operazioni Per La Messa In Marcia
3.3. Operazioni per la messa in marcia Inserimento e disinserimento del bloccasterzo Per inserire il bloccasterzo ruotare il manubrio verso sinistra sino a fine corsa. Premere la chiave verso l’interno e ruotare in senso antiorario; contemporaneamente ruotare leggermente il manubrio in senso orario fino allo scatto della chiave sul simbolo del lucchetto; ora il bloccasterzo è... - Page 20 Selezione marce Utilizzando il pulsante di cambio marcia Shift è possibile selezionare tre modalità di guida differenti: • 1 Velocità massima: 30 Km/h. Compare l’icona sul display. • 2 Velocità massima: 38 Km/h. Compare l’icona sul display. • 3 Velocità massima: 45 Km/h. Compare l’icona sul display.
-
Page 21: Sella
3.4. Sella Inserire la chiave nella serratura posta nella parte posteriore sinistra. Ruotare in senso orario. Ribaltare la sella in avanti. Richiudendo, la serratura della sella si bloccherà automaticamente. 3.5. Gancio portaborse Il gancio portaborse è posizionato tra lo sterzo e la pedana poggiapiedi, nella parte interna dello scudo. -
Page 22: Sosta Dello Scooter
3.6. Sosta dello scooter Per lo stazionamento utilizzare il cavalletto centrale. Abbassare il cavalletto con il piede fino all’apertura completa e contemporaneamente aiutarsi sollevando manualmente lo scooter, afferrandolo con la mano destra al portapacchi e accompagnandolo sino al completo appoggio dello scooter. Spingendo in avanti lo scooter il cavalletto torna automaticamente nella posizione di partenza: questa operazione va eseguita sempre prima di... -
Page 23: Batteria E Ricarica
4. Batteria e Ricarica 4.1. Batteria Il veicolo è fornito di una batteria agli ioni di litio con grande capacità, piccola autoscarica, alta energia, lunga durata, sicurezza e affidabilità come batteria di alimentazione ideale. La capacità della batteria diminuisce con l’aumentare del tempo e del chilometraggio e l’uso e la manutenzione corretti possono prolungare efficacemente la durata della batteria. - Page 24 Non usare questa batteria per scopi diversi da quelli indicati. L’utilizzo per scopi diversi da quello previsto può dare origine a cortocircuiti all’interno della batteria che potrebbe incendiarsi. Pericolo d’incendio • Non smontare o rompere la batteria • Per effetto di un incidente con grave danneggiamento meccanico della batteria, possono verificarsi cortocircuiti all’interno della batteria stessa e quest’ultima potrebbe danneggiarsi od incendiarsi.
- Page 25 Manutenzione della batteria • La ricarica frequente riduce la durata della batteria. Si consiglia di caricare la batteria quando la carica della batteria è inferiore al 70%, ovvero caricarla il prima possibile in caso di luci gialla o rossa accesa e caricarla immediatamente in caso di sola luce rossa accesa. Non scaricare frequentemente la batteria al minimo, altrimenti ciò...
-
Page 26: Caricabatterie
4.2. Caricabatterie La spia rossa di ricarica è accesa durante la ricarica. Interrompere la ricarica dopo l’accensione della spia verde in estate; continuare a caricarlo per 3 - 4 ore dopo l’accensione della spia verde in inverno. Cattive abitudini di ricarica comportano danni alla batteria, come ad esempio la ricarica prolungata, la ricarica immediatamente dopo la guida e la ricarica in ambienti ad alta temperatura. - Page 27 Durante la ricarica, utilizzare il caricabatterie originale e l’alimentatore a 220V CA stabile. La polarità del connettore di uscita del caricatore deve essere coerente con quella della batteria, altrimenti danneggerebbe il caricatore e la batteria. Manutenzione del caricabatterie • Non tenere il caricabatterie a bordo. La vibrazione durante la guida su strada sconnessa causerà...
-
Page 28: Ricarica Delle Batterie
4.3. Ricarica della batteria Il livello di carica della batteria è visibile a sinistra sul display digitale del veicolo. La spia, quando presenta tutte le barre, indica che la carica è completa e soddisfa il normale funzionamento del veicolo. Quando presenta solo l’ultima barra rossa, indica la mancanza di elettricità... - Page 29 Ricarica con batteria fuori bordo Per la ricarica con batteria fuori bordo procedere come segue: • Disabilitare il sistema. • Sollevare la sella. • Sollevare leggermente la batteria per permettere l’estrazione del connettore. • Scollegare il connettore alla batteria ruotando la linguetta e tirando.
-
Page 30: Regolazione E Manutenzione
5. Regolazione e manutenzione 5.1. Regolazioni Specchietti retrovisori Sui lati destro e sinistro del manubrio sono montati i due specchietti retrovisori la cui regolazione è possibile ruotando manualmente lo stelo fino a portare lo specchietto nella posizione desiderata. Freno a disco anteriore e posteriore L’usura del disco e delle pastiglie viene compensata automaticamente, quindi non ha effetto sul funzionamento del freno e non richiede registrazioni. -
Page 31: Procedure Di Manutenzione Ordinaria
5.2. Procedure di manutenzione ordinaria Pneumatici La giusta pressione degli pneumatici ti offrirà la massima stabilità. Si consiglia di controllare le condizioni degli pneumatici e di prenderne la pressione con il manometro almeno una volta al mese, oppure in qualsiasi momento quando la pressione dei pneumatici è... - Page 32 Sostituzione delle lampadine In caso di sostituzione delle lampadine: • Assicurarsi che l’interruttore di alimentazione sia su OFF. • Quando la luce è accesa, la lampadina genererà calore e continuerà a farlo anche se la luce è spenta. Assicurarsi che si sia raffreddato prima di eseguire la manutenzione. •...
- Page 33 Pulizia del veicolo Per evitare l’insorgere di ossidazioni, lavare lo scooter ogni volta che viene utilizzato in particolari condizioni atmosferiche o stradali, come strade cosparse di sale o prodotti antighiaccio nel periodo invernale, condizioni di inquinamento atmosferico come città, zone industriali, zone ad alta salinità od umidità, nell’atmosfera come zone marittime.
-
Page 34: Guasti Comuni E Risoluzione Dei Problemi
6. Guasti comuni e risoluzione dei problemi Guasto Causa Risoluzione Dopo aver attivato 1. Scoppio del fusibile 1. Controllare se il fusibile l’interruttore generale, non c’è 2. Batteria scarica deve essere sostituito attività nel veicolo 3. Spegnimento 2. Caricare la batteria dell’interruttore generale 3. - Page 35 Guasto Causa Risoluzione Chilometraggio di viaggio 1. Pressione degli pneumatici 1. Gonfiarli completamente insufficiente insufficiente 2. Caricare completamente 2. Carica insufficiente o o verificare se la spina del guasto del caricabatterie caricabatterie è collegata 3. Invecchiamento o male e se si è verificato un danneggiamento della batteria guasto nel caricabatterie 4.
-
Page 36: Dati Tecnici
7. Dati tecnici 1220 1610... - Page 37 Dati motore Modello In-wheel Tensione di esercizio 60 V Potenza massima 1,5 KW Batteria Modello 60V24AH Carica Li-Ion Peso 9 Kg Autonomia 70 Km Temperatura operativa -10 °C a 45 °C Dati veicolo Lunghezza 1610 mm Larghezza 680 mm Interasse 1220 mm Altezza attacchi specchietti 1080 mm...
-
Page 38: Informazioni Sul Servizio Assistenza
8. Informazione sul servizio assistenza Gli utenti devono operare secondo questo manuale del prodotto, in caso motivo di difetti di produzione, secondo le disposizioni della legge, l’azienda soddisfa i suoi obblighi di garanzia. Scaduto il periodo di garanzia sulle componenti principali, tutti gli interventi saranno a pagamento. In caso di sostituzione della batteria oltre il periodo di garanzia, essa sarà... -
Page 39: Certificato Della E-Scooter Icone
Leva del freno attribuzione freno ruota anteriore freno ruota anteriore delle leve freno ruota posteriore freno ruota posteriore Timbro e firma del rivenditore specializzato ICONE ______________________________________________ 10. Scheda di garanzia Cliente Cognome, Nome________________________________________________________________________ Indirizzo________________________________________________________________________________ CAP / Località___________________________________________________________________________ Tel / Fax________________________________________________________________________________... -
Page 40: Verbale Di Consegna
11. Verbale di consegna La consegna al cliente dell’e-Scooter ICONE di cui sopra effettuata dopo il montaggio finale in condizione di marcia e la verifica o il controllo del regolare funzionamento dei punti indicati di seguito (le ulteriori operazioni necessarie sono riportate tra parentesi). - Page 41 NOTE...
- Page 45 3.5 Bag hanger 3.6 Parking 3.7 USB port Battery and charger 4.1 Battery 4.2 Charger 4.3 Battery recharge Adjustment and maintenance 5.1 Adjustment 5.2 Ordinary maintenance procedures Common faults and troubleshooting Technical data Service information E-Scooter ICONE certificate Warranty card Delivery report...
-
Page 46: General Informations
1. General informations 1.1. Symbolism Particularly important informations are recalled within the manual on which it is necessary to dwell more carefully. Each sign consists of a different symbol to make evident the content of the text that follows it and to facilitate the placement of the topics in the different areas. -
Page 47: Identification
1.3 Identification The identification numbers are engraved on the frame and on the crankcase. They must always be indicated in requests for spare parts. It is advisable to check the correspondence of the vehicle serial numbers with those shown on the documents of the same. -
Page 48: Controls And Tools
2. Controls and tools 2.1. General view of the scooter Accelerator Rearview mirror Seat Direction indicator Charging socket Brake lever Rear shock absorber Front optical group Passenger footboard Front fender Rear disc brake Suspension fork Centre stand Front disc brake... - Page 49 Display Controls USB port Passenger handle Key switch Rear optical unit Bag hanger License plate lighting Under-seat compartment License plate holder Saddle opening lock Rear reflector Side stand Engine block...
-
Page 50: Controls And Instruments Position
2.2. Controls and instruments position Dashboard Integral brake lever Rear brake lever Accelerator High beam button Gear change button Direction indicator button Lights button Horn button Key switch Reverse button... - Page 51 Left control group Rear brake lever Pull the lever on the left side of the steering to activate the rear disc brake. High beam button Press to activate the high beam. Direction indicator button Press the left/right button to operate the left/right flashers.
- Page 52 Right control group Front brake lever Pull the lever on the right side of the steering wheel to operate the front disc brake. Accelerator Turn the knob to adjust the speed of the scooter. Lights button Press the button on the left to activate the led lights. Gear change button Use the button to select the three different driving modes, depending on your driving style, road conditions...
- Page 53 Key switch The key switch enables or disables the system and the steering lock. The scooter is supplied with a main key and a duplicate which can be used both to operate the key switch and to open the seat. We recommend that you keep the duplicate key separately from the main one.
-
Page 54: Dashboard
2.3. Dashboard Battery charge status Indicators Speedometer Gear selector Odometer Indicator lights Battery failure indicator Accelerator failure indicator Engine failure indicator Reverse indicator Open side stand indicator High beam indicator Braking indicator Direction indicator Control unit fault indicator Charging indicator... - Page 55 Battery failure indicator The battery failure indicator light is red. If it lights up, it is advisable to go to an authorized dealer to check and solve the problem. Engine failure indicator The engine failure indicator light is orange. If it lights up, it is advisable to go to an authorized dealer to check and solve the problem.
- Page 56 Speedometer The speedometer indicates the current speed. The value appears in kilometers per hour (km/h) Odometer The odometer indicates the total distance traveled by your vehicle. Battery charge status The battery charge status indicates the vehicle’s charge level. Ready Light up after the vehicle is turned on following a check.
-
Page 57: Use
3. Use 3.1. Check before start Before using the scooter, it is always good practice to carry out some checks: • check the state of charge of the batteries; • check the operation of the front light, the rear light, the indicators direction and license plate light;... - Page 58 Avoid starting with the center stand down: when the rear wheel makes contact with the ground, it must not turn to avoid an abrupt start. On rough roads, in case of rain, snow or on a slippery road it is necessary to reduce the speed and increase the safety distance from other vehicles, riding carefully.
-
Page 59: Starting Operation
3.3. Starting operation Engaging and disengaging the steering lock To engage the steering lock, turn the handlebar to the left as far as it will go. Press the key inwards and turn anticlockwise; at the same time turn the handlebar slightly clockwise until the key clicks on the padlock symbol;... - Page 60 Gear selector Using the Shift button, three different riding modes can be selected: • 1 Maximum speed: 30 Km/h. The icon appears on the display. • 2 Maximum speed: 38 Km/h. The icon appears on the display. •...
-
Page 61: Seat
3.4. Seat Insert the key in the lock located on the left rear. Turn clockwise. Fold the saddle forward. Upon closing, the seat lock will lock automatically. 3.5. Bag hanger The bag hanger is positioned between the steering and the footrest, on the inside of the shield. By exerting pressure on the lower part of the hook, the upper part comes out and it is possible to hang an object on it. -
Page 62: Parking
3.6. Parking For parking use the center stand. Lower the stand with your foot until it is completely open and at the same time help yourself by manually lifting the scooter, grasping it with the right hand on the luggage rack and accompanying it until the scooter is fully supported. -
Page 63: Battery And Charger
4. Battery and charger 4.1. Battery The vehicle is equipped with a lithium-ion battery with large capacity, small self-discharge, high energy, long life, safety and reliability as an ideal power battery. Battery capacity decreases with increasing time and mileage and correct use and maintenance can effectively extend battery life. - Page 64 Do not use this battery for purposes other than those indicated. Use for purposes other than the intended one can give rise to short circuits inside the battery which could catch fire. Fire hazard • Do not disassemble or break the battery. •...
- Page 65 Battery maintenance • Frequent charging shortens the battery life. It is recommended to charge the battery when the battery charge is less than 70%, i.e. charge it as soon as possible in the event of yellow or red lights on and charge it immediately if only the red light is on. Do not frequently discharge the battery to a minimum, otherwise it will affect battery life.
-
Page 66: Charger
4.2. Charger The red charging light is on during charging. Stop charging after the green light turns on in summer; continue to charge it for 3 - 4 hours after the green light turns on in winter. Bad charging habits lead to battery damage, such as extended charging, charging immediately after driving and charging in high temperature environments. - Page 67 When charging, use the original charger and stable 220V AC power supply. The polarity of the charger output connector must be consistent with that of the battery, otherwise it would damage the charger and the battery. Battery charger maintenance • Do not keep the charger on board. Vibration while driving on a bumpy road will cause the welding joints of the electronic components of the charger to lose or fall, resulting in abnormal or completely damaged charging characteristics, which will lead to insufficient charges or overloads.
-
Page 68: Battery Recharge
4.3. Battery recharge The battery charge level is visible on the left on the vehicle’s digital display. The warning light, when it has all the bars, indicates that charging is complete and satisfies the normal operation of the vehicle. When it has only the last red bar, it indicates a lack of electricity and should be charged as soon as possible. - Page 69 Charging with battery off board To recharge with an overboard battery, proceed as follows: • Disable the system. • Lift the saddle. • Lift the battery slightly to allow the connector to be removed. • Disconnect the connector from the battery by turning the tab and pulling.
-
Page 70: Adjustment And Maintenance
5. Adjustment and maintenance 5.1. Adjustment Rearview mirrors The two rear-view mirrors are mounted on the left and right sides of the handlebar and can be adjusted by manually rotating the stem until the mirror is brought to the desired position. Front and rear disc brake The wear of the disc and pads is automatically compensated, therefore it has no effect on the operation... -
Page 71: Ordinary Maintenance Procedures
5.2. Ordinary maintenance procedures Tires The right tire pressure will offer you maximum stability. We recommend checking the condition of the tires and taking the pressure with the pressure gauge at least once a month, or at any time when the tire pressure is insufficient. Front tire pressure: 2,2 ±... - Page 72 Replacing the bulbs In case of bulb replacement: • Make sure that the power switch is OFF. • When the light is on, the bulb will generate heat and will continue to do so even if the light is turned off. Make sure it has cooled down before performing maintenance. •...
- Page 73 Vehicle cleaning To avoid the onset of oxidation, wash the scooter every time it is used in particular weather or road conditions, such as roads sprinkled with salt or anti-ice products in winter, atmospheric pollution conditions such as cities, industrial areas, areas with high salinity or humidity, in the atmosphere as maritime areas.
-
Page 74: Common Faults And Troubleshooting
6. Common faults and troubleshooting Fault Cause Troubleshooting After opening the main switch, 1. Blown fuse 1. Check if the fuse needs to there is no activity in the 2. Low battery be replaced vehicle 3. Switching off the main 2. - Page 75 Fault Cause Troubleshooting The alarm cannot be 1. Anti-theft error 1. Press the shift button for detached and the vehicle a long time and the vehicle cannot operate will run at low speed. Drive the vehicle to the designated point of sale for maintenance Other faults 1.
-
Page 76: Technical Data
7. Technical data 1220 1610... - Page 77 Engine data Model In-wheel Operating voltage 60 V Maximum power 1,5 KW Battery Model 60V24AH Charge Li-Ion Weight 9 Kg Range 70 Km Operating temperature -10 °C a 45 °C Vehicle data Length 1610 mm Width 680 mm Wheelbase 1220 mm Height of mirror attachments 1080 mm Front tire pressure...
-
Page 78: Service Information
8. Service information Users must operate according to this product manual, in case of production defects, according to the provisions of the law, the company meets its warranty obligations. Once the guarantee period for the main components has expired, all interventions will be subject to payment. -
Page 79: E-Scooter Icone Certificate
Brake lever attribution front wheel brake front wheel brake of levers rear wheel brake rear wheel brake Stamp and signature of the ICONE specialist dealer ______________________________________________ 10. Warranty card Customer Surname, First Name____________________________________________________________________ Address________________________________________________________________________________ Postcode / Location______________________________________________________________________ Tel / Fax________________________________________________________________________________... -
Page 80: Delivery Report
11. Delivery report The delivery to the customer of the ICONE e-Bike mentioned above carried out after the final assembly in running condition and the verification or control of the regular operation of the points indicated below (further necessary operations are shown in parentheses). - Page 81 NOTES...
- Page 83 Fotografa il codice QR con uno smartphone o un tablet e scopri il mondo ICONE. Costi di connessione in base al contratto di telefonia mobile.
- Page 84 #iconeway www.iconeway.com © 2020 ICONE è un marchio registrato. Tutti i diritti sono riservati.
Need help?
Do you have a question about the SMART.E and is the answer not in the manual?
Questions and answers