
Subscribe to Our Youtube Channel
Related Manuals for Blumfeldt Turion


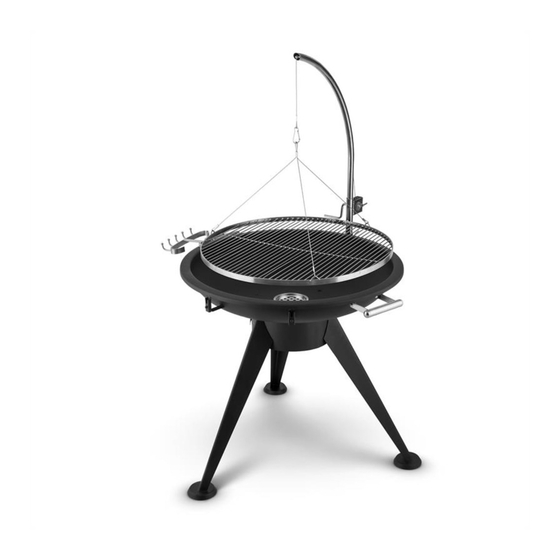
Summary of Contents for Blumfeldt Turion
- Page 1 Turion Feuerschale mit Grill Fire Bowl with Grill Braséro con parrilla Braciere avec gril Brasero con griglia 10028486...
-
Page 3: Table Of Contents
Sehr geehrter Kunde, wir gratulieren Ihnen zum Erwerb Ihres Gerätes. Lesen Sie die folgenden Hinweise sorgfältig durch und befolgen Sie diese, um möglichen Schäden vorzubeugen. Für Schäden, die durch Missachtung der Hinweise und unsachgemäßen Gebrauch entstehen, übernehmen wir keine Haftung. Scannen Sie den folgenden QR-Code, um Zugriff auf die aktuellste Bedienungsanleitung und weitere Informationen rund um das Produkt zu erhalten: INHALTSVERZEICHNIS... -
Page 4: Sicherheitshinweise
SICHERHEITSHINWEISE WARNUNG Erstickungsgefahr! Die Feuerschale ist nur zur Nutzung im Freien bestimmt. Sie darf nicht in Gebäuden, Garagen oder anderen geschlossenen Bereichen verwendet werden. Es können sich giftige Dämpfe bilden, die zum Ersticken führen. • Die Feuerschale ist nicht für gewerbliche Zwecke geeignet. •... - Page 5 VORSICHT! VERWENDEN SIE KEINEN ALKOHOL ODER BENZIN ZUM ANZÜNDEN ODER WIEDERANZÜNDEN! Besondere Hinweise zu Grillgeräten • Legen Sie das Grillgut erst auf, wenn der Brennstoff mit einer Ascheschicht bedeckt ist! • Das Gerät wird sehr heiß und darf während des Betriebes nicht bewegt werden.
-
Page 6: Einzelteile
EINZELTEILE... -
Page 7: Zusammenbau
ZUSAMMENBAU Aufbau der Feuerschale 1. Legen Sie die Federn (S6) über die Kopfschrauben mit Innengewinde (S2). 2. Stülpen Sie die Füße (J) darüber und schrauben Sie sie an den Gewinden der Standbeine (D) fest. 3. Befestigen Sie die Standbeine (D) mit Hilfe der Kreuzschlitzschrauben (S3) an der Feuerschale. - Page 8 Befestigung der Griffe und Halterungen 1. Schrauben Sie die Griffe an den Laschen der Feuerschale fest. Verwenden Sie dazu die Schrauben (S1) und Gegenmuttern (S4). 2. Hängen Sie die Hakenleiste für das Grillwerkzeug (H) einfach ein. Befestigung des Grillros 1. Haken Sie das Seil des Grillrosts (C)am Seil des Grillarms ein.
-
Page 9: Benutzung
BENUTZUNG Feuer entzünden 1. Stellen Sie sicher, dass die Feuerschale auf einem festen, flachen, ebenen und hitzebeständigen Untergrund, entfernt von brennbaren Gegenständen, aufgestellt ist. 2. Legen Sie Papier oder trockenes Brennholz in die Mitte des Feuerschalenbodens. Hinweis: Legen Sie Brennmaterial nicht direkt in die Feuerschale, sondern immer auf das Papier bzw. -
Page 10: Reinigung Und Pflege
REINIGUNG UND PFLEGE VORSICHT Verbrennungsgefahr! Lassen Sie die Feuerschale vollständig abkühlen, bevor Sie sie auf Schäden untersuchen oder reinigen. Die Feuerschale auf Schäden untersuchen Überprüfen Sie die Feuerschale regelmäßig auf Schäden, um die Produktsicherheit und eine längere Lebensdauer zu gewährleisten. Überprüfen Sie alle Teile, um sicherzustellen, dass sie fest sitzen. - Page 11 Dear customer, Congratulations on the purchase of your device. Please read the following instructions carefully and follow them to prevent potential damage. We accept no liability for damage caused by disregarding the instructions or improper use. Please scan the QR code to access the latest operating instructions and for further information about the product.
-
Page 12: Safety Instructions
SAFETY INSTRUCTIONS WARNING Risk of suffocation! The fi re bowl is intended for outdoor use only. It must not be used in buildings, garages or other enclosed areas. Toxic fumes can form, which lead to suffocation. • The fi re bowl is not suitable for commercial purposes. •... - Page 13 CAUTION! DO NOT USE ALCOHOL OR GASOLINE TO LIGHT OR RE-LIGHT! Special notes on barbecues • Do not place the food on the grill until the fuel is covered with a layer of ash! • The device gets very hot and must not be moved during operation. •...
-
Page 14: Individual Parts
INDIVIDUAL PARTS... -
Page 15: Assembly
ASSEMBLY Assembling the fire bowl 1. Place the springs (S6) over the cap screws with internal thread (S2). 2. Put the feet (J) on top and screw them to the threads of the legs (D). 3. Attach the stand legs (D) to the fire bowl using the Phillips screws (S3). - Page 16 Attaching the handles and brackets 1. Screw the handles onto the tabs of the fire bowl. Use the screws (S1) and locknuts (S4) for this purpose. 2. Attach the hook bar for the barbecue tools (H). Attaching the grill grate 1.
-
Page 17: Use
Light a fire 1. Make sure that the fire bowl is placed on a firm, flat, level and heat- resistant surface, away from flammable objects. 2. Place paper or dry firewood in the centre of the fire bowl base. Note: Do not place fuel directly in the fire bowl, but always on the paper or firewood. -
Page 18: Cleaning And Care
CLEANING AND CARE CAUTION Risk of burns! Allow the fi re bowl to cool down completely before inspecting it for damage or cleaning it. Inspecting the fi re bowl for damage Check the fi re bowl regularly for damage to ensure product safety and a longer service life. - Page 19 Cher client, chère cliente, Toutes nos félicitations pour l’acquisition de ce nouvel appareil. Lisez attentivement les indications suivantes et suivez-les pour éviter d'éventuels dommages. Nous ne saurions être tenus pour responsables des dommages dus au non-respect des consignes et à la mauvaise utilisation de l’appareil.
-
Page 20: Consignes De Sécurité
CONSIGNES DE SÉCURITÉ MISE EN GARDE Risque d'étouffement ! Le braséro est uniquement destiné à une utilisation en extérieur. Il ne doit pas être utilisé dans un bâtiment, un garage ou d'autres espaces clos. Des fumées toxiques peuvent se former et provoquer un étouffement. - Page 21 ATTENTION ! N'UTILISEZ PAS D'ALCOOL OU D'ESSENCE POUR ALLUMER OU RALLUMER LE FEU ! Consignes particulières concernant les barbecues • Ne placez pas les grillades tant que le combustible n'est pas recouvert d'une couche de cendres ! • L'appareil devient très chaud et ne doit pas être déplacé pendant le fonctionnement.
-
Page 22: Pièces Détachées
PIÈCES DÉTACHÉES... -
Page 23: Montage
MONTAGE Assemblage du braséro 1. Placez les ressorts (S6) sur les vis à tête avec filetage interne (S2). 2. Placez les pieds (J) au-dessus et vissez-les aux filetages des pieds (D). 3. Fixez les pieds du support (D) au braséro à l'aide des vis Phillips (S3). - Page 24 Fixation des poignées et des supports 1. Vissez les poignées aux languettes du braséro. Utilisez pour cela les vis (S1) et les contre-écrous (S4). 2. Accrochez simplement le rail à crochets pour l'outil de gril (H). Fixation de la grille de cuisson 1.
-
Page 25: Utilisation
UTILISATION Pour allumer le feu 1. Vérifiez que le braséro est sur une surface ferme, plane, de niveau et résistante à la chaleur, loin des objets inflammables. 2. Placez du papier ou du bois de chauffage sec au centre du fond du brasier. Remarque : ne mettez pas de combustible directement dans le braséro, mais toujours sur le papier ou le bois de chauffage. -
Page 26: Nettoyage Et Entretien
NETTOYAGE ET ENTRETIEN ATTENTION Risque de brûlure ! Laissez le braséro refroidir complètement avant de l'examiner pour déceler tout dommage, ou de le nettoyer. Contrôle de l'état du braséro Vérifi ez régulièrement que le braséro n'est pas endommagé pour garantir la sécurité... - Page 27 Gentile cliente, la ringraziamo per l'acquisto del dispositivo. La preghiamo di leggere attentamente le seguenti istruzioni per l’uso e di seguirle per evitare possibili danni. Non ci assumiamo alcuna responsabilità per danni scaturiti da una mancata osservanza delle avvertenze di sicurezza e da un uso improprio del dispositivo.
- Page 28 AVVERTENZE DI SICUREZZA AVVERTIMENTO Pericolo di soffocamento! Il braciere è adatto solo all'uso all'aperto. Non può essere utilizzato in edifi ci, garage o altri ambienti al chiuso. Possono formarsi vapori tossici, che provocano il soffocamento. • Il braciere non è adatto a utilizzi commerciali. •...
- Page 29 ATTENZIONE! NON UTILIZZARE ALCOOL O BENZINA PER ACCENDERE O RIATTIVARE IL FUOCO! Note particolari sui dispositivi per grigliare • Posizionare gli alimenti da grigliare solo quando il combustibile è coperto da uno strato di cenere! • Il dispositivo diventa bollente e non può essere spostato durante l'uso. •...
- Page 30 SINGOLI COMPONENTI...
- Page 31 ASSEMBLAGGIO Montaggio del braciere 1. Posizionare le molle (S6) sulle viti con filettatura interna (S2). 2. Mettervi sopra i piedini (J) e avvitarli alla filettatura delle gambe d'appoggio (D). 3. Fissare le gambe d'appoggio (D) al braciere con le viti con testa a croce (S3).
- Page 32 Fissare le maniglie e le staffe 1. Avvitare le maniglie alle linguette del braciere. Per fare ciò utilizzare le viti (S1) e i controdadi (S4). 2. Basta appendere la barra del gancio per l'attrezzo da barbecue (H). Fissaggio della griglia 1.
- Page 33 UTILIZZO Accendere il fuoco 1. Assicurarsi che il braciere sia posizionato su una superficie stabile, liscia, resistente al calore e in piano e lontano da oggetti infiammabili. 2. Collocare carta o legna da ardere al centro del fondo del braciere. Nota: non inserire il combustibile direttamente nel braciere, ma sulla carta o sulla legna da ardere.
- Page 34 PULIZIA E MANUTENZIONE ATTENZIONE Pericolo di ustioni! Lasciare che il braciere si raffreddi completamente prima di verifi care che sia integro o di pulirlo. Controllare che il braciere non sia danneggiato Controllare regolarmente se il braciere è danneggiato, in modo da garantire sicurezza e una lunga vita utile.
Need help?
Do you have a question about the Turion and is the answer not in the manual?
Questions and answers