Table of Contents
Advertisement
Quick Links
Advertisement
Table of Contents

Related Manuals for MonsterShop 23494


Summary of Contents for MonsterShop 23494
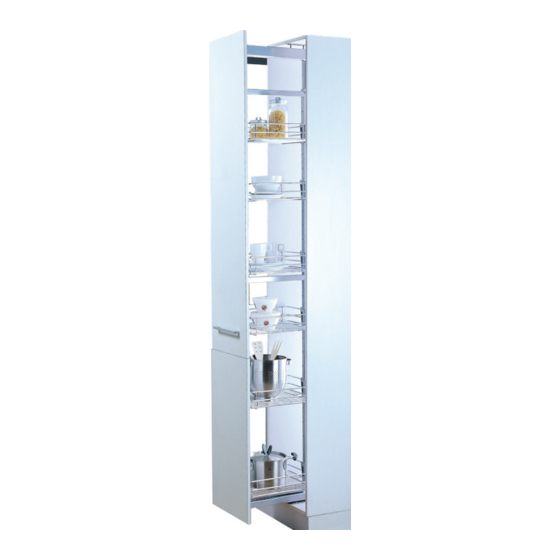
- Page 1 23494/23495 Kitchen Larder Unit Monster - Buy Monster - Be Monster...
-
Page 2: Specification
Specification Product Description Struggling to get to those items at the back of your cupboard? Well we’ve got a solution. Our pull-out kitchen larder will help you to reach everything with ease. The centre mounted larder units allow full access to either side of the baskets, so you can store a range of items. - Page 3 Specification Item Contents Screw Package: Runners- 11 x Round head screw (ST4 x 16) Product Specifics 300mm Cabinet and 1700 - 1950mm height: Frame: 450mm D x 240mm W x 1700 - 1950mm H Baskets: 415mm D x 240mm W x 75mm H 300mm Cabinet and 1900 - 2200mm height: Frame: 500mm D x 350mm W x 1900 - 2200mm H Baskets: 415mm D x 240mm W x 75mm H...
-
Page 4: Product Features
Specification Product Features 1) Frame 2) Top runner 3) Bottom runner 4) Door plate 5) Door connector 6) Wire basket 7) Round head screw (ST4 x 16) 8) Allen head bolt (M6 x 20) 9) Pan head bolt (M6 x 12) 10) Flat hex screw (M6 x 15) 11) Basket clip 12) Allen key... - Page 5 User Guide Assembly Instructions Make sure you have all the components before starting your project. Step 1 - Installing the bottom runner 1) Draw a centre line on the bottom panel of the cabinet you are installing the pull-out larder in. 2) Align the bottom runner with the centre line on the bottom panel.
- Page 6 User Guide Assembly Instructions Step 2 - Installing the top runner 1) Repeat the same procedure on the top of the cabinet by finding and drawing the centre line. 2) Align the top runner with the center line on the top panel. 3) Mark the positions of the pilot holes required for the top runner.
- Page 7 User Guide Assembly Instructions Step 3 - The frame 1) Extend the top and bottom runners. 2) Attach the frame to the top and bottom runners. Use the image below to help. (2 x pan head bolt, 1 x flat hex screw and 1 x rubber ring)
- Page 8 User Guide Assembly Instructions Step 4 - Fixing the door plates 1) Mark the location of the door plates on the cabinet door. Use the image below to help. 2) Mark the 8 pilot holes for the 8 round head screws. 3) Drill the 8 fixing holes.
- Page 9 User Guide Assembly Instructions 6) Attach the door plates to the frame using the allen head bolts. You can see an image of the bolt in the picture above. 7) Attach the 2 other door plates using 4 round head screws. Remember to mark pilot holes before drilling!
- Page 10 User Guide Operation Instructions 8) You can adjust the cabinet door by adjusting the bolts. Use the provided allen key to do so. Allen Keys Step 5 - Attaching the Baskets 1) Fit the wire baskets to the frame and place the plastic clips over the wires to securely fsaten it to the frame.
-
Page 11: Troubleshooting
Troubleshooting Resolution Guide Please read through the guide below if you have any issues or faults with your device. The information covers and resolves the majority of frequently asked questions. Q: There are parts missing from my order. A: If a part is missing please get in touch with us within 7 days on receipt of your order. -
Page 12: Safety Advice
Safety Advice Safe Working Practice Please read through the safe working practice to ensure prevention of injury or damage to the device. Please do not assemble if any of the pull-out larder system is broken and/or damaged. Take care when using tools such as a drill. Wear eye protection when working the drill. -
Page 13: Sales Department
For information regarding this device or other products from our Monster divisions please use the following details below. Tel: 01347 878888 Email: hello@monstershop.co.uk Support Department For queries about this device, warranty, returns or reporting faults please use the following details below. - Page 14 Our dedicated customer service team will be more than happy to help with any questions you may have. Home & Garden Storage Shelving Sign & Digital Retail & Hospitality Commercial Equipment Check out all our Monster brands at www.monstershop.co.uk...
Need help?
Do you have a question about the 23494 and is the answer not in the manual?
Questions and answers