Table of Contents
Advertisement
Quick Links
Advertisement
Table of Contents

Related Manuals for BTEK DD 700


Summary of Contents for BTEK DD 700
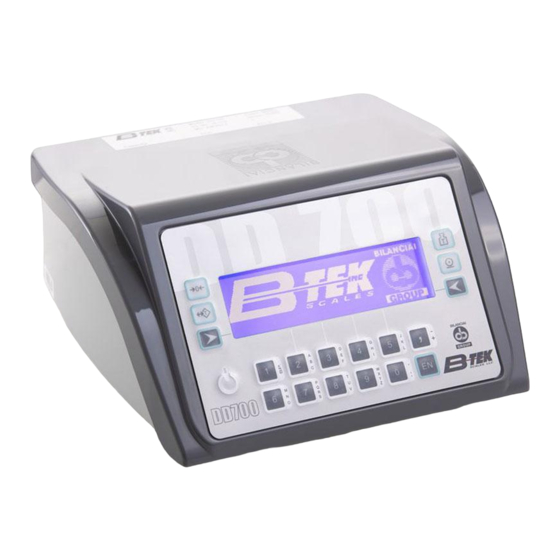
- Page 1 • DD 700 • DD 700ic • DD 700i Models Include:...
-
Page 3: Table Of Contents
INSTALLATION MANUAL DD700 CONTENTS 1 ACCESS TO METROLOGICAL PARAMETERS ................3 1.1 Version with connectors ......................... 3 1.2 Version with cable glands ........................4 1.3 Analogue scale sampling ........................5 1.3.1 Setup Menu/Scale/Sampling/Run ..................5 1.3.2 Setup Menu/Scale/Sampling/View data ................6 1.3.3 Setup Menu/Scale/Sampling/Correction ................ - Page 4 INSTALLATION MANUAL DD700...
-
Page 5: Access To Metrological Parameters
INSTALLATION MANUAL DD700 1 ACCESS TO METROLOGICAL PARAMETERS To access customisation of the metrological parameters (parameters more significantly linked to legal operation of the scale) you must press the calibration button 1.1 Version with connectors Figure 1.1-1 - Calibration button - Plastic terminal version Figure 1.1-2 - Calibration button - Stainless steel terminal version Key: 1. -
Page 6: Version With Cable Glands
INSTALLATION MANUAL DD700 1.2 Version with cable glands Figure 1.2-1 - Calibration button - Stainless steel terminal version Key: 1. Terminal opening protection seal 2. Stamped self-adhesive label sealing the protective screw of the calibration switch 3. Calibration switch Referring to the previous figure, proceed as follows: ... -
Page 7: Analogue Scale Sampling
INSTALLATION MANUAL DD700 1.3 Analogue scale sampling 1.3.1 Setup Menu/Scale/Sampling/Run Scale sampling consists in calibrating the instrument. This is required whenever it was not possible to be done when the scale was built or when mechanical or electronic pieces are replaced. The sampling procedures have been developed based on different requirements which can be encountered. -
Page 8: Setup Menu/Scale/Sampling/View Data
INSTALLATION MANUAL DD700 Removing the weights in inverse order samples the descent. The procedure (indicated on the display) is the same as for sampling the Full Scale Zero, with the only difference that, in this case, more than one point must be sampled. -
Page 9: Setup Menu/Digital Scale/Sampling/Angles Calibration
INSTALLATION MANUAL DD700 Setup Menu/DIGITAL Scale/Sampling/Angles calibration The angle calibration operation makes it possible to correct any assembly errors of the digital cells, construction tolerances, etc. To calibrate the angles, the sample weight (not necessarily known) must be loaded in sequence on each individual digital cell. -
Page 10: Setup Menu/Digital Scale/Test
INSTALLATION MANUAL DD700 It might be necessary to replace one cell inside the plant. In this case, the angular coefficient for the replaced cell can be calculated without calibrating all the other cells. Proceed as follows: Unload scale press READY. -
Page 11: Setup Menu/Digital Scale/Test/Saving Terminal Data
INSTALLATION MANUAL DD700 the arrow allows you to perform the inverse operation For the other parameters of this manual, see the Customisation chapter of the advanced user manual. 1.4.2 Setup Menu/DIGITAL Scale/Test/Saving terminal data Important information for operation of the terminal itself is recorded on the terminal board like, for example, sampling data, angular coefficients, serial numbers and cell addresses, etc. -
Page 12: Disassembling Components
INSTALLATION MANUAL DD700 2 DISASSEMBLING COMPONENTS 2.1 Disassembling support (only for stainless steel version) Figure 2.1-1 – Disassembling support Referring to the previous figure, proceed as follows: Unscrew the fixing knobs (ref. 1). Remove the support (ref. 2 wall-mounted version) (ref. 3 tabletop version). ... -
Page 13: Opening The Terminal
INSTALLATION MANUAL DD700 2.2 Opening the terminal 2.2.1 ABS Version Figure 2.2-1 - Opening the terminal Referring to the previous figure, proceed as follows: Remove the four screws (ref. 1) and rotate the cover forward, holding it up with one hand to avoid damaging the connections. -
Page 14: Stainless Steel Version
INSTALLATION MANUAL DD700 2.2.2 Stainless steel version Figure 2.2-2 - Opening the terminal Referring to the previous figure, proceed as follows: Remove the four screws (ref. 1) and rotate the side cover, holding it up with one hand to avoid damaging the connections. -
Page 15: Disassembling Display
INSTALLATION MANUAL DD700 Disassembling display 2.3.1 ABS Version Figure 2.3-1 – Disassembling display Referring to the previous figure, proceed as follows: Open the terminal. Disconnect the connector (ref. 1). Unscrew the four screws (ref. 2) and remove the display (ref. 3) from the cover. -
Page 16: Stainless Steel Version
INSTALLATION MANUAL DD700 2.3.2 Stainless steel version Figure 2.3-3 – Disassembling display Referring to the previous figure, proceed as follows: Open the terminal. Disconnect the connector (ref. 1) from the display. Disconnect the connector (ref. 2) from the LED bar (optional - ref. 3) ... -
Page 17: Disassembling Terminal Power Supply (Only For Stainless Steel Version With Cable Gland)
INSTALLATION MANUAL DD700 Disassembling terminal power supply (only for stainless steel version with cable gland) Figure 2.4-1 - Disassembling terminal power supply Referring to the previous figure, proceed as follows: Open the terminal. Disconnect the power wires (+ red and – black) to the CPU board and the mains power cord from the connector (ref. -
Page 18: Disassembling Lithium Battery
INSTALLATION MANUAL DD700 Disassembling lithium battery 2.5.1 ABS Version WARNING If the time and date are missing when the terminal is switched on, the lithium battery must be replaced. Figure 2.5-1 - Disassembling lithium battery Referring to the previous figure, proceed as follows: ... -
Page 19: Stainless Steel Version With Connectors
INSTALLATION MANUAL DD700 2.5.2 Stainless steel version with connectors WARNING If the time and date are missing when the terminal is switched on, the lithium battery must be replaced. Figure 2.5-2 - Disassembling lithium battery Referring to the previous figure, proceed as follows: ... -
Page 20: Stainless Steel Version With Cable Glands
INSTALLATION MANUAL DD700 2.5.3 Stainless steel version with cable glands WARNING If the time and date are missing when the terminal is switched on, the lithium battery must be replaced. Figure 2.5-3 - Disassembling lithium battery Referring to the previous figure, proceed as follows: ... -
Page 21: Disassembling First Analogue Scale
INSTALLATION MANUAL DD700 Disassembling first analogue scale ATTENTION The first analogue scale is welded onto the motherboard. If it needs to be replaced, the motherboard must be replaced as well. Disassembling second analogue scale 2.7.1 ABS Version Figure 2.6-1 - Disassembling second analogue scale input Referring to the previous figure, proceed as follows: ... -
Page 22: Steel Version With Connectors
INSTALLATION MANUAL DD700 2.7.2 Steel version with connectors Figure 2.6-1 - Disassembling second analogue scale input Referring to the previous figure, proceed as follows: Disconnect the second analogue scale from the terminal. Open the terminal. Disconnect the connector (ref. 1) from its equivalent on the motherboard. ... -
Page 23: Stainless Steel Version With Cable Glands
INSTALLATION MANUAL DD700 2.7.3 Stainless steel version with cable glands Figure 2.7-3 - Disassembling analogue scale input Referring to the previous figure, proceed as follows: Open the terminal. Disconnect the second analogue scale from the terminal. Disconnect the connector (ref. 1) from its equivalent on the motherboard. ... -
Page 24: Disassembling Digital Scale
INSTALLATION MANUAL DD700 Disassembling digital scale 2.8.1 ABS Version Figure 2.8-1 - Disassembling digital scale Referring to the previous figure, proceed as follows: Disconnect the digital scale from the terminal. Open the terminal. Disconnect the connector (ref. 1) from the corresponding one on the digital scale board (ref. 2). ... -
Page 25: Stainless Steel Version With Connectors
INSTALLATION MANUAL DD700 2.8.2 Stainless steel version with connectors Figure 2.8-2 -Disassembling power supply for digital scale Referring to the previous figure, proceed as follows: Disconnect the digital scale from the terminal. Open the terminal. Disconnect the connector (ref. 1) from the corresponding one on the digital scale board (ref. 2). ... -
Page 26: Stainless Steel Version With Cable Glands
INSTALLATION MANUAL DD700 2.8.3 Stainless steel version with cable glands Figure 2.8-3 -Disassembling power supply for digital scale Referring to the previous figure, proceed as follows: Open the terminal. Disconnect the digital scale from the terminal. Disconnect the connector (ref. 1) from the corresponding one on the digital scale board (ref. 2). ... -
Page 27: Disassembling I/O Board
INSTALLATION MANUAL DD700 Disassembling I/O board 2.9.1 ABS Version Figure 2.9-1 – Disassembling I/O board Referring to the previous figure, proceed as follows: Disconnect the I/O board from the terminal. Open the terminal. Disconnect the connector (ref. 1) from its equivalent on the motherboard. ... -
Page 28: Stainless Steel Version With Connectors
INSTALLATION MANUAL DD700 2.9.2 Stainless steel version with connectors Figure 2.9-2 – Disassembling I/O board Referring to the previous figure, proceed as follows: Disconnect the I/O board from the terminal. Open the terminal. Disconnect the connector (ref. 1) from its equivalent on the motherboard. ... -
Page 29: Stainless Steel Version With Cable Glands
INSTALLATION MANUAL DD700 2.9.3 Stainless steel version with cable glands Figure 2.9-3 – Disassembling I/O board Referring to the previous figure, proceed as follows: Open the terminal. Disconnect the digital scale from the terminal. Disconnect the connector (ref. 1) from its equivalent on the motherboard. ... -
Page 30: Disassembling Motherboard
INSTALLATION MANUAL DD700 2.10 Disassembling motherboard 2.10.1 Plastic version Figure 2.10-1 - Disassembling motherboard Referring to the previous figure, proceed as follows: Disconnect the terminal from all the utilities. Open the terminal. Remove the lithium battery If present, remove the second analogue scale input or digital scale input. ... -
Page 31: Stainless Steel Version With Connectors
INSTALLATION MANUAL DD700 2.10.2 Stainless steel version with connectors Figure 2.10-2 - Disassembling motherboard Referring to the previous figure, proceed as follows: Disconnect the terminal from all the utilities. Open the terminal. Remove the lithium battery If present, remove the second analogue scale input or digital scale input. ... -
Page 32: Stainless Steel Version With Cable Glands
INSTALLATION MANUAL DD700 2.10.3 Stainless steel version with cable glands Figure 2.10-3 - Disassembling motherboard Referring to the previous figure, proceed as follows: Disconnect the terminal from all the utilities. Open the terminal. Remove the lithium battery ... -
Page 33: Installing Optional Boards
INSTALLATION MANUAL DD700 2.12 Installing optional boards Follow the instructions supplied with the optional boards. 2.13 Connecting serial port peripheral devices and USB Follow the instructions supplied with the peripheral devices. - Page 34 Società Cooperativa Bilanciai Campogalliano - 41011 Campogalliano (MO) Italy Via S. Ferrari, 16 - Tel. +39 (0)59 893 611 - Fax +39 (0)59 527 079 Web: http://www.coopbilanciai.it - E-mail:cb@coopbilanciai.it Customer Assistance Service Tel. +39 (0)59 893 612 - Fax +39 (0)59 527 294 Servizio post vendita After sales service Service après-vente...
Need help?
Do you have a question about the DD 700 and is the answer not in the manual?
Questions and answers