Advertisement
Available languages
Available languages
Quick Links
Building Air Conditioning Control System
Signal Receiving Unit
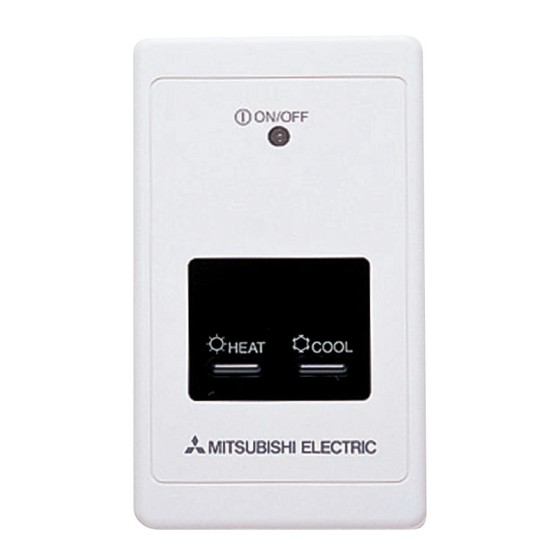
PAR-FA32MA
Installation Manual
This installation manual contains only the description of how to install the Signal Receiving Unit PAR-FA32MA. For information about
how to wire and how to install air conditioning units, see the installation manual for them.
For your safety, first be sure to read
" 1 Safety Precautions "
described below thoroughly and then install the Signal Receiving Unit PAR-
FA32MA correctly.
1
Safety Precautions
● The following two symbols are used to denote dangers that may be caused by incorrect use and their degree:
WARNING
This symbol denotes what could lead to serious injury or death if you misuse the PAR-FA32MA.
CAUTION
This symbol denotes what could lead to a personal injury or damage to your property if you misuse the PAR-FA32MA.
● After reading this installation manual, keep it in a place where the final user can see it anytime.
When someone moves, repairs or uses the PAR-FA32MA, make sure that this manual is forwarded to the final user.
WARNING
■ Ask your dealer or technical representative to install the unit.
Any deficiency caused by your own installation may result in an elec-
tric shock or fire.
■ Install in a place which is strong enough to withstand the weight
of the PAR-FA32MA.
Any lack of strength may cause the PAR-FA32MA to fall down, re-
sulting in personal injury.
■ Firmly connect the wiring using the specified cables. Carefully
check that the cables do not exert any force on the terminals.
Improper wiring connections may produce heat and possibly a fire.
■ Never modify or repair the PAR-FA32MA by yourself.
Any deficiency caused by your modification or repair may result in
an electric shock or fire.
Consult with your dealer about repairs.
■ Do not install in any place exposed to flammable gas leakage.
Flammable gases accumulated around the body of PAR-FA32MA
may cause an explosion.
■ Do not use in any special environment.
Using in any place exposed to oil (including machine oil), steam and
sulfuric gas may deteriorate the performance significantly or give
damage to the component parts.
■ Wire so that it does not receive any tension.
Tension may cause wire breakage, heating or fire.
■ Completely seal the wire lead-in port with putty etc.
Any dew, moisture, cockroaches, insects entering the unit may cause
an electric shock or a malfunction.
■ Do not wash with water.
Doing so may cause an electric shock or a malfunction.
■ Do not install in any place at a temperature of more than 40 C
(104 F) or less than 0 C (32 F) or exposed to direct sunlight.
2
Confirming the Supplied Parts
Check that the box includes the following parts in addition to this installation manual:
(1) Signal Receiving Unit ......................................................... 1
(2) Remote control cord (2 core 3 m (9 ft)) .............................. 1
NOTE: Extended remote controller cords are not supplied with this equipment and must therefore be procured locally by the customer.
Use electrical cable in accordance with the following specifications.
0.3 - 1.25 mm
2
(Stranded 22 to 16 AWG) twin-core cable (CVV, CVS, VVF)
Use a maximum of 1.25 mm
2
(16 AWG) cable for signal receiving unit wiring. 0.75 mm
See the installation manual supplied with the outdoor unit for details of maximum wiring distances.
2 Setting example
2-1 When setting in same room.
● Separate setting
Each unit can only be operated by its own wireless
remote controller.
"0"
"1"
"2"
"3"
"0"
"1"
"2"
"3"
2-2 When setting in different rooms.
Assing a different number to each wireless remote
controller and all the Signal Receiving Unit
(Leave the setting as purchase)
(2) Main/Sub switch settings (leave the initial "Main" setting when not using the MA remote controller).
Set the Main/Sub switch when using with the MA remote controller (PAR-20MAA).
Set the signal receiving unit to "Sub" and the MA remote controller (PAR-20MAA) to "Main".
5
How To Install
(1) Choose a place in which to install the Signal Receiving Unit (switch box).
Be sure to observe the following steps:
1 When installing on either the switch box or the wall,allow space around the Signal
Receiving Unit as shown in the figure on the right.
2 When installing the Signal Receiving Unit to the swich box, the Signal Receiving Unit
slipped downward for 6.5 mm (1/4 inch) as right illustrated.
3 Parts which must be supplied on site.
Switch box for one unit
Thin-copper wiring pipe
Lock nut and bushing
4 lnstall the unit on the wall or ceiling where the signal is received from the remote
controller.
(Refer to the below illustration)
90˚
Install the Signal Receiving Unit where is watched from any position.
NOTE: lf the Signal Receiving Unit is installed near a fluoresent lamp specially inverter type,signal interception may occur.
Be careful for installing the Signal Receiving Unit or replacing the lamp.
(2) Install the remote control cord to the terminal block (No polarity).
Remote control cord
Insert the minus screwdriver toward the
arrow pointed and wrench it to remove the cover.
A flat screwdriver whose width of blade is between
4 and 7 mm (5/32 - 9/32 inch) must be used.
WT04753X03
GB
■ Ensure that installation work is done correctly following this
installation manual.
Any deficiency caused by installation may result in an electric shock
or fire.
■ All electrical work must be performed by a licensed technician,
according to local regulations and the instructions given in this
manual.
Any lack of electric circuit or any deficiency caused by installation
may result in an electric shock or fire.
■ Do not move and re-install the PAR-FA32MA yourself.
Any deficiency caused by installation may result in an electric shock
or fire.
Ask your distributor or special vendor for moving and installation.
■ To dispose of this product, consult your dealer.
CAUTION
■ Do not install in any steamy place such a bathroom or kitchen.
Avoid any place where moisture is condensed into dew. Doing so
may cause an electric shock or a malfunction.
■ Do not install in any place where acidic or alkaline solution or
special spray are often used.
Doing so may cause an electric shock or malfunction.
■ Use standard wires in compliance with the current capacity.
A failure to this may result in an electric leakage, heating or fire.
■ Do not touch any PCB (Printed Circuit Board) with your hands
or with tools. Do not allow dust to collect on the PCB.
Doing so may cause fire or an electric shock.
■ Do not touch any control button with your wet hands.
Doing so may cause an electric shock or a malfunction.
■ Do not press any control button using a sharp object.
Doing so may cause an electric shock or a malfunction.
■ Never contact the power supply with the control wiring termi-
nals.
Doing so will certainly cause the controller to catch fire.
(3) Screw (M4
30) .................................................................. 2
(4) Wood screw (4.1
16) ........................................................ 2
2
(18 AWG) wiring is recommended for ease of installation.
- 1 -
● Single setting
All the units can be operated by a single wireless remote
controller.
"0"
"0"
"0"
"0"
"0"
"0"
"0"
"0"
"0"
Signal receiving
70 ( 2-3/4 )
unit external
Center of
Switch box
Switch box
Installation pitch
Unit : mm (in)
Example: Ceiling cassette type, Ceiling cosealed type
Remote controller Cord
ø10 (13/32)
Indoor unit
Signal Receiving Unit
When consealing wire, the hole ø10 (13/32) to push a remote
control cord through is nesessary on the ceiling.
Push a remote control cord
through the wires installed hole.
- 3 -
3
Example of System Configuration
The remote controller wire is connected to CITY MULTI System (C type or later).
(In case of CITY MULTI System)
Central management transmission line
(M-NET transmission line)
Indoor and outdoor transmission lines
(M-NET transmission line)
MA remote controller cable
Signal receiving unit
NOTE:
No power supply lines are shown and only the trans-
mission lines are shown in the above wiring example.
Provide shield grounding of M-NET transmission line
at one arbitrary point.
1 Wiring from signal receiving unit.
· Connected to MA remote controller wiring terminal block (TB15) on the indoor unit. (The terminal block has no polarities.)
2 With group operation (group 3 and group 4 above).
· After wiring the MA remote controller wiring terminal block (TB15) on the group operation indoor unit, connect to the indoor unit
with the lowest address within the group.
NOTE: With group operation with a different cooling system, wire only the MA remote controller wiring terminal block (TB15).
Do not wire the indoor/outdoor transmission terminal block (TB5).
3 The signal receiving unit and the MA remote controller may be used together (group 4 above).
· Set the MA remote controller as "Main", and the signal receiving unit as "Sub".
· When other types of remote controllers are used, refer to section " 7 Possible Combinations of Signal Receiving Units and
Remote Controllers ".
See the installation manual supplied with the outdoor unit for details of setting up indoor (IC) and outdoor (OC) units.
See the relevant equipment manual for details of setting up the central controller and transmission line power supply unit.
4
Setting the Pair Number & Main/Sub Switch
Setting pair number of the wireless remote controller and the Signal Receiving Unit.
Set switch position of the Signal Receiving Unit as follows.
Refer to the installation manual that came with the wireless remote controller for how to set pair numbers of wireless remote controllers.
(1) Change the pair number switch to set the pair number.
1 Pair number
To fix the Signal Receiving Unit which operates from the wireless remote controller.
10 kinds of setting (0 - 9) are available for the wireless remote controller and Signal Receiving Unit.
Adapt a pair number to the using wireless remote controller.
(3) Installing hole when the Signal Receiving Unit is installed on the wall direct.
Cut the thin-wall portion inside the bottom case (oblique section) by a knife or a nipper.
Take out the connected remote control cord to the terminal brock through this space.
(4) Seal the Signal Receiving Unit cord lead-in hole with putty in order to prevent the possible entry of dew, water
droplets, cockroaches, other insects, etc.
When installing on the switch box, seal the con-
nections between the switch box and wiring
pipe with putty.
When using the switch box
Wall
200 (7-7/8)
Seal around here
with putty
(5) Install the lower case on the switch box or directly on the wall.
(6) Install the cover
Protrusion
6
Test Run
(pillar, etc)
Refer to the installation manual for wireless remote controller for how to perform the test run.
7
Possible Combinations of Signal Receiving Units and Remote Controllers
When the Signal Receiving Unit and other types of remote controller are used together, the following combinations must be used.
ossible combinations of remote controllers
Indoor unit function
Main remote controller
Models with 1 F tempera-
ture setting
Models with maintenance
function
Models without 1 F tem-
perature setting
Models without mainte-
nance function
RX:
Signal Receiving Unit (PAR-FA32MA)
MA(20): MA remote controller (PAR-20MAA)
This product is designed and intended for use in a residential, commercial or light-industrial environment.
The product at hand is based on the following EU regulations:
Electromagnetic Compatibility Directive 89/336/EEC
HEAD OFFICE: TOKYO BLDG., 2-7-3, MARUNOUCHI, CHIYODA-KU, TOKYO 100-8310, JAPAN
Authorized representative in EU: MITSUBISHI ELECTRIC EUROPE B.V.
Group 1
Group 2
OC
IC
IC
51
01
02
TB7
TB3
TB5
TB15
TB5
TB15
Replace CN41
with CN40.
CN40
(Main)
(Main)
Leave CN41 as it is.
CN41
OC
IC
IC
54
06
05
TB7
TB3
TB5
TB15
TB5
TB15
MA
(Main)
Group 4
A main remote controller and a sub remote con-
troller can be connected to each group.
1 2
3
PAR-FA32MA
Pair No. of receiver
Seal
matches that of re-
mote controller.
0
Main/Sub switch
(Factory setting
"main")
0
Pair number switch
(Factory setting "0")
Signal Receiving Unit
(Externals removing the cover)
- 2 -
When opening a hole using a drill for Signal Receiving Unit cord (or tak-
ing the cord out of the back of the Signal Receiving Unit), seal that hole
with putty.
When routing the cord via the portion cut off from the upper case, equally
seal that portion with putty.
Remote control
cord (Accessory)
When installing directly on the wall
Wiring pipe
Seal around here
Locknut
with putty
Bushing
Switch box
Screw (M4
When installing the lower case directly on
the wall or the ceiling, use wood screws.
Sub remote controller
MA(20)/RX(31)
RX
The temperature cannot be set in increments
of 1 F using wireless remote controller.
RX
MA(20)/RX(31)
RX
RX
MA(21)
RX
RX
MA(21)
All combinations shown above
RX(31): PAR-FA31MA (Old model)
MA(21): MA remote controller (PAR-21MAA)
HARMAN HOUSE, 1 GEORGE STREET, UXBRIDGE, MIDDLESEX UB8 1QQ, U.K.
- 4 -
Group 3
IC
03
TB5
TB15
(Main)
IC
04
TB5
TB15
(Sub)
Bottom case
Thin-wall protion
Remote control cord
Seal around here
with putty
30)
Availability
Available
Not available
Available
Available
Not available
Available
Advertisement

Related Manuals for Mitsubishi Electric PAR-FA32MA


Summary of Contents for Mitsubishi Electric PAR-FA32MA
- Page 1 This symbol denotes what could lead to serious injury or death if you misuse the PAR-FA32MA. CAUTION This symbol denotes what could lead to a personal injury or damage to your property if you misuse the PAR-FA32MA. NOTE: No power supply lines are shown and only the trans- ●...
- Page 2 Câble de télécommande MA CN40 Ce manuel d’installation contient uniquement les instructions relatives à l’installation de l’unité de réception des signaux PAR-FA32MA. Pour de plus amples informations concernant l’installation des climatiseurs ainsi que leur raccordement au secteur, reportez-vous à leur manuel d’installation.