Advertisement
Quick Links
PLEASE READ THESE INSTRUCTIONS FIRST BEFORE INSTALLATION
PLEASE READ THESE INSTRUCTIONS FIRST BEFORE INSTALLATION
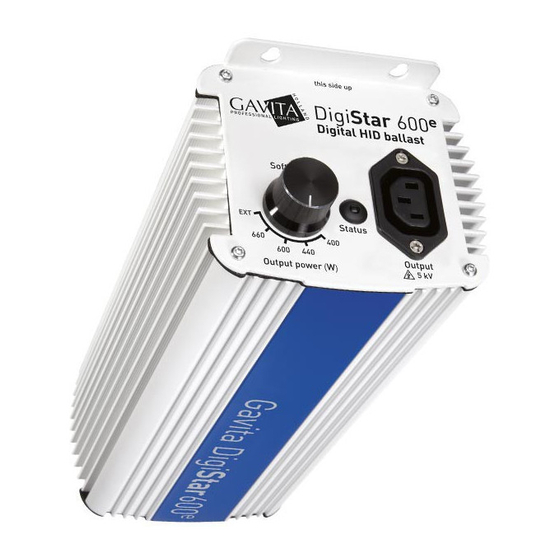
Congratulations on your purchase of the
Congratulations on your purchase of the DigiStar Electronic ballast. We have done every
and safe operation, but the installation and use of the ballast is the responsibility of the user. Incorrect use or
and safe operation, but the installation and use of the ballast is the responsibility of the user. Incorrect use or
and safe operation, but the installation and use of the ballast is the responsibility of the user. Incorrect use or
installation can lead to failure and damage to the ballast. Damage to the ballast and electronic circuitry as a
installation can lead to failure and damage to the ballast. Damage to the ballast and electronic circuitry as a
installation can lead to failure and damage to the ballast. Damage to the ballast and electronic circuitry as a
result of incorrect installation and use revokes your warrant
t of incorrect installation and use revokes your warranty, so we recommend you read this manual carefully
before installing your electronic ballast.
before installing your electronic ballast.
Installation
Be sure to comply to local installation regulations.
Be sure to comply to local installation regulations.
Always install your electronic ballast vertical
Our ballasts do not get very hot at all but a cool ballast is a happy ballast!
Keep distance
distance between your ballasts to insure a free air flow
distance
distance
between your ballasts to insure a free air flow. Keep at least 5 cm distance between individual
ballasts. Mount ballasts on a non-combustible material.
These ballasts are developed for indoor use only. Do not install your ballasts in a wet environment. Th
These ballasts are developed for indoor use only.
ballasts are sealed to prevent dust and humidity
ballasts are sealed to prevent dust and humidity from entering the ballast we recommend to install this ballast in
a dry environment at environment temperatur
a dry environment at environment temperatures below 40° Celsius (104° Fahrenheit). If you install your ballasts
in a closed cabinet make sure you have enough
make sure you have enough active cooling, with the air stream going up. We recommend
active cooling on the bottom
Switching gear
We recommend to use two pole contactors
appropriate switching gear is recommended. Do not use household timers to switch electronic ballasts.
appropriate switching gear is recommended. Do not use household timers to switch electronic ballasts.
appropriate switching gear is recommended. Do not use household timers to switch electronic ballasts.
Lamp connection, replacement and hot restrike
Always install the lamp lead and lamp
Always install the lamp lead and lamp
•
When connecting a lamp lead to a reflector make sure that the wire ends are tightly secured in their
When connecting a lamp lead to a reflector make sure that the wire ends are tightly secured in their
When connecting a lamp lead to a reflector make sure that the wire ends are tightly secured in their
•
terminals and a strain relief is in place. For stranded wire always use
terminals and a strain relief is in place. For stranded wire always use
Always connect the ground wire to the reflector if it is not a double insulated type
Always connect the ground wire to the reflector if it is
•
When changing the lamp first disconnect the ballast from mains by removing the
When changing the lamp first disconnect the ballast from mains by removing the 230 V plug.
When changing the lamp first disconnect the ballast from mains by removing the
•
Never disconnect a lamp by pulling the lamp cord out of a live ballast..
Never disconnect a lamp by pulling the lamp cord out of a live
•
Allow a lamp to cool for 20-30 minutes before restarting (hot restrike).
•
Preventing EMI and mains pollution
Preventing EMI and mains pollution
The DigiStar ballast is tested for EMI (Electro Magnetic Interference) and has met the highest standards.
ballast is tested for EMI (Electro Magnetic Interference) and has met the highest standards.
ballast is tested for EMI (Electro Magnetic Interference) and has met the highest standards.
Incorrect installation however can cause unnecessary mains pollution and EMI. Therefore please follow these
Incorrect installation however can cause unnecessary mains pollution and EMI. Therefore please follow these
Incorrect installation however can cause unnecessary mains pollution and EMI. Therefore please follow these
guidelines for correct wiring:
1. Do not coil your excess
Do not coil your excess wiring
Do not coil your excess
Do not coil your excess
to meet the required length.
2. Mount your ballasts as close to your reflectors as possible.
Mount your ballasts as close to your reflectors as possible.
Mount your ballasts as close to your reflectors as possible.
Mount your ballasts as close to your reflectors as possible.
Mount your ballasts as close to your reflectors as possible.
Mount your ballasts as close to your reflectors as possible. The shorter the lead to the lamp the less
Mount your ballasts as close to your reflectors as possible.
Mount your ballasts as close to your reflectors as possible.
chance of EMI.
3. Keep your mains leads and l
Keep your mains leads and lamp leads separated.
Keep your mains leads and l
Keep your mains leads and l
Keep your mains leads and l
Keep your mains leads and l
Keep your mains leads and l
Keep your mains leads and l
bundle or running parallel can cause interference signals on the power grid and can cause damaging
bundle or running parallel can cause interference signals on the power grid and can cause damaging
bundle or running parallel can cause interference signals on the power grid and can cause damaging
feedback in your ballast.
DigiStar instructions 1.01
Document number 11012001/TTE
Electronic ballast. We have done everything to insure a long life
vertical
vertical
vertical
vertically ly ly ly, so the air can rise through the cooling ribs for optimal cooling.
vertical
vertical
vertical
, so the air can rise through the cooling ribs for optimal cooling.
but a cool ballast is a happy ballast!
combustible material.
air inlet
of your cabinet to ensure a cool air flow through your installation cabinet.
of your cabinet to ensure a cool air flow through your installation cabinet.
of your cabinet to ensure a cool air flow through your installation cabinet.
contactors. Be advised that all electronic ballasts have a
. Be advised that all electronic ballasts have an inrush current so
and hot restrike
before
30 minutes before restarting (hot restrike).
wiring
wiring
wiring, especially not for the lamp lead. Rather shorten your leads to
wiring
wiring
wiring
wiring
, especially not for the lamp lead. Rather shorten your leads to the lamp
amp leads separated.
amp leads separated. Keeping your mains leads and lamp leads in one
amp leads separated.
page 1
, so we recommend you read this manual carefully
your ballasts in a wet environment. Though the
the ballast we recommend to install this ballast in
cooling, with the air stream going up. We recommend
connecting your ballast to mains.
nnecting your ballast to mains.
a double insulated type.
The shorter the lead to the lamp the less
Keeping your mains leads and lamp leads in one
distance between individual
). If you install your ballasts
cable end sleeves
e end sleeves
.
Changes reserved
Advertisement

Related Manuals for Gavita DigiStar 400


Summary of Contents for Gavita DigiStar 400
- Page 1 PLEASE READ THESE INSTRUCTIONS FIRST BEFORE INSTALLATION PLEASE READ THESE INSTRUCTIONS FIRST BEFORE INSTALLATION Congratulations on your purchase of the Congratulations on your purchase of the DigiStar Electronic ballast. We have done every Electronic ballast. We have done everything to insure a long life and safe operation, but the installation and use of the ballast is the responsibility of the user.
- Page 2 For stranded wire always use cable end sleeves. Warranty GAVITA Holland warrants the mechanical and electronic components of this product to be free of defects in warrants the mechanical and electronic components of this product to be free of defects in...