Advertisement
Quick Links
Advertisement

Related Manuals for Vaporfi VOLT


Summary of Contents for Vaporfi VOLT
- Page 1 USER MANUAL ENGLISH • ESPAÑOL...
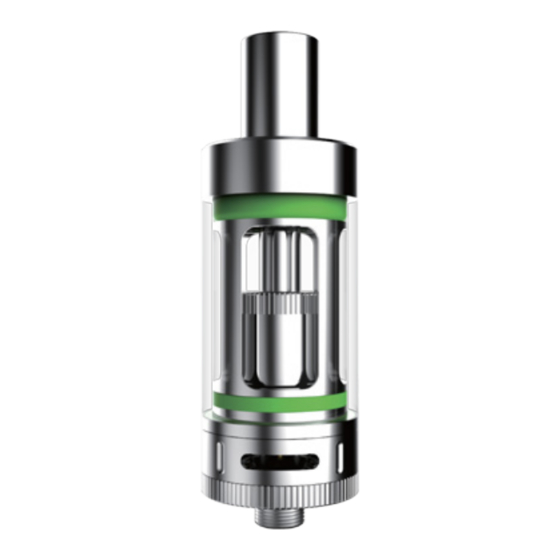
- Page 3 VAPORFI™ VOLT TANK Thanks for your purchase of the VaporFi Volt Tank! In order to use this tank correctly, effectively and with absolute safety, please follow the instructions in this manual.
-
Page 4: What's Included
WHAT’S INCLUDED: » 1 x Volt Tank (4.5ml) » 1 X OCC Sub Ohm 0.5Ω / Range 15-30 W » 1 x OCC 1.2Ω / Range 12-25 W » 2 x RBA 0.5Ω Coil » 1 x Japanese Organic Cotton »... - Page 5 REFILLING E-LIQUID Turn tank upside down and unscrew the base by turning it counterclockwise. Point and pour the e-liquid onto the sides of the tank (Do not overfill. E-liquid should be just below the center tube). Screw the base back onto the tank by turning the base clockwise until you feel resistance (make sure not to over tighten).
-
Page 6: Changing The Atomizer Head
CHANGING THE ATOMIZER HEAD Atomizers generally last 1-3 weeks depending on individual usage. When you notice that the flavor and/or vapor have diminished, you experience a burnt taste, it may be time to change your atomizer. Remove the tank from the battery and turn the tank upside down. - Page 7 SWITCH TO REBUILDABLE DECK Remove the base of the tank by turning it counterclockwise. Unscrew the replaceable atomizer by turning it counterclockwise. Screw rebuildable deck onto the main base by turning the deck clockwise. Pint and pour the e-liquid onto the sides of the tank (do not overfill.
- Page 8 BUILDING YOUR COIL Follow these quick and easy steps to build your Volt RBA. Begin by creating a coil with the provided Kanthal Wire. Here’s how: Cut a piece of Kanthal wire 6” in length. Using the provided screwdriver, hold the screwdriver handle and the Kanthal wire between your thumb and forefinger.
- Page 9 Straighten the leads to mount on the RBA. You should now have a coil.
- Page 10 REBUILDING YOUR ATOMIZER Remove the housing from the Rebuildable Deck. Locate and loosen the post screws on the Rebuildable Deck by turning it counterclockwise no more than 3 full turns. Make sure the screws are not removed from the Deck. Attach your coil to the Rebuildable Deck by wrapping the 1/2 inch leads around the loosened post screws then tighten the screws by turning clockwise to secure.
- Page 11 Slide the strip of cotton into the center of the coil and leave 1/2 inch on each side, cutting excess cotton if required. Lay or push the 1/2 inch cotton down onto or just above the build deck. Saturate the cotton with e-liquid and attach the housing back onto the Rebuildable Deck.
-
Page 12: Air Flow Control
AIR FLOW CONTROL The Air Flow Control at the base of the tank can be adjusted by turning the control ring In either direction. Adjust the Air Flow to your desire. - Page 13 VaporFi™ products contain nicotine, a chemical known to the State of California to cause birth defects or other reproductive harm. Nicotine...
- Page 14 If the cartridge is swallowed, seek immediate medical assistance. VaporFi™ products are intended for the use by adults of legal smoking age (18 or older in California), and not by children, or women...
- Page 16 MANUAL DE USUARIO...
- Page 17 TANQUE VOLT DE VAPORFI™ ¡Gracias por comprar el Tanque Volt VaporFi! Para utilizar este tanque correctamente, por favor, siga las instrucciones de este manual, con eficacia, y con absoluta seguridad.
-
Page 18: Qué Está Incluido
¿QUÉ ESTÁ INCLUIDO? » 1 x Tanque Volt (4.5ml) » 1 x Atomizador OCC sub Ohm 0.5Ω / rango de 15-30W » 1 x Atomizador OCC 1.2Ω / rango de 12-25W » 2 x Bobinas RBA 0.5Ω » 1 x Algodón Organico Japones »... - Page 19 RECARGA DEL E-LÍQUIDO Ponga el tanque boca abajo y desenrosque la base girándola hacia la izquierda. Apunte y vierta el e-líquido sobre las paredes del tanque (No llene en exceso. El e-líquido debe estar justo por debajo del tubo central). Atornille la base de nuevo en el tanque girando la base hacia la derecha hasta que encuentre resistencia (asegúrese de no apretar demasiado).
- Page 20 CAMBIO DEL CABEZAL DEL ATOMIZADOR Por lo general los atomizadores duran entre 1 a 3 semanas dependiendo del uso individual. Sin embargo, si siente un sabor a quemado, nota una disminución en el sabor y/o la producción de vapor puede ser el momento de cambiar su atomizador.
Need help?
Do you have a question about the VOLT and is the answer not in the manual?
Questions and answers