Table of Contents
Advertisement
IronKey VP80ES External SSD User Manual – Rev. 1.0
User Manual
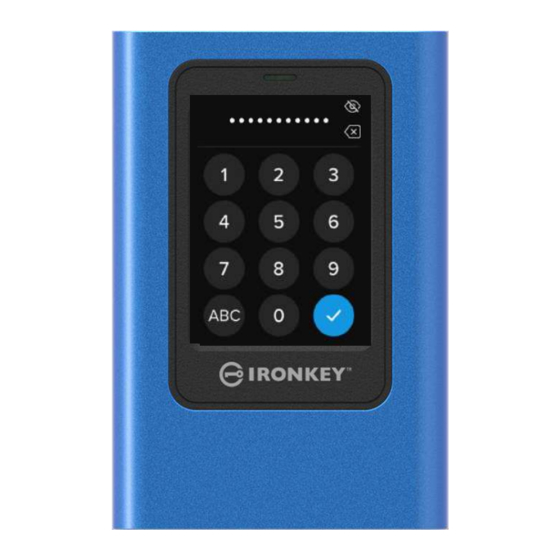
IronKey Vault Privacy 80 External SDD
FIPS 197 Certified
Hardware-Based
Advanced Encryption Standard (AES)
256-bit Encryption in XTS Mode
©2022 Kingston Technology Corporation. All rights reserved. All trademarks and registered trademarks are the property of their respective owners.
1
Advertisement
Table of Contents

Related Manuals for Kingston Technology IronKey Vault Privacy 80


Summary of Contents for Kingston Technology IronKey Vault Privacy 80
- Page 1 User Manual IronKey Vault Privacy 80 External SDD FIPS 197 Certified Hardware-Based Advanced Encryption Standard (AES) 256-bit Encryption in XTS Mode ©2022 Kingston Technology Corporation. All rights reserved. All trademarks and registered trademarks are the property of their respective owners.
-
Page 2: Table Of Contents
VP80ES is Not Correctly Taking Input …………………………………………………………. Using the User Menu …………………………………………………………………………... Change Password ……………………………………………………………………………….. Auto-Lock Time ……………………………………………………………………………….….. Touch Sounds ……………………………………………………………………………………. Brightness ………………………………………………………………………………………… ©2022 Kingston Technology Corporation. All rights reserved. All trademarks and registered trademarks are the property of their respective owners. - Page 3 IronKey VP80ES External SSD User Manual – Rev. 1.0 Language …………………………………………………………………………………………. Drive Information ……………………………………………………………………………..Disclaimer ……………………………………………………………………………………….. ©2022 Kingston Technology Corporation. All rights reserved. All trademarks and registered trademarks are the property of their respective owners.
-
Page 4: At A Glance
The VP80ES is fully cross-platform compatible and OS independent - with no software or special drivers required, it works transparently with Windows, Linux, macOS, Chrome OS, or any system that supports USB mass storage devices. ©2022 Kingston Technology Corporation. All rights reserved. All trademarks and registered trademarks are the property of their respective owners. -
Page 5: Getting Started
“PASSWORD1”. Attackers utilize social engineering techniques to guess passwords based on what they know about the owner of the USB drive. ©2022 Kingston Technology Corporation. All rights reserved. All trademarks and registered trademarks are the property of their respective owners. -
Page 6: Use The Correct File System
You can reformat the data partition if needed but data is lost when the drive is reformatted. See Formatting Your VP80ES for more information. ©2022 Kingston Technology Corporation. All rights reserved. All trademarks and registered trademarks are the property of their respective owners. -
Page 7: Initializing And Connecting Your Vp80Es
Enter key. Tap 123 to swap the keyboard to numbers. Tap ABC to swap back to letters. Press ABC to return to Alphabet menu ©2022 Kingston Technology Corporation. All rights reserved. All trademarks and registered trademarks are the property of their respective owners. - Page 8 Operating System. For more details, see Disconnecting Your VP80ES. Alternatively, tapping LOCK AND DISCONNECT will disconnect the drive from the computer. ©2022 Kingston Technology Corporation. All rights reserved. All trademarks and registered trademarks are the property of their respective owners.
-
Page 9: Disconnecting Your Vp80Es
2. Once the drive has been ejected from macOS, press LOCK AND DISCONNECT on the drive. 3. Tap POWER OFF on your VP80ES and unplug from the computer. Tap UNLOCK to start a new session. ©2022 Kingston Technology Corporation. All rights reserved. All trademarks and registered trademarks are the property of their respective owners. -
Page 10: Additional Windows Configuration Changes
NOTE: If you are using a device with a battery (i.e. laptop or tablet), you will need to set this for On Battery and Plugged in. 10. Click OK. ©2022 Kingston Technology Corporation. All rights reserved. All trademarks and registered trademarks are the property of their respective owners. -
Page 11: Formatting Your Vp80Es
5. Click on Create and format hard disk partitions. 6. Right click on the drive letter that corresponds to your VP80ES. This example shows (D:). ©2022 Kingston Technology Corporation. All rights reserved. All trademarks and registered trademarks are the property of their respective owners. - Page 12 9. You will be warned that all data will be erased and asked if you would like to continue. Press 10. When finished, your VP80ES will be available under ‘This PC’. ©2022 Kingston Technology Corporation. All rights reserved. All trademarks and registered trademarks are the property of their respective owners.
-
Page 13: Formatting Your Vp80Es On Macos
4. Click the Erase tab at the top of the screen. 5. Rename the disk label to “KINGSTON” and choose a file system. ©2022 Kingston Technology Corporation. All rights reserved. All trademarks and registered trademarks are the property of their respective owners. - Page 14 Time Machine. Choose your preferred option. 8. Click Done. Your formatted VP80ES should now appear under Drives. ©2022 Kingston Technology Corporation. All rights reserved. All trademarks and registered trademarks are the property of their respective owners.
-
Page 15: Linux Compatibility And Configuration
If you want to rename the drive, use the e2label command: # e2label /dev/sdb1 /VaultPrivacy80ES In this case, VaultPrivacy80ES is an example of a drive name. ©2022 Kingston Technology Corporation. All rights reserved. All trademarks and registered trademarks are the property of their respective owners. -
Page 16: Using Vp80Es Features
Each menu has a Forward and a Back arrow to navigate between them: On Menu 3, you can only go back to Menu 2 so only the back arrow is available. ©2022 Kingston Technology Corporation. All rights reserved. All trademarks and registered trademarks are the property of their respective owners. - Page 17 Crypto-erase the drive, including encryption key and data. Touch Calibration Calibrate the touch-screen interface if you are having problems. Touch Sounds Enable or disable touch sounds. ©2022 Kingston Technology Corporation. All rights reserved. All trademarks and registered trademarks are the property of their respective owners.
-
Page 18: User Menu
NOTE: After entering the password, the connect screen is briefly shown for 10 seconds. To enter the onboard Admin menu, you will need to tap the Gear icon quickly. ©2022 Kingston Technology Corporation. All rights reserved. All trademarks and registered trademarks are the property of their respective owners. -
Page 19: Using The Admin (Administrator) Menu
Step-by-step Process to Set User 1. From the Admin menu, tap SET USER. 2. Tap ENABLE. (Option is set to DISABLE as default). ©2022 Kingston Technology Corporation. All rights reserved. All trademarks and registered trademarks are the property of their respective owners. - Page 20 6. Tap CONNECT to connect the VP80ES instantly or wait for 10 seconds for VP80ES to automatically connect to your computer. ©2022 Kingston Technology Corporation. All rights reserved. All trademarks and registered trademarks are the property of their respective owners.
-
Page 21: Read-Only Mode
1. Tap the READ-ONLY MODE feature from the Admin menu. 2. Tap ENABLE. 3. Tap Back from the upper left to save and exit to the Admin menu. ©2022 Kingston Technology Corporation. All rights reserved. All trademarks and registered trademarks are the property of their respective owners. -
Page 22: Password Rules
3. Tap Back from the upper left to save and exit to the Admin menu. Note: The default PASSWORD LENGTH is 6. ©2022 Kingston Technology Corporation. All rights reserved. All trademarks and registered trademarks are the property of their respective owners. -
Page 23: Password Counter
(especially if a PIN password is used). NOTE: The default RANDOMIZE KEY LAYOUT is Enabled. ©2022 Kingston Technology Corporation. All rights reserved. All trademarks and registered trademarks are the property of their respective owners. -
Page 24: Auto-Lock Time
NOTE: The minimum BRIGHTNESS is 1 and the maximum is 30. 3. Tap Back from the upper left to save and exit to the Admin menu. ©2022 Kingston Technology Corporation. All rights reserved. All trademarks and registered trademarks are the property of their respective owners. -
Page 25: Language
2. Factory Initialize - Tap & hold SECURE ERASE in the Admin menu for 5 seconds. Your drive will show a “FACTORY INITIALIZE” prompt. ©2022 Kingston Technology Corporation. All rights reserved. All trademarks and registered trademarks are the property of their respective owners. - Page 26 YES. Selecting NO will cancel the process. 3. When your drive asks for “DELETE ALL DRIVE DATA?”, tap YES. Selecting NO will cancel the Secure Erase process. ©2022 Kingston Technology Corporation. All rights reserved. All trademarks and registered trademarks are the property of their respective owners.
-
Page 27: Touch Calibration
Proceed with care and preferably use a stylus pen. The precision of the calibration highly influences how accurately the drive receives input. 1. Tap the TOUCH CALIBRATION option from the Admin menu. ©2022 Kingston Technology Corporation. All rights reserved. All trademarks and registered trademarks are the property of their respective owners. -
Page 28: Touch Sounds
5 seconds (use a timer if needed) when the IronKey logo appears with a progress bar. Follow the Touch Calibration steps. ©2022 Kingston Technology Corporation. All rights reserved. All trademarks and registered trademarks are the property of their respective owners. -
Page 29: Using The User Menu
1. Tap AUTO-LOCK TIME from the user menu. 2. Configure the desired number of minutes the drive can remain unlocked and idle. ©2022 Kingston Technology Corporation. All rights reserved. All trademarks and registered trademarks are the property of their respective owners. -
Page 30: Touch Sounds
2. Tap + to increase the brightness and - to decrease the brightness. 3. Tap Back from the upper left to save and exit to the user menu. ©2022 Kingston Technology Corporation. All rights reserved. All trademarks and registered trademarks are the property of their respective owners. - Page 31 Drive information shown: • QR Code Serial Number • Alphanumeric Serial Number • Firmware Version • Capacity • Certification Logos • Patent Information ©2022 Kingston Technology Corporation. All rights reserved. All trademarks and registered trademarks are the property of their respective owners.
- Page 32 Kingston, IronKey, and Vault Privacy are registered trademarks of Kingston Digital Inc. All other trademarks are the property of their respective owners. All rights reserved. ©2022 Kingston Technology Corporation. All rights reserved. All trademarks and registered trademarks are the property of their respective owners.
Need help?
Do you have a question about the IronKey Vault Privacy 80 and is the answer not in the manual?
Questions and answers