Table of Contents
Advertisement
Wireless Self-emptying Rain
Contents
1. Introduction ..................................................................3
2. Unpacking .................................................................... 3
3. Features ........................................................................ 4
4. Setup Guide ..................................................................5
4.1 Site Survey .............................................................5
4.2 Rain Gauge Sensor Set Up and Installation .......... 6
4.2.1 Install rain gauge filter ....................................7
4.2.2 Install rain collector top ..................................8
4.2.3 Install Batteries in rain gauge sensor ..............9
5. Mounting ....................................................................10
6. Wi-Fi Configure with gateway .................................. 14
6.1 Pair with Gateway ................................................14
6.2 Wi-Fi Connection for the Gateway ......................15
8. Maintenance ...............................................................16
9. Specification .............................................................. 17
10. Warranty Information .............................................. 18
Gauge Sensor
Model: WH40
1
Advertisement
Table of Contents

Subscribe to Our Youtube Channel
Related Manuals for ECOWITT WH40


Summary of Contents for ECOWITT WH40
-
Page 1: Table Of Contents
6. Wi-Fi Configure with gateway ........14 6.1 Pair with Gateway ..........14 6.2 Wi-Fi Connection for the Gateway ......15 7. View Online Data on WS View Plus or Ecowitt App 15 8. Maintenance ...............16 9. Specification .............. 17 10. Warranty Information ..........18... - Page 2 *Please scan the QR code to read English manual and keep it for future reference *Bitte scannen Sie den QR-Code zudeutsche Anleitung lesen und aufbewahren füZukunftsbezug *Si prega di scansionare il codice QR perleggi il manuale italiano e conservalo perReferenza futura Instruction manuals https://www.ecowitt.com/support/download/49...
-
Page 3: Introduction
The data can be streamed by Wi-Fi Gateway(sold separately) and can be viewed online Data on WS View Plus or Ecowitt App mobile application after the Wi-Fi configuration done. To ensure the best product performance, please read this manual and retain it for future reference. -
Page 4: Features
WS View Plus or Ecowitt App View current rainfall data on WU Dashboard of the WS View Plus or Ecowitt App (requires to upload to Weather Underground first) When paired with a Weather Station Console (WH5360/HP2553/HP3501): ... -
Page 5: Setup Guide
WH5360 only has calibration function.) When uploaded to Ecowitt Weather Server: View current rainfall data & history records & graph on the website Set and receive email alerts from the server Sensor name can be edited on the website ... -
Page 6: Rain Gauge Sensor Set Up And Installation
Ensure the rain gauge is mounted level to the ground, away from any horizontal surface that can introduce rain-splashing or surrounding snow buildup. Note: If the rain gauge sensor was mounted less than 3.3 feet or 1 meter above the ground, the electromagnetic waves would be absorbed by the earth when raining. -
Page 7: Install Rain Gauge Filter
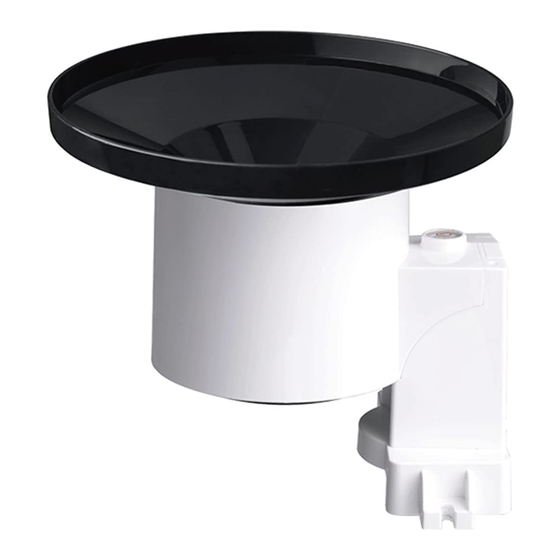
Rain collector top Battery compartment door LED Indicator Surface installation screw hole Bubble level U-bolt installation hole Table 2: Sensor assembly detailed items 4.2.1 Install rain gauge filter There’s a stainless steel filter included in the package. It’s aimed to stop leaves or bird's dropping to avoid the obstruction of the cone hole. -
Page 8: Install Rain Collector Top
Figure 2: Rain gauge filter in/un-installation diagram 4.2.2 Install rain collector top Align the rain collector top with the rain bucket, pay attention to the lock groove position as shown on the left side in Figure 3. Next, lock the top clockwise to the lock groove position, as shown on the right side of the figure, until it comes to a stop and the top cannot be removed from the bucket. -
Page 9: Install Batteries In Rain Gauge Sensor
4.2.3 Install Batteries in rain gauge sensor Remove the battery door on the back of the sensor by sliding it in the direction of the arrow. Insert one AA battery as described and put compartment door back and slide it in the opposite direction to lock. Figure 4: Rain gauge sensor battery installation diagram The LED indicator on the top of the battery door (item 2) -
Page 10: Mounting
batteries backwards. You can permanently damage the outdoor sensor. Lithium batteries are recommended for the best performance. We do not recommend rechargeable batteries. They have lower voltages, do not operate well at wide temperature ranges, and do not last as long, resulting in poorer reception. - Page 11 Mount with U-bolts The mounting assembly includes two U-Bolts and a bracket that tightens around a 1" to 2” diameter pole (not included) using the four U-Bolt nuts.
- Page 12 Note: Use the bubble level beside the rain sensor as a guide to verify that the sensor is leveled. Mount with screws The mounting assembly also includes two screws for installation on a flat place. Note: Use the bubble level beside the rain sensor as a guide to verify that the sensor is leveled.
- Page 13 1. Electro-Magnetic Interference (EMI). Keep the console several feet away from computer monitors and TVs. 2. Radio Frequency Interference (RFI). If you have other 915/433/868 MHz devices(same frequency with your device) and communication is intermittent, try turning off these other devices for troubleshooting purposes.
-
Page 14: Wi-Fi Configure With Gateway
6. Wi-Fi Configure with gateway This rain sensor doesn’t has a display function and you need to use our WS View Plus or Ecowitt App to view the rainfall data on your mobile application after pairing this device with our Wi-Fi Gateway(sold separately). -
Page 15: Wi-Fi Connection For The Gateway
Any question, please contact the customer service. 7. View Online Data on WS View Plus or Ecowitt App When the Wi-Fi configuration is done, you can view the live data of your rain sensor on the WS View Plus or Ecowitt App. -
Page 16: Maintenance
8. Maintenance The following steps should be taken for proper maintenance of your station Clean Rain Gauge Check the rain gauge every 3 months. Rotate the funnel counterclockwise and lift it up. Clean the funnel and bucket with a damp cloth to remove any dirt, debris and insects. -
Page 17: Specification
Replacing batteries regularly Batteries of the outdoor sensor array should be replaced every 1-2 years. In applications where data dropouts cannot be tolerated, check the batteries every 3 months and apply a corrosion preventing compound (not included) on the battery terminals for protection. Prevent snow build up In snowy environments, use anti-icing silicon spray on the top of the rain collection top, to prevent snow build... -
Page 18: Warranty Information
Note: The frequency is fixed and could not be changed. Power consumption Rain sensor: 1xAA Alkaline batteries (not included) Battery life: Minimum 12 months 10. Warranty Information We disclaim any responsibility for any technical error or printing error, or the consequences thereof. All trademarks and patents are recognized.
Need help?
Do you have a question about the WH40 and is the answer not in the manual?
Questions and answers