Advertisement
Quick Links
Model #
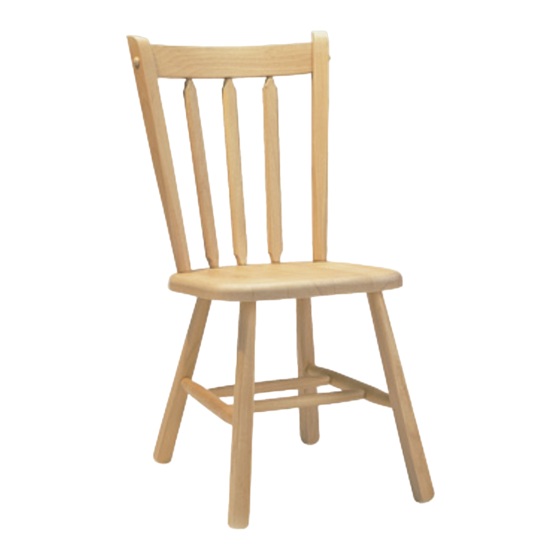
70Wa
Riverside Chair
Assembly Instructions
Congratulations!
This fine piece of furniture will make a handsome
addition to your home. For the best results, start by
reading both the Assembly Instructions and
Finishing Hints before you begin your project.
For normal household use only.
recommended for commercial use.
Do not climb or stand on this piece of
furniture.
P.O. Box 2827
Eugene, OR 97402 USA
Service Policy:
which are defective, missing or damaged
during assembly. Please contact Whittier
Wood Products customer service department
directly (by phone, fax, mail or email) for
replacement parts.
Hours:
Our friendly customer service staff
can be reached Monday-Friday 7:00 a.m. to
5:00 p.m. (Pacific Time). A message can be
left 24 hours a day, 7 days a week.
To Order:
Provide the complete furniture
model number (upper left corner of this
page), part letter, production code, quantity
needed, reason for replacement and your full
name and address along with a telephone
number in case we need to contact you.
Parts ship from our Eugene, Oregon factory
within 1 or 2 business days from the time
we receive the request. Please allow 5-10
business days for delivery.
O O u u t t s s ide
ide U U . . S. or Canada:
S. or Canada: 5 5 4 4 1 1 - - 6 6 8 8 7 7 - - 0 0 2 2 1 1 3 3
F F a a x: x: 5 5 4 4 1 1 - - 6 6 8 8 7 7 - - 2 2 0 0 6 6 0 •
M M a a i i l l : : P P .O .O. . B B o o x 28
x 282 2 7 •
7 • E E ugen
Completely read the Assembly Instructions and
Finishing Hints before you begin your project.
Store the parts: 1) in their box; 2) in a dry place; 3) in
temperatures ranging from 40º to 90ºF (not on a cold
and possibly damp cement floor).
Periodically inspect your furniture for any loose
glue joints, screws or any other problem that might
affect the stability of your furniture. Tighten or repair
as needed.
Production Code:
VN
We will replace any parts
0 • www
www. . w w h h i i t t t t ie ier r w w oo
ood d . . c c om
ugene e , , O O r r egon
egon 9 9 7 7 4 4 0 0 2, 2, U U . . S S . . A A . .
om
Rev. 2/07
Advertisement

Related Manuals for Whittier Wood Furniture Riverside 70Wa


Summary of Contents for Whittier Wood Furniture Riverside 70Wa
- Page 1 Model # 70Wa Riverside Chair Assembly Instructions Service Policy: We will replace any parts which are defective, missing or damaged during assembly. Please contact Whittier Wood Products customer service department directly (by phone, fax, mail or email) for replacement parts. Hours: Our friendly customer service staff can be reached Monday-Friday 7:00 a.m.
- Page 2 70Wa Riverside Chair – Parts List TOOLS REQUIRED: Phillips screwdriver, Rubber Mallet, Hammer, Nail Set and Glue. BEFORE BEGINNING ASSEMBLY, check that the quantities of the parts received match those on the parts list below. PART DESCRIPTION QTY. PART DESCRIPTION QTY.
- Page 3 Turn the chair upside down, being sure to protect the top of the seat with a towel or cardboard. Put a little glue on the tapered ends of the wood Wedges (M) and pound them into the slots in the bottom of the Back Posts (C &...
- Page 4 Place the stretcher assembly with the brads facing down so that they do not show after the final assembly. Spread a thin film of glue into the holes of the front and back legs. The shorter, Back Legs (G) are placed on the smaller ends of the Side Stretchers (H).
- Page 5 Modelo # 70Wa Silla Riverside Instrucciones para Armar Normas para obtener servicio: Reemplaza- remos las piezas que tengan defectos, falten o se dañen durante el armado. Sírvase comunicarse con el departamento de servicio al cliente de Whittier Wood Products directamente (por teléfono, fax, correo o e-mail) para obtener piezas de repuesto.
-
Page 6: Instrucciones De Ensamblado
70Wa Silla Riverside INSTRUCCIONES DE ENSAMBLADO HERRAMIENTAS NECESARIAS: Destornillador Phillips, mazo de caucho, martillo, conjunto de clavos, pegamento. Madera (N). Vea la FIGURA 3. Con cuidado limpie l IMPORTANTE: exceso de pegamento de alrededor del botón. (Si los ¡LEA LOS CONSEJOS SOBRE botones se llenaron de pegamento, lije bien el área para ENCOLADO ANTES DE ARMAR! que absorban la tintura o el acabado. - Page 7 No. de modèle 70Wa Chaise Riverside Politique de service : Nous remplacerons toutes Instructions de Montage les pièces défectueuses, manquantes ou endom- magées pendant le montage. Veuillez contacter directement le service clientèle de Whittier Wood Products (par téléphone, fax, courrier ou e-mail) pour obtenir les pièces de remplacement.
-
Page 8: Instructions De Montage
70Wa Chaise Riverside INSTRUCTIONS DE MONTAGE OUTILS NÉCESSAIRES : Tournevis cruciforme, maillet en caoutchouc, marteau, chasse-clous, colle. poncez complètement la surface pour qu’elle puisse absorber IMPORTANT : la teinture ou le produit de finition du bois.) AVANT DE PROCÉDER À L’ASSEMBLAGE, LISEZ LES CONSEILS FIG. - Page 9 Finishing Hints Choosing the Finish: Basic 1. Choose a finish that will meet your expectations for the product you are Equipment: finishing. Are you matching existing furniture or do you want a “natural” finish? Is the piece to be functional, decorative or both? The answers to these Rubber gloves questions may affect the type of finish you choose.
- Page 10 Gluing Hints (cont.) 3. We recommend that you use a good wood glue, such as Elmer’s Wood Glue or White Glue, Titebond Wood Glue or the equivalent; unless the instructions call for a special type such as a slow drying epoxy glue.
- Page 11 1. Choisissez un enduit de finition qui réponde à ce que vous attendez du meuble. Sou- haitez-vous l’harmoniser à votre mobilier actuel ou voulez-vous un aspect naturel ? Le meuble est-il destiné à être fonctionnel, décoratif ou les deux ? Le type d’enduit Gants en de finition que vous choisissez dépend des réponses à...
- Page 12 Conseils de Finition (suite) 3. Nous vous recommandons d’utiliser une bonne colle à bois, par exemple Elmer’s Wood Glue ou White Glue, Titebond Wood Glue ou équivalent, sauf si les instructions préconisent un type spécial de colle, par exemple une colle époxyde à...
- Page 13 1. Elija un acabado que cumpla con las expectativas para el producto a ser acabado. ¿Debe hacer juego con otros muebles o se desea un acabado “natural”? ¿Ha de ser Guantes de caucho funcional, decorativo o ambas cosas? Las respuestas a estas preguntas pueden afectar el tipo de acabado que se seleccione.
- Page 14 Ayudas Para el Pegamento: (cont.) 3. Recomendamos que utilice una buen pegamento de carpintero, como Elmer’s Wood Glue o White Glue, Titebond Wood Glue o su equivalente. Lea el rótulo del fabricante cuidadosamente y siga todas las instrucciones. 4. Asegúrese de que los agujeros estén libres de polvo para que el pegamento tenga una superficie limpia a la cual adherirse.
Need help?
Do you have a question about the Riverside 70Wa and is the answer not in the manual?
Questions and answers