
Related Manuals for Siemens WM10E364IL Series


Summary of Contents for Siemens WM10E364IL Series
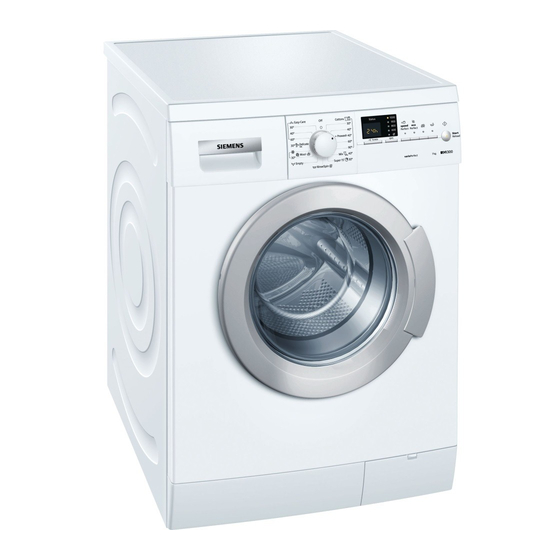
- Page 1 Washing machine WM10E364IL ... siemens-home.com/welcome Register your product online ens-home.com/welcome...
- Page 2 Your new washing machine Note/tip Information about the optimum use of You have chosen a Siemens washing the appliance/any other useful machine. information. Please take a few minutes to read and 1. 2. 3. / a) b) c) become familiar with the advantages of your washing machine.
-
Page 3: Table Of Contents
Contents e n I n s t r u c t i o n M a n u a l a n d I n s t a l l a t i o n I n s t r u c t i o n s z Wasser Plus (Water plus)* . -
Page 4: Intended Use
Intended use After-sales service ..26 Intended use Consumption rates ..27 For private domestic use only. ■ I n t e n d e d u s e The washing machine is suitable for Energy and water consumption, ■... -
Page 5: Safety Instructions
Safety instructions Reaching into the drum while Safety instructions ■ it is still rotating may cause hand injuries. Electrical safety Do not reach into the drum S a f e t y i n s t r u c t i o n s while it is rotating. -
Page 6: Environmental Protection
Environmental protection Cut through the mains cable Do not let children touch the ■ and remove it, along with the hot washing machine door. plug. Destroy the lock on the ■ washing machine door. Environmental Warning Risk of suffocation! protection Children may become wrapped Packaging/used appliance in packaging/film or packing... -
Page 7: Main Points In Brief
Main points in brief Main points in brief M a i n p o i n t s i n b r i e f Connect the mains Turn on the water Sort the laundry. Open the washing plug. tap (for models machine door. -
Page 8: Getting To Know The Appliance
Getting to know the appliance Getting to know the appliance Washing machine G e t t i n g t o k n o w t h e a p p l i a n c e ( Detergent drawer ~ Page 17 8 Washing machine door with door handle 0 Controls/display elements 9S Open the washing machine door... -
Page 9: Control Panel
Getting to know the appliance Control panel ( Programme selector for selecting a H G Speed*, ¦ Eco*, Ø Reduced programme and for switching the machine on and Ironing, l Rinse Plus / z Water Plus (Aqua Plus)* additional programme settings (* depending on the model) 0 Display panel for settings and information Übersicht aller zusätzlichen... -
Page 10: Laundry
Laundry – W : Suitable for washing by Laundry hand; e.g. programme h/Wool programme S orting laundry – Ž : Do not wash the laundry in L a u n d r y the machine. Sort your laundry according to the care instructions and manufacturer's Prepare the laundry information on the care labels,... -
Page 11: Detergent
Detergent Saving energy and detergent Detergent For light and normal soiling, you can C orrect selection of detergent save energy (lower washing D e t e r g e n t temperature) and detergent. The care label is crucial for selecting the correct detergent, temperature and Saving Soiling/note... -
Page 12: Overview Of Programmes
Overview of programmes Overview of programmes Programmes on the programme selector O v e r v i e w o f p r o g r a m m e s Programme/type of laundry/information Settings Name of the programme Max. load; Brief explanation of the programme and for which fabrics it is suita- * Reduced load for the G Speed ble. -
Page 13: Starching
Overview of programmes Programme/type of laundry/information Settings h / Í Wool max. 2 kg Hand- or machine-washable fabrics that are made of wool or contain Ž, 30 °C wool; 2 ... 800 rpm particularly gentle wash programme to prevent laundry from shrink- ing, with longer pauses in the programme (during which the items rest in the water) Notes... -
Page 14: Soaking
Programme default settings Soaking programme settings also change the programme duration. Pour soaking agent/detergent into Before starting the programme, the compartment II in accordance with programme end ("Finished in" time) can the manufacturer's instructions. be preselected in increments of one Turn the programme selector to hour (h = hours) up to a maximum of 24 Cottons 30 °C programme. -
Page 15: Additional Programme
Additional programme settings Additional programme Operating the settings appliance G Speed* Preparing the washing A d d i t i o n a l p r o g r a m m e s e t t i n g s O p e r a t i n g t h e a p p l i a n c e machine For washing in a shorter time with a... -
Page 16: Change The Programme Default Settings
Operating the appliance Change the programme Placing laundry into the drum default settings Warning You can use the default settings or Risk of death! change them. Items of laundry pretreated with cleaning agents that contain solvents, To do this, repeatedly press the e.g. -
Page 17: Measure And Add Detergent And Care Products
Operating the appliance Measure and add detergent and care products Caution! Damage to the appliance Cleaning agents and agents for pretreating laundry (e.g. stain removers, prewash sprays, etc.) may cause Measuring aid A For liquid detergent damage if they come into contact with Compartment II Detergent for the main wash, the surfaces of the washing machine. -
Page 18: Start The Programme
Operating the appliance appropriate dispenser and place it in Adding laundry the drum. After starting the programme, you can add or remove laundry as required. Start the programme To do this, press the Start/Reload Select the Start/Reload button. The button. indicator lamp lights up and the The "Start/Reload"... -
Page 19: Programme End During Rinse Hold
Sensors Select Rinse/Spin (deactivate the Remove any foreign objects from the ■ Rinse Plus/Aqua Plus button) or drum and the rubber seal – risk of select Empty. rusting. Select Start/Reload. Programme end during rinse hold - - - appears on the display panel, the O status display lights up and the "Start/ Reload"... -
Page 20: Setting The Signal
Setting the signal Setting the signal S e t t i n g t h e s i g n a l 1. Activate the setting mode for the signal volume Set to $ One step, the display Select and hold One step, release panel lights up 2. -
Page 21: Drum
Cleaning and maintenance Cleaning with a jet of water is Leave the detergent drawer open Note: ■ prohibited. so that any residual water can evaporate. Drum Detergent solution pump Wipe the inside of the rubber seal dry blocked with a cloth. Leave the washing machine door open in order that the drum can Warning dry. -
Page 22: The Drain Hose At The Siphon Is Blocked
Cleaning and maintenance The drain hose at the siphon For models without a drain hose: Carefully unscrew the pump cover is blocked until the detergent solution begins to flow out. Switch off the appliance. Pull out the When the service flap is half full, mains plug. -
Page 23: Faults And What To Do About Them
Faults and what to do about them. Warning Risk of injury! You may injure your hands if you reach into the drum while it is rotating. Do not reach into the drum while it is rotating. Wait until the drum has stopped rotating. -
Page 24: Information On The Display Panel
Faults and what to do about them. Information on the display panel Display Cause/remedial action The washing machine door is unlocked. It is possible to add laundry. Temperature too high. Wait until the temperature drops. ■ Water level too high. Not possible to add laundry. Close the washing machine ■... - Page 25 Faults and what to do about them. Faults Cause/remedial action Spin result not satisfac- Not a fault – the unbalanced load detection system has interrupted the spin ■ tory. because the laundry is unevenly distributed. Distribute small and large items of washing in the drum. Laundry wet/too damp.
-
Page 26: After-Sales Service
After-sales service Faults Cause/remedial action YES appears on the dis- The washing machine door is unlocked. It is possible to add laundry. play in reload mode. If you cannot correct a fault yourself (after switching off/on) or a repair is required: Turn the programme selector to Off. -
Page 27: Consumption Rates
Consumption rates Consumption rates Energy and water consumption, programme duration and C o n s u m p t i o n r a t e s residual moisture for the main washing programmes Programme Load Energy consumption* Water* Programme duration* Cottons 30 °C 7 kg 0,31 kWh... -
Page 28: Efficiency Test Programmes For Cotton Fabrics
Technical data Efficiency test programmes for cotton fabrics The following programmes (standard cotton fabrics and are the most efficient programmes, indicated by ü) are with respect to combined energy and suitable for cleaning normally soiled water consumption. Standard programmes for Cottons in accordance with reg- Load Approximate pro- ulation... -
Page 29: Positioning And Connecting
Positioning and connecting Notes Positioning and Check the machine for transport ■ connecting damage. Never use a damaged machine. If you have a complaint, please contact the retailer from Included with the appliance whom you purchased the appliance, P o s i t i o n i n g a n d c o n n e c t i n g or our after-sales service. -
Page 30: Installation Surface
Positioning and connecting Installing the appliance in a Caution! Water damage kitchenette The connection points for the water supply hose and water drain hose are Warning under high water pressure. To prevent Install the appliance (underneath the leaks and water damage, you must worktop or fitted in a cabinet) before follow the instructions in this section. -
Page 31: Hose And Cable Lengths
Positioning and connecting Take the hoses out of the holders. Hose and cable lengths Left-hand connection ■ Unscrew and remove all four transport brace screws. Remove the sleeves. To do this, remove the mains cable from the holders. Right-hand connection ■... -
Page 32: Water Inlet
Positioning and connecting Water inlet Model: Standard ■ Warning Risk of death! There is a risk of electric shock if you touch live components. Do not immerse the Aqua-Stop safety valve in water (it contains an electric valve). Model: Aqua-Secure ■... -
Page 33: Levelling
Positioning and connecting Height difference between the ■ installation surface and the drain: Min. 60 cm, max. 100 cm You can lay the water drain hose as follows: Drainage into a washbasin ■ Warning Levelling Risk of scalding! When you are washing at high Level the appliance using a spirit level. -
Page 34: Electrical Connection
Positioning and connecting Electrical connection Before washing for the first time Warning The washing machine was thoroughly Risk of death! tested before leaving the factory. In There is a risk of electric shock if you order to remove any water which may touch live components. -
Page 35: Transportation
Positioning and connecting Transportation E.g. when moving house Preparatory work: Turn off the water tap. Reduce the water pressure in the supply hose. Maintenance – filter in the water supply ~ Page 22 Drain the remaining detergent solution. Maintenance – detergent solution pump blocked ~ Page 21 Disconnect the washing machine from the mains. - Page 36 01450 2655 (0.03 € per minute at peak. Off peak 0.0088 € per minute.) You can find the contact information for all countries in the attached after-sales service directory. BSH Hausgeräte GmbH Carl-Wery-Straße 34 81739 München GERMANY siemens-home.com *9001027435* 9001027435 (9511)
Need help?
Do you have a question about the WM10E364IL Series and is the answer not in the manual?
Questions and answers