dji AVATA User Manual
Hide thumbs
Also See for AVATA:
- Manual (34 pages) ,
- User manual (15 pages) ,
- Quick start manual (4 pages)
Table of Contents
Advertisement
Advertisement
Table of Contents

Related Manuals for dji AVATA


Summary of Contents for dji AVATA
- Page 1 User Manual v1.0 2022.08...
- Page 2 Searching for Keywords Search for keywords such as “battery” and “install” to find a topic. If you are using Adobe Acrobat Reader to read this document, press Ctrl+F on Windows or Command+F on Mac to begin a search. Navigating to a Topic View a complete list of topics in the table of contents.
-
Page 3: Using This Manual
Download the DJI Fly App Scan the QR code above to download DJI Fly. The Android version of DJI Fly is compatible with Android v6.0 and later. The iOS version of DJI Fly is compatible with iOS v11.0 and later. - Page 4 Contents © 2022 DJI All Rights Reserved.
- Page 5 User Manual DJI Avata © 2022 DJI All Rights Reserved.
-
Page 6: Product Profile
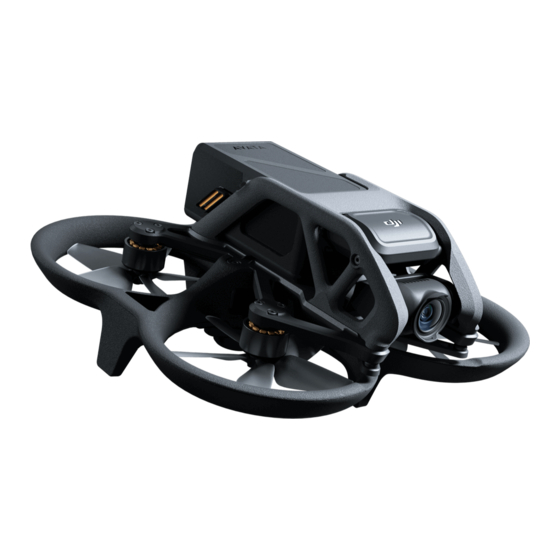
Introduction DJI Avata features a compact and portable aircraft body, which is equipped with a propeller guard. With both a Vision System and an Infrared Sensing System, it can hover stably and fly flexibly indoors as well as outdoors, and automatically initiate Return to Home (RTH). -
Page 7: Preparing The Aircraft
≥30 W USB PD It is recommended to use the DJI 30W USB-C Charger or other USB Power Delivery chargers. It is recommended to attach a gimbal protector to protect the gimbal when the aircraft is not in use. Adjust the camera to the horizontal position, then install the gimbal protector and make sure it is secure. - Page 8 4. Use the power cable (USB-C) provided to connect the power port of the goggles to the goggles battery. Press the power button once, then press again and hold for two seconds to power the goggles on. © 2022 DJI All Rights Reserved.
- Page 9 -0.8 D - +2.0D -0.8 D - +2.0D d. After you get a clear view, press the knobs in and rotate them in the direction as shown to lock in the lenses’ position and the diopter. © 2022 DJI All Rights Reserved.
- Page 10 Re-attach the screen protector after use to protect the lens and prevent damage caused by direct sunlight. Only use the DJI goggles battery provided. DO NOT use non-DJI batteries. DO NOT use the goggles battery to power other devices. DJI FPV Goggles V2 1.
- Page 11 Preparing the Remote Control Devices Press the power button once to check the current battery level. Charge before using if the battery level is too low. DJI Motion Controller 5V, 1A/2A USB Power Delivery chargers are not supported. © 2022 DJI All Rights Reserved.
- Page 12 User Manual DJI Avata DJI FPV Remote Controller 2 1. Charge the battery. 2. Remove the control sticks from the storage slots and mount them on the remote controller. 3. Unfold the antennas. © 2022 DJI All Rights Reserved.
- Page 13 10. Battery Level LEDs 15. Infrared Sensing System 16. Downward Vision System Before flying, make sure the USB-C port and microSD card slot cover is correctly and securely sealed to avoid interference with the propellers. © 2022 DJI All Rights Reserved.
- Page 14 12. Link Button 13. Foam Padding DJI FPV Goggles V2 Antennas USB-C Port Front Cover microSD Card Slot Channel Adjustment Buttons Air Intake Channel Display IPD Slider © 2022 DJI All Rights Reserved.
- Page 15 Press and hold to switch between 16. Audio/AV-IN Port photo and video mode. 17. Power Port (DC5.5×2.1) 14. Back Button 18. Link Button Press to return to the previous menu or exit the current mode. © 2022 DJI All Rights Reserved.
- Page 16 Press again to unlock the attitude. Press once to check the current battery level. Press and hold to initiate RTH. Press again to Press once then again and hold to power the cancel RTH. motion controller on or off. © 2022 DJI All Rights Reserved.
- Page 17 For storing the control sticks. Flight Pause/RTH Button Press once to make the aircraft brake and hover in place (only when GNSS or Vision System is available). Press and hold to initiate RTH. Press again to cancel RTH. © 2022 DJI All Rights Reserved.
- Page 18 Tighten the screw clockwise to increase the vertical resistance of the corresponding stick. Loosen the screw to decrease vertical resistance. 19. F2 Left Stick Recentering Adjustment Screw (Vertical) Tighten the screw clockwise to disable the vertical recentering of the corresponding stick. Loosen the screw to enable vertical recentering. © 2022 DJI All Rights Reserved.
- Page 19 DJI Avata Linking Follow the steps below to link the aircraft, goggles, and remote control devices. Make sure that the DJI devices used with the aircraft are activated through the DJI Assistant 2 (Consumer Drones Series) and updated to the latest firmware before linking.
- Page 20 Activation DJI Avata must be activated before using for the first time. Make sure all devices are linked after powering on the aircraft, goggles, and remote control device. Connect the USB-C port of the goggles to the mobile device, run DJI Fly, and follow the prompts to activate.
-
Page 21: Flight Modes
Intelligent Flight Battery. Flight Modes DJI Avata has three flight modes, which can be switched via the flight mode switch or button on the remote control devices. Normal Mode: The aircraft utilizes GNSS, the Downward Vision System, and the Infrared Sensing System to locate itself and stabilize. -
Page 22: Aircraft Status Indicator
User Manual DJI Avata Aircraft Status Indicator DJI Avata has an aircraft status indicator on the top. Aircraft Status Indicator The aircraft status indicator shows the status of the flight control system of the aircraft. Refer to the table below for more information about the aircraft status indicator. -
Page 23: Return To Home
In order to avoid unnecessary danger due to insufficient power, DJI Avata will intelligently determine whether the current battery level is sufficient to return to the Home Point based on the current location. Low Battery RTH is triggered when the Intelligent Flight Battery is depleted to the point that the safe return of the aircraft may be affected. - Page 24 Before each flight, it is important to enter Settings and then Safety on the goggles and set a suitable RTH altitude. During RTH, if the aircraft is flying forward and the remote controller signal is normal, the DJI FPV remote controller 2 can be used to control the speed of the aircraft, but cannot control the orientation or fly left or right.
-
Page 25: Vision System And Infrared Sensing System
DJI Avata Vision System and Infrared Sensing System DJI Avata aircraft is equipped with both an Infrared Sensing System and a Downward Vision System. The Downward Vision System consists of two cameras. The Infrared Sensing System consists of two 3D infrared modules. -
Page 26: Advanced Calibration
If the abnormality persists after auto calibration, a prompt appears in the goggles that advanced calibration is required. Advanced calibration can only be performed using DJI Assistant 2 (Consumer Drones Series). Follow the steps below to calibrate the vision system cameras. -
Page 27: Flight Recorder
Use soft cloth if there is any dirt, dust, or water on the glass of the Downward Vision System and Infrared Sensing system. DO NOT use any cleaning product that contains alcohol. c) Contact DJI Support if there is any damage to the glass of the Downward Vision System or Infrared Sensing System. -
Page 28: Attaching The Propellers
User Manual DJI Avata Propellers There are two types of DJI Avata propellers, which are designed to spin in different directions. Make sure to match the propellers and motors by following the instructions. Propellers With Marks Without Marks Illustration Mounting Position... -
Page 29: Detaching The Propellers
Propeller blades are sharp. Handle with care. Only use official DJI propellers. DO NOT mix propeller types. Propellers are consumable components. Purchase additional propellers if necessary. Make sure that the propellers and motors are installed securely before each flight. -
Page 30: Intelligent Flight Battery
11. Communication: Information about the voltage, capacity, and current of the battery is transmitted to the aircraft. Refer to the DJI Avata Safety Guidelines and the stickers on the battery before use. Users shall take full responsibility for all operations and usage. -
Page 31: Powering On/Off
1. Charge with a USB charger and connect it to an AC outlet (100-240V, 50/60 Hz). Use a power adapter if necessary. 2. Connect the Intelligent Flight Battery to the USB charger using DJI Avata Adapter with the battery powered off. 3. The battery level LEDs display the current battery level during charging. - Page 32 Fully charge the battery at least once every three months to maintain battery health. DJI does not take any responsibility for damage caused by not using DJI Avata Adapter or DJI Avata Battery Charging Hub. The table below shows the battery level during charging.
-
Page 33: Installing/Removing The Battery
Disconnect the power port, press the battery buckles on the sides of the Intelligent Flight Battery, and remove it from the compartment. DO NOT insert or remove the battery while the aircraft is powered on. Make sure the battery is mounted securely. © 2022 DJI All Rights Reserved. - Page 34 Gimbal Profile The gimbal of DJI Avata stabilizes the camera and supports tilt angle adjustment, allowing you to capture clear and steady images and videos at high flight speed. The control tilt range is -80° to +65°. Use the remote control devices to control the tilt of the camera.
-
Page 35: Storing Photos And Videos
Storing Photos and Videos DJI Avata has 20 GB of built-in storage and supports the use of a microSD card to store photos and videos. A UHS-I Speed Grade 3 rating or above microSD card is required due to the fast read and write speeds necessary for high-resolution video data. -
Page 36: Power Supply
DJI Goggles 2 are equipped with high-performance dual displays and ultra-low-latency image transmission for use with DJI aircraft, giving you a real-time aerial FPV (First Person View) experience. The wireless streaming function enables you to project the live-feed from your mobile phone or computer to the goggles screen, bringing you an immersive viewing experience. - Page 37 For example, if you usually wear -6.0 D glasses and the self-prepared lens is -3.0 D, then you will need to adjust the diopter of the goggles to -3.0 D to ensure that the overall diopter is -6.0 D after the eyeglass frame is installed on the goggles. © 2022 DJI All Rights Reserved.
-
Page 38: Operation
Mode Shuttle Apeture Manual 1/200 Manual 1200K 20.5km/h 1.8km/h 20.5km/h 1.8km/h 500m 1024.4m 500m 1024.4m 12'59'' 12'59'' Status 15min 15min 10min 10min Album Transmission Status Setting Album More Transmission Setting © 2022 DJI All Rights Reserved. Status More Album Transmission... - Page 39 When operating the touch panel, use slow and precise swipes to maximize function accuracy. You can change the setting to enter the menu by swiping left to right. Go to Settings > Control > Invert Horizontal Swipe to make the changes. © 2022 DJI All Rights Reserved.
-
Page 40: Home Screen
Displays the remote control signal strength between the aircraft and remote control device and the video downlink signal strength between the aircraft and the goggles. 9. Remaining Flight Time Displays the remaining flight time of the aircraft after starting the motors. © 2022 DJI All Rights Reserved. - Page 41 Swipe down from the top of the touch panel to enter the shortcut menu and perform the following functions: • Start/stop recording • Lock/unlock the screen • Enable/disable Enhanced Display • Enable/disable Head Tracking • Adjust brightness • Adjust volume © 2022 DJI All Rights Reserved.
- Page 42 Displays the in-use aircraft model and detailed information of prompt alerts. To change aircraft, use the switch function in the upper right corner. 2. Album Shows the photos or videos stored on the microSD of the goggles. Select the file and confirm to preview. © 2022 DJI All Rights Reserved.
- Page 43 Note that the data cannot be recovered after formatting. Operate with caution. b. In Advanced Camera Settings, users can set the recording device, color, and anti-flicker, as well as enable or disable auto record on takeoff, and video subtitles. © 2022 DJI All Rights Reserved.
- Page 44 The wireless streaming function enables you to cast the video playing on the mobile device to the goggles screen (the video player must support the screen casting function). Using the Head Tracking Function DJI Avata supports a head tracking function, which can be enabled by clicking in the shortcut menu of the goggles.
- Page 45 DJI Avata DJI FPV Goggles V2 The DJI FPV Goggles V2 are equipped with a high-performance display and support 810p 120fps HD display and real-time audio transmission. By receiving the video signal from the aircraft, users can enjoy a first-person view of their aerial experience in real-time.
-
Page 46: Back Button
(will display A when Press and hold to switch between photo and video mode. in auto channel mode). Back Button Press to return to the previous menu or exit the current mode. Home Screen © 2022 DJI All Rights Reserved. - Page 47 If you select to record with both the aircraft and the goggles, the storage information of both the aircraft and goggles will be displayed on the home screen. If you select to record with only the aircraft or goggles, only the storage information of the corresponding device will be displayed. © 2022 DJI All Rights Reserved.
- Page 48 Home Point, and view the IMU and compass status and calibrate them if necessary. b. Find My Drone helps to find the location of the aircraft on the ground by using the cached video in the goggles. © 2022 DJI All Rights Reserved.
- Page 49 View device information, such as the serial number and the firmware of the goggles and linked devices. b. Select the system language. c. Select Reset All to reset the goggles and the linked devices to their default settings. d. Switch aircraft model. © 2022 DJI All Rights Reserved.
-
Page 50: Remote Control Devices
When used with the goggles, the DJI Motion Controller provides an immersive and intuitive flying experience that allows users to easily control the aircraft using hand movements. Built into the DJI Motion Controller is DJI's O3+ transmission technology, offering a maximum transmission range of 6 mi (10 km). The motion controller works at both 2.4 and 5.8 GHz and is capable of selecting the best transmission channel automatically. -
Page 51: Controlling The Aircraft
It is recommended to watch the tutorial video in the goggles before using for the first time. Go to Settings > Control > Motion Controller > Flight Control > First Flight Tutorial. Before using for the first time, practice flying with the motion controller using DJI Virtual Flight. Motion Controller Aircraft &... -
Page 52: Lock Button
6% to 15%. A low battery level alert can be canceled by pressing the power button. A critical battery level alert will sound when the battery level is less than 5% and cannot be canceled. © 2022 DJI All Rights Reserved. -
Page 53: Optimal Transmission Zone
DO NOT calibrate your compass in locations with strong magnetic interference, such as near magnets, parking lots, or construction sites with underground reinforced concrete structures. DO NOT carry ferromagnetic materials such as mobile phones during calibration. © 2022 DJI All Rights Reserved. -
Page 54: Controlling The Camera
DJI FPV Remote Controller 2 Built-into the DJI FPV Remote Controller 2 is DJI O3+ transmission technology, offering a maximum transmission range of 6 mi (10 km). The buttons make control of the aircraft and camera effortless while the detachable control sticks allow for the remote controller to be easily stored. - Page 55 Stick Neutral/Center Point: Control sticks are in the center. Moving the control stick: Push the control stick away from the center or push the throttle stick away from the lowest position when using Manual mode. © 2022 DJI All Rights Reserved.
- Page 56 The more the stick is pushed away from the center, the faster the aircraft moves. Flight Mode Switch Toggle the switch to select the desired flight mode. Position Flight Mode Manual mode Sport mode Normal mode © 2022 DJI All Rights Reserved.
-
Page 57: Start/Stop Button
F1 screw to make sure the stick resistance is suitable. When using Manual mode, the aircraft has no flight assistance functions such as automatic stabilization. Before using Manual mode, practice flying in Manual mode using DJI Virtual Flight to ensure that you can fly safely. - Page 58 The signal between the aircraft and the remote controller is most reliable when the antennas are positioned in relation to the aircraft as shown below. Weak Strong Optimal Transmission Zone In order to avoid interference, DO NOT use other wireless devices on the same frequency as the remote controller. © 2022 DJI All Rights Reserved.
-
Page 59: Stick Adjustment
F1 Right Stick Resistance Adjustment F1 Left Stick Resistance Adjustment Screw (Vertical) Screw (Vertical) F2 Right Stick Recentering Adjustment F2 Left Stick Recentering Adjustment Screw (Vertical) Screw (Vertical) 3. Reattach the rubber grip once the adjustment is complete. © 2022 DJI All Rights Reserved. - Page 60 DJI Fly App Connect the goggles to the mobile device, launch DJI Fly, and enter the home screen. Tap GO FLY to display the video transmission, which allows you to share the FPV camera view. Fly Spots View or share nearby suitable flight and shooting locations, learn more about GEO zones, and preview aerial photos of different locations taken by other users.
-
Page 61: Flight Environment Requirements
Make sure that all flights are carried out in an open area. The flying height is limited to 500 m. DO NOT exceed this height. Strictly abide by local laws and regulations when flying. Make sure to read the DJI Avata Safety Guidelines to understand the safety notices before flying. - Page 62 Restricted Zones, Authorization Zones, Warning Zones, Enhanced Warning Zones, and Altitude Zones. Users can view such information in real-time in DJI Fly. GEO Zones are specific flight areas, including but not limited to airports, large event venues, locations where public emergencies have occurred (such as forest fires), nuclear power plants, prisons, government properties, and military facilities.
-
Page 63: Pre-Flight Checklist
8. Make sure that the gimbal protector is detached and the camera lens and the sensors are clean. 9. Make sure that the goggles antennas are installed securely and the remote controller antenna is lifted. 10. Only use genuine DJI parts or DJI authorized parts. Unauthorized parts may cause system malfunctions and compromise fight safety. -
Page 64: Stopping The Motors
The default setting can be changed in goggles. When using the Manual mode, press the start/stop button twice on the remote controller to stop the motors at any time. Stopping motors mid-flight will cause the aircraft to crash. © 2022 DJI All Rights Reserved. -
Page 65: Video Suggestions And Tips
4. Start the motors. 5. For DJI motion controller, press and hold the lock button, to make the aircraft take off automatically, ascend to approximately 1.2 m, and hover. For DJI FPV remote controller V2, gently push the throttle stick up to take off. -
Page 66: Maintenance
DJI Goggles 2 Replacing the Antennas If an antenna is damaged, you can contact DJI after-sales to purchase a new one for replacement. To remove the antenna, hold the bottom of the antenna and pull it upwards. When installing, distinguish the left and right antennas and make sure the antenna is properly aligned with the port. - Page 67 Store the goggles in a dry place at room temperature to avoid damage to the lenses and other optical components from high temperatures and humid environments. Keep the lenses away from direct sunlight to avoid screen damage. © 2022 DJI All Rights Reserved.
- Page 68 The lenses are delicate. Clean them gently. DO NOT scratch them as this will affect viewing quality. Store the goggles in a dry room at room temperature to avoid damage to the lenses from high temperature and humid environments. © 2022 DJI All Rights Reserved.
-
Page 69: Specifications
Tilt: -95° to +75° Controllable Rotating Range Tilt: -80° to +65° Stabilization Single-axis (tilt) Max Control Speed 60°/s Angular vibration range ±0.01° (Normal mode) Electronic Roll Axis Live view correction not supported, supports video correction © 2022 DJI All Rights Reserved. - Page 70 Single shot Max Photo Size 4000×3000 Photo Format JPEG Used with DJI Goggles 2: 4K@50/60fps 2.7K@50/60/100fps 1080p@50/60/100fps Video Resolution Used with DJI FPV Goggles V2: 4K@50/60fps 2.7K@50/60/100/120fps 1080p@50/60/100/120fps Video format Max Video Bitrate 150 Mbps Color Profiles Standard, D-Cinelike RockSteady EIS...
- Page 71 Samsung PRO Plus V30 U3 V30 A2 256GB microSDXC DJI Avata dissipates heat by using the airflow of the propellers to prevent the aircraft from overheating. When the aircraft is in standby mode for a long time, the temperature may rise. In this situation, the built-in temperature control system can detect the current temperature and will power off the aircraft automatically to prevent overheating.
- Page 72 Chemical System LiNiMnCoO2 Energy 18 Wh Charging Temperature 0° to 45° C (32° to 113° F) Max Charging Power 12.6 W (5 V 2 A / 9 V 1.4 A) Operating Time Around 2 hours © 2022 DJI All Rights Reserved.
- Page 73 2.4 GHz: ≤28.5 dBm (FCC), ≤20 dBm (CE/SRRC/MIC) Transmitter Power (EIRP) 5.8 GHz: ≤31.5 dBm (FCC), ≤19 dBm (SRRC), ≤14 dBm (CE) Operating Temperature -10° to 40° C (14° to 104° F) Operating Time Approx. 5 hours © 2022 DJI All Rights Reserved.
- Page 74 Transmitter Power (EIRP) 5.8 GHz: ≤31.5 dBm (FCC), ≤19 dBm (SRRC), ≤14 dBm (CE) Operating Temperature -10° to 40° C (14° to 104° F) Charging Time 2 hours and 30 minutes Operating Time Approx. 9 hours © 2022 DJI All Rights Reserved.
-
Page 75: Firmware Update
Firmware Update Use one of the following methods to update the firmware: 1. Use the DJI Fly App to update the firmware for the entire set of devices including the aircraft, goggles, and remote control device. 2. Use DJI Assistant 2 (Consumer Drones Series) to update the firmware for a single device. - Page 76 This content is subject to change. Download the latest version from https://www.dji.com/avata If you have any questions about this document, please contact DJI by sending a message to DocSupport@dji.com. and DJI AVATA are trademarks of DJI. Copyright © 2022 DJI All Rights Reserved.
Need help?
Do you have a question about the AVATA and is the answer not in the manual?
Questions and answers