Advertisement
Quick Links
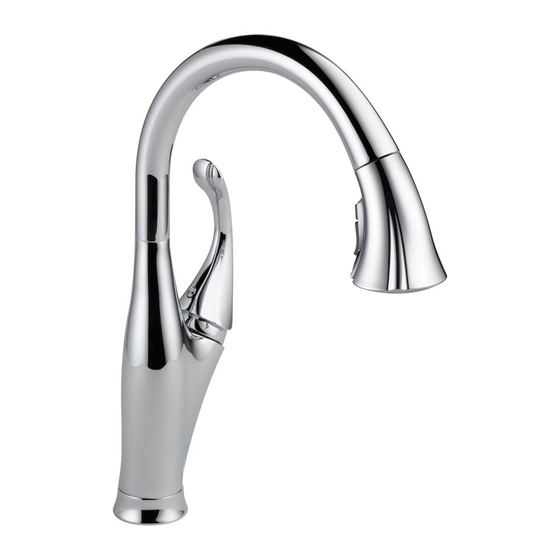
Models/Modelos/Modèles
9178-DST, 9181-DST, 9192-DST,
9678-DST, 9981-DST, 9992-DST,
16971-DST, 19922-DST, 19949-DST,
19978-DST & 19992-DST
Series/Series/Seria
Write purchased model number here.
Escriba aquí el número del modelo comprado.
Inscrivez le numéro de modèle ici.
WARNING: THIS FAUCET IS NOT TO BE USED WITH PORTABLE
DISHWASHERS!
ADVERTENCIA: ¡SESTA LLAVE NO SE DEBE UTILIZAR CON MAQUINAS
LAVAPLATOS PORTATILES!
AVERTISSEMENT: ON NE DOIT PAS BRANCHER UN LAVE-VAISSELE
PORTATIF SUR CE ROBINET!
For easy installation of your Delta
faucet you will need:
• To READ ALL the instructions completely
before beginning.
• To READ ALL warnings, care, and maintenance
information.
Para instalación fácil de su llave Delta
usted necesitará:
• LEER TODAS las instrucciones completamente
antes de empezar.
• LEER TODOS los avisos, cuidados, e
información de mantenimiento.
Pour installer votre robinet Delta
facilement, vous devez:
• LIRE TOUTES les instructions avant de débuter;
• LIRE TOUS les avertissements ainsi que toutes
les instructions de nettoyage et d'entretien.
www.deltafaucet.com
HIGH-RISE PULL-DOWN KITCHEN AND
83817
BAR / PREP FAUCETS
LLAVES DE AGUA ELEVADAS, DESLIZABLES HACIA
ABAJO, PARA COCINAS Y BARES / PREP
ROBINET À COL DE CYGNE ET BEC-DOUCHETTE
POUR ÉVIER DE BAR OU D'ÎLOT DE CUISINE
83817
1
You may need/Usted puede necesitar/
Articles dont vous pouvez avoir besoin:
1/8" (3.17mm)
5/3/16
Rev. A
Advertisement

Related Manuals for Delta 9178-DST


Summary of Contents for Delta 9178-DST
- Page 1 • To READ ALL the instructions completely before beginning. • To READ ALL warnings, care, and maintenance information. Para instalación fácil de su llave Delta usted necesitará: • LEER TODAS las instrucciones completamente antes de empezar. • LEER TODOS los avisos, cuidados, e información de mantenimiento.
- Page 2 19992-DST, 9992-DST & 9192-DST 19978-DST, 9678-DST & 9178-DST Models 19949-DST, 19992-DST, 9992-DST, 9192-DST, 19978-DST , 9178-DST & 9678-DST Place gasket (1) into groove on bottom of base ring (2). Place base ring onto then install hub (5) onto trim ring. Ensure that tabs on trim and base rings are sink over mounting hole, then install trim ring (3) over base ring.
- Page 3 16971-DST, 9181-DST, 9981-DST & 19922-DST Model 16971-DST, 9181-DST, 9981-DST & 19922-DST Place gasket (1) into groove on bottom of faucet (2). Insert faucet tubes and mounting shank (3) through mounting hole. Install mounting bracket (4) and nut (5) onto the mounting shank using wrench (6). Modelos 16971-DST, 9181-DST, 9981-DST y 19922-DST Coloque el empaque (1) en la ranura ubicada en la parte inferior de la llave de agua - grifo (2).
- Page 4 Optional / Opcional / Facultative Optional Escutcheon Installation Not included with all models - To order see replacement parts page for the sink. Slide the tubes and shank of the hub (4) through the escutcheon your model. For installations using the 10" escutcheon, be certain and use and mounting holes, then install hub onto escutcheon.
- Page 5 Loop tubing (5) if it is created. Delta is not responsible for tubing that is cut l Tubing is cut too short: buy a coupling union and a too long.
- Page 6 Custom Fit Connections Incorrect Installation Instalación Incorrecta Conexiones Especiales Installation Incorrecte Spéciaux Branchement Correct method Método Correcto Bonne méthode Do not install sleeve Ensure cut is straight. upside down. Custom Fit Connections - Plastic Sleeve Installation Instructions No instale la manga Asegúrese que el corte 1.
- Page 7 Flush Supply Lines Then, while holding the outlet tube (1) over the Place a bucket below outlet tube (1) and move Move faucet handle (2) to the off position, and bucket, slowly open and close the supply stops the valve handle (2) to the open mixed position. carefully remove container of water.
-
Page 8: Instalación De La Manguera
Soap Dispenser Installation Note: Soap dispenser not included with all models. Remove nut (1). Separate head (2) from body (3). Insert body (3) and gasket (4) through selected hole in sink. Make sure Hose Installation gasket (4) is properly seated in the base. Secure body to sink Side View with nut (1). - Page 9 3 Function Wand Mango de 3 Funciones Poignée à 3 Fonctions 90º Check the operation of the 2 function sprayer by pushing the Turn on water supplies (1) and faucet valve handle (2). Check trigger (A) from aerator to spray. For models with a 3 function all connections at arrows for leaks.
- Page 10 Setting The Handle Limit Stop (Optional) This faucet includes an integrated handle limit stop that has two positions. Position because it limits the amount of hot water in the mix; however, this handle limit stop will not always prevent scalding because it does not compensate for incoming 1, to the left, allows full handle motion (the full range between “all cold”...
- Page 11 * AVISO: Si no aprieta fijamente la tuerca tapa con una IMPORTANTE: Instale la rejilla otra vez dentro Su llave de agua tipo deslizable Delta tiene un siste- llave de tuercas pudiera resultar en daño por agua. de la cabeza del rociador (si no la reinstala ma de protección contra el contraflujo, incorporado,...
Need help?
Do you have a question about the 9178-DST and is the answer not in the manual?
Questions and answers