Advertisement
Models/Modelos/Modèles
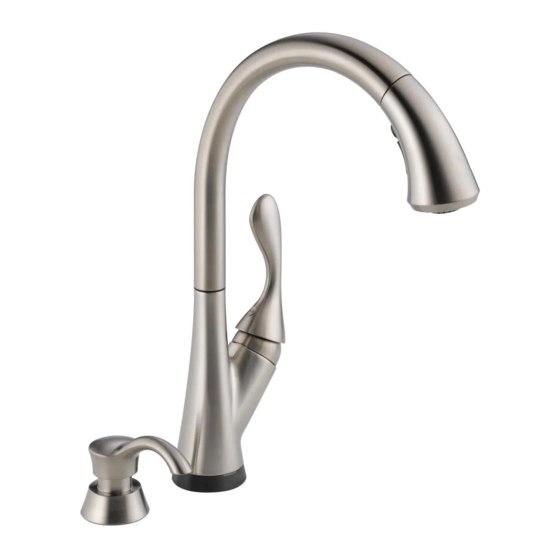
ADDISON™, ASHTON
®
& LELAND
Write purchased model number here.
Escriba aquí el número del modelo comprado.
Inscrivez le numéro de modèle ici.
You may need/Usted puede necesitar/Articles dont vous pouvez avoir besoin:
3/32"
For easy installation of your
Delta
faucet you will need:
®
• To READ ALL the instructions completely
before beginning.
• To READ ALL warnings, care, and maintenance
information.
Para instalación fácil de su llave
Delta
usted necesitará:
®
• LEER TODAS las instrucciones completamente
antes de empezar.
• LEER TODOS los avisos, cuidados, e
información de mantenimiento.
Pour installer votre robinet
Delta
facilement, vous devez:
®
• LIRE TOUTES les instructions avant de débuter;
• LIRE TOUS les avertissements ainsi que toutes
les instructions de nettoyage et d'entretien.
Congratulations, Your faucet has a new feature. Delta
contains the splatter with an innovative water shield. Now you can power off the mess without making a bigger one.
Felicitaciones, su grifo tiene una nueva característica. La tecnología de Delta® ShieldSpray™ corta los sucios persistentes con un chorro intenso y
contiene la salpicadura con un protector de agua innovador. Ahora usted tiene la potencia de limpieza sin ensuciar más.
Félicitations! Votre robinet a une nouvelle caractéristique. La technologie ShieldSprayMC de Delta® utilise un jet concentré qui déloge la saleté
incrustée et un écran d'eau innovateur qui empêche les éclaboussures. Vous pouvez maintenant déloger la saleté sans tout salir dans les environs.
To access additional technical documents & product info, visit www.deltafaucet.com/p/Your-Model-Number-Here
(Example: www.deltafaucet.com/p/9159T-DST)
Para acceder a documentos técnicos adicionales e información sobre el producto, visítenos en www.deltafaucet.
com/p/Your-Model-Number-Here (ejemplo: www.deltafaucet.com/p/9159T-DST)
Pour avoir accès à des documents techniques supplémentaires et à de l'information sur le produit, visitez www.delta-
faucet.com/p/Votre-numéro-de-modèle-ci (exemple : www.deltafaucet.com/p/9159T-DST)
92834
®
, ESQUE™
®
TOUCH
O
PULL-OUT KITCHEN & BAR/ PREP FAUCET
2
LLAVE DE AGUA/GRIFO EXTRAÍBLE TOUCH
COCINAS Y FREGADEROS PARA PREPARATIVOS/
BARES
ROBINET TOUCH
O
2
ÉVIER D'ÎLOT, DE BAR ET DE CUISINE
9178T-DSTp
9678T-DSTp
®
ShieldSpray™ Technology cuts through stubborn messes with a concentrated stream and
1
®
À BEC RÉTRACTABLE POUR
9181T-DSTp
9192T-DSTp
9981T-DSTp
9992T-DSTp
?
www.deltafaucet.com
1-800-345-DELTA (3358)
customerservice@deltafaucet.com
®
O
PARA
2
19922T-DSTp
04/11/2018
Rev. F
Advertisement
Table of Contents

Subscribe to Our Youtube Channel
Related Manuals for Delta TOUCH2O ADDISON


Summary of Contents for Delta TOUCH2O ADDISON
- Page 1 Now you can power off the mess without making a bigger one. Felicitaciones, su grifo tiene una nueva característica. La tecnología de Delta® ShieldSpray™ corta los sucios persistentes con un chorro intenso y contiene la salpicadura con un protector de agua innovador.
-
Page 2: Cleaning And Care
Delta ® Esta es la garantía exclusiva por escrito de Delta Faucet Company y la garantía no es transfer- ible. Delta Faucet Company no será responsable por cualquier daño a la llave de agua que resulte del mal uso, abuso, negligencia o mala instalación o mantenimiento o reparación incorrecta, incluy-... - Page 3 ® LELAND RP80977 Wand Retainer & Replacement Kit Models/Modelos/Modèles Soporte para el mango y piezas de 9178T-DST & 9678T-DST repuesto Trousse de rechange et pièce de retenue de douchette RP50585p Button & Set Screw Botón y Tornillo 9678T de Presión Bouton et Vis RP51480p de calage...
- Page 4 ADDISON Models/Modelos/Modèles RP63193p Lever Handle, Button & Set Screw RP47271p 9192T-DST & 9992T-DST Manijas de Palanca, Botón y Tornillo Button & Set Screw Botón y Tornillo de Presión Manette, Bouton et Vis de calage Bar Faucet Bouton et Vis de calage Grifo para Bares Pour évier de bar RP53879p...
- Page 5 ESQUE RP80977 Models/Modelos/Modèles Wand Retainer & Replacement Kit 9181T-DST & 9981T-DST Soporte para el mango y piezas de repuesto Trousse de rechange et pièce de RP83820p retenue de douchette Lever Handle, Button & Set Screw Manijas de Palanca, Botón y Tornillo Manette, Bouton et 9981T Vis de calage...
- Page 6 ® ASHTON Models/Modelos/Modèles 19922T-DST RP53879p RP63194p Button Lever Handle, Button Botón & Set Screw Bouton Manijas de Palanca, Botón y Tornillo Manette, Bouton et Vis de calage RP40650 Set Screw Tornillo de Presión Vis de calage RP80977 Wand Retainer & Replacement Kit RP51502p Soporte para el mango y...
- Page 7 RP93410 Filter Filtro EP92546 Filtre Solenoid Assembly Ensamble de Solenoide Électrovanne For PC, CZ, & AR finishes, order EP92546 For RB & SP finishes, order EP92546XX Para acabados PC, CZ, y AR, ordene EP92546 Para acabados RB & SP, ordene EP92546XX RP13938 Pour les finis PC, CZ et AR, commandez EP92546 O-Ring (2)
- Page 8 OPTIONAL / OPCIONAL / FACULTATIVE Insert D Optional Escutcheon Installation Mount Faucet to Deck Insert faucet tubes and shank through mounting isolation feature (7) on bracket is in sink hole. For optional installations using the 10 1/2” hole in sink; and, place faucet (1) over mounting Shank (8) must not touch edge of sink to ensure escutcheon, order RP47274 (specify finish) not hole.
-
Page 9: Water Line Connections
Ensure all fittings and end connections are free of ● Tubing is not cut perpendicular to the axis of the leak-free joint to be created. Delta is not debris. Faucet fittings (1) are 3/8" compression, tube: carefully make an additional cut, being careful responsible for tubing that is cut too short or with ends colored red for hot and blue for cold. - Page 10 Correct method Incorrect Installation Instalación Incorrecta Método Correcto Installation Incorrecte Bonne méthode Do not install sleeve Ensure cut is straight. upside down. No instale la manga Asegúrese que el corte boca abajo. esté recto. Custom Fit Connections - Plastic Sleeve Installation Instructions 1.
-
Page 11: Solenoid Installation
Flush Supply Lines Solenoid Installation Because your sprayer has been factory assembled to the hose, Slide tube (15) into the top solenoid nipple (16). Rotate clip (17) over tube and nipple we do not recommend removing to flush the lines. Instead, if to secure connection. - Page 12 Push clip (21) onto shank as shown to ensure clip is tight onto shank. Ensure LED Push hose end (19) onto solenoid assembly outlet (18). Attach clip (20) over hoses wire (22) is properly pushed in to solenoid. Make sure wire extends away from as shown.
-
Page 13: Check For Leaks
“AA” Batteries (Last up to 2 years) Pilas “AA” (Duran hasta 2 años) Piles « AA » (Durée utile de 2 ans) “C” Batteries (Last up to 5 years) Pilas “C” (Duran hasta 5 años) Piles « C » (durée utile de 5 ans) Important: Place batteries in holder, secure cap and lay on cabinet floor as shown in Step 9. - Page 14 3 Function Wand Mango de 3 Funciones Poignée à 3 Fonctions 90º Sprayer will lock into position when brought into proximity of the spout magnet. The WIth the wand undocked, press button 1 to use the Shieldspray mode. sprayer can be removed by either pulling directly out from the spout or by twisting 90° in Hold the plate 1/2 way through the bubble.
-
Page 15: Maintenance
Maintenance If faucet exhibits very low flow A. Remove and clean aerator (1) (Note: some models require wrench (2) to remove aerator.), or B. Unscrew hose from spray head and clean debris from screen - the screen is located just inside the spray (3). Note: Not all spray heads have a screen. C. - Page 16 (43°C). 5. Auto Shut-off—the faucet will automatically shut off after running for 4 minutes. 3 red flashes before solenoid opens or closes - replace batteries. Sugerencias rápidas para su llave de agua/grifo Delta Touch ® ® Guía del LED...
- Page 17 Solenoid Troubleshooting Note: Normal operation of the faucet will turn off water flow if faucet is not touched for 4 minutes. the spray head inlet. Move handle to the “on” position to verify water is reaching the sprayer. 1. If your spout indicates three red flashes, replace the batteries. If the spout still indicates three red Replace spray head.
- Page 18 Notes / Notas / Notes 92834 Rev. F...
- Page 19 Notes / Notas / Notes 92834 Rev. F...
- Page 20 92834 Rev. F...
Need help?
Do you have a question about the TOUCH2O ADDISON and is the answer not in the manual?
Questions and answers