Table of Contents
Advertisement
Quick Links
Advertisement
Table of Contents
Troubleshooting

Related Manuals for ECS SG20QT1C


Summary of Contents for ECS SG20QT1C
- Page 1 SG20QT1C User Guide...
- Page 2 Regulatory Compliance Information FEDERAL COMMUNICATIONS COMMISSION INTERFERENCE STATEMENT This device complies with Part 15 of the FCC Rules. Operation is subject to the following two conditions: (1) this device may not cause harmful interference, and (2) this device must accept any interference received, including interference that may cause undesired operation.
- Page 3 CAUTION: Any changes or modifications not expressly approved by the grantee of this device could void the user's authority to operate the equipment. This device is slave equipment, the device is not radar detection and not ad-hoc operation in the DFS band. RF Exposure warning This device meets the government’s requirements for exposure to radio waves.
- Page 4 Canadian Department of Communications Compliance Statement This digital apparatus does not exceed the Class B limits for radio noise emissions from digital apparatus set out in the Radio Interference Regulations of the Canadian Department of Communications. This device complies with Industry Canada licence-exempt RSS standard(s).
- Page 5 French SAR/DAS Votre ordinateur a un DAS. Pour plus d'informations, voir le portail radiofréquences-sante-environnement: www.radiofrequences.gouv.fr In the European Union, this symbol indicates that this product including battery must not be disposed of with household waste. It is your responsibility to hand it over to a designated collection point for the recycling of waste electrical and electronic equipment.
- Page 6 Attention: Teachers, Parents and Adult Supervisors This product is an educational tool designed for school children, ages 6 and up. There must be supervision by an adult on school children under 10 when using this laptop. It is a must to have a thorough explanation to students on safe and proper handling of the laptop, power supply, battery pack, and power cord.
- Page 7 Safety Precautions The following are lists of precautionary measures the students must understand before using this computer inside the classroom or home environment: Do not place near the fire or other sources of heat. Do not expose to magnetic fields. Do not expose to direct sunlight.
- Page 8 Do not disassemble or open, crush, bend or deform, puncture, or shred. Do not modify or remanufacture, attempt to insert foreign objects into the battery, immerse or expose to water or other liquids, or expose to excessive heat, fire, or other hazard. Only use the battery in the system for which it was specified.
-
Page 9: Table Of Contents
Contents Getting to know your computer ..........1 Package contents ......................1 Layout ............................2 Front ..........................2 Left ..........................3 Right ..........................3 Back ..........................4 Function keys ......................5 Using your computer ..............6 Powering ON/OFF ......................6 Powering on your computer ................ - Page 10 Settings screen ......................... 14 Setup Your Google Account ..................15 Changing the language settings ................15 Pin and unpin your app ....................16 Pinning an App to Shelf ..................16 Unpinning an App ....................16 Wireless LAN ........................17 Enabling wireless connection ................ 17 Updating Chrome OS ....................
-
Page 11: Getting To Know Your Computer
1. Getting to know your computer Package contents Carefully unpack your box and take out the items listed as below. If any of the items is missing or damaged, contact your dealer immediately: • One laptop • One AC adapter •... -
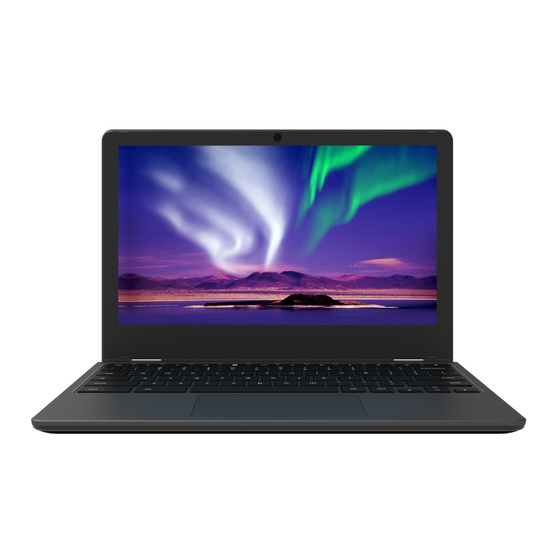
Page 12: Layout
Layout Front Name Function Often for taking self-portraits as well as Web camera for video conferencing. Mainly for sound and speech recording Microphone The main display of your laptop. Press it to power on/off your laptop. Power button Allows you to control your system using Touchpad figure gestures... -
Page 13: Left
Left Name Function Type-C USB port Plug your USB Type-C supported devices here. (USB 3.2 Gen1) SIM card slot (Nano Insert Micro SIM card here type) (Optional) Right Name Function Combo Audio jack for Plug your 3.5mm headphone here microphone/headphone USB 3.2 Gen1 Plug your USB devices here. -
Page 14: Back
Back Name Function The sound system has two speakers for Speaker playing music, notification sounds, and other audio data. -
Page 15: Function Keys
Function keys Go to the previous Increases the display page. brightness. Refresh your current Mutes/unmutes the page. audio output. Open the page in Decreases the volume full-screen mode. level. Show all your open Increases the volume windows. level. Turns the computer on Take a screenshot and off. -
Page 16: Using Your Computer
2. Using your computer Powering ON/OFF Powering on your computer 1. If this is the first time you turn this computer on, connect the AC adapter and fully charge the battery. 2. Press the power button (normally 1 to 2 seconds) until you see the power indicator lights up in blue. -
Page 17: Powering On For The First Time
Powering on for the first time The laptop will require you to do the initial setup, which including: Sign in to or create your Google Account Setup a wireless connection and more Please follow the instruction to complete the initial setup. Powering off your computer Save all your data before powering your computer off. -
Page 18: Putting Your Computer Into Sleep Mode
Putting your computer into sleep mode When you will be away from your computer for a short time, you can put it to sleep by closing the display panel. Waking up your computer To wake up your computer, just open the lid, then press any key or swipe the touchpad. -
Page 19: Three Fingers
Drag two fingers vertically the touchpad to scroll vertically. Drag two fingers horizontally on the touchpad to scroll horizontally. Three fingers Action Explanation Press and drag upward with three fingers to bring existing active windows out on the desktop. Press and drag downward with three fingers to hide all existing active windows and bring out the desktop. -
Page 20: Chromebook Interface
3. Chromebook Interface Virtual desks The Desktop screen is as shown below and natively provides virtual desktop feature. Virtual desks gives you the ability to have multiple desks interfaces on your laptop and to switch between them like you have multiple monitors. With this feature, you can create many desktops and respectively keep different apps open, separating types of work. -
Page 21: Start With Virtual Desk
Start With Virtual Desk You'll need to open the Task View to work with virtual desktops. To do this, click press the show windows key, which is as shown on the left. Creating a new desktop For the first time, you'll only see the view at the top of the page.The first desktop is your current one. -
Page 22: Launcher
Launcher To search, show your apps, and interact with Google Assistant, you can either click on the Launcher icon located in the corner of your screen or press once on the Launcher key of the keyboard. And the launcher page will appear, as shown below For how to setup this menu, please refer to page 15. -
Page 23: App Shortcuts Area
App shortcuts area In this area, you can put the shortcuts of your frequently used apps. For how to arrange this area, please refer to page 15 Status area The right part of the shelf holds several icons that show you the status of your system, as shown below. -
Page 24: Setup And Connection
Setup and Connection Settings screen To access to the Settings screen: 1. Click the Status are in the low-right corner of the Desktop. 2. Click the Settings icon 3. To show the advanced settings, scroll to the bottom and select Advanced. -
Page 25: Setup Your Google Account
Setup Your Google Account To set up your Chromebook, you'll need: 1. Your Google Account username and password 2. Access to a network In the sign-in screen. At the bottom left of the screen, click on the button labeled Add Person. You can sign in using your Google account or create a new Google Account if you don’t already have one. -
Page 26: Pin And Unpin Your App
Pin and unpin your app Pinning an App to Shelf To add an app on the shelf: 1. Select the Launcher icon. 2. Click to select All Apps (or type the name of the desired app). 3. Locate and two-finger tap the desired app icon. 4. -
Page 27: Wireless Lan
Wireless LAN Enabling wireless connection 1. Select the Status area of the shelf in the lower-right corner of the desktop. 2. Select Settings icon. 3. Select Network and set the Wi-Fi function to ON, as shown below icon “Show known networks”, and a network list will 4. -
Page 28: Updating Chrome Os
Updating Chrome OS Automatic update Each time you turn on your Chromebook, it automatically checks for updates. When an update is available, this update icon will appear as a notification in the status area. To apply the update 1. Select the Status area of the shelf in the lower-right corner of the screen. -
Page 29: Connecting An External Device
Connecting an External Device Connecting to the USB port 1. Plug a USB device into a USB port on your Chromebook, 2. Select the Launcher icon. 3. Click to select All Apps (or type the name of the desired app). 4. - Page 30 Charging your battery Plug the USB-C end of the adapter into a USB-C port on the left side of your laptop Plug the adapter into a wall-socket. Battery indicator is red when battery is charging. When the battery is fully charged, the indicator stays solid blue.
- Page 31 Inspecting your battery status By inspecting the status area To check the status of your battery, click the battery icon located in the bottom right corner of the screen which shows you the estimated battery time remaining, as shown below. The control panel shows the status of your battery, which described as below.
-
Page 32: Chromebook Help And Troubleshooting
Chromebook Help and Troubleshooting Settings for Sleep mode To save battery power while your Chromebook is on, you can put it to sleep by closing the lid. Or 1. At the bottom right, select the Status area in the lower-right corner of the screen. -
Page 33: Troubleshooting
Troubleshooting This section describes some common problems and suggested solutions, and ways to recover your computer from a crash. Be aware that the problems and solutions described here are meant only as a guide. They are not definitive problem solving techniques. For certain problems, you might need help from your reseller or your service provider. - Page 34 Questions Answers Chromebooks use apps from the Google Play What software Store and on the web, instead of traditional works on a software applications. There are apps to be Chromebook? productive, get creative, enjoy movies and shows, and play games and more. Download Chromebook apps from the How do I get more Google...
- Page 35 You’ll use your Google Account to sign in to your Chromebook. It is the same account you Why does my use for Google services such as Gmail and Chromebook need my Google Account Drive. Your Chromebook uses your account information? information to automatically sign you into apps and services.
-
Page 36: Specification
6. Specification Qualcomm SC7180 (QSIP) 64 bits ARM v8 compliant applications Processor processor Dual high performance cores Adreno GPU 6xx, with 64 bits addressing Qualcomm SC7180 (QSIP) Sixth-generation LTE multimode modem Cat12 Cat 13 uplink, up to 150Mbps LTE Modem ... - Page 37 Polymer 2 cell 2S1P 5530mAh Li-Polymer Battery, soft pack, non-removable, 2 cells, 2s1p/7.6V/5530mAh/ 42Wh Battery Polymer 2 cell 2S1P 4000mAh Li-Polymer Battery, soft pack, non-removable, 2 cells, 2s1p/7.6V/4000mAh/ 30Wh 2 x USB 3.2 Gen1 Type C port, Data, PD, and DP(switchable) ...
- Page 38 Safety& cTUVus WEEE(Declaration) Environment RoHS (Declaration) Energy Star V8.0 Erp Lot 6 Design CEC-BCS ( for California ) ready CEC-Computer ( for USA ) Drop test MIL-STD-810H Others Validation (122cm) Operating ...
Need help?
Do you have a question about the SG20QT1C and is the answer not in the manual?
Questions and answers