Table of Contents
Advertisement
Quick Links
model no. 040-1190-4
NOTE: Please read instructions carefully before installation.
Please refer to assembly instructions and ensure the bike carrier is installed
correctly.
Please keep the instruction manual in your vehicle for future reference.
For assistance, please contact customer service at
1-888-670-6686 (toll-free).
HITCH MOUNT PLATFORM BIKE
CARRIER
INSTRUCTION
MANUAL
Advertisement
Table of Contents

Related Manuals for CCM 040-1190-4


Summary of Contents for CCM 040-1190-4
- Page 1 040-1190-4 HITCH MOUNT PLATFORM BIKE CARRIER INSTRUCTION NOTE: Please read instructions carefully before installation. MANUAL Please refer to assembly instructions and ensure the bike carrier is installed correctly. Please keep the instruction manual in your vehicle for future reference.
- Page 2 040-1190-4 CLEANING READ AND FOLLOW THE SAFETY INSTRUCTIONS BEFORE USING THE BIKE CARRIER. • Wipe the bike carrier with a damp cloth and mild detergent after every use and before storage. IT IS USER'S RESPONSIBILITY TO ENSURE THE SAFE AND PROPER USE OF THIS PRODUCT.
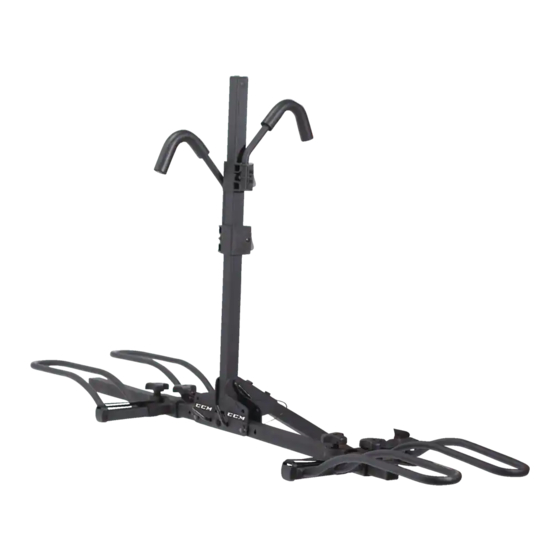
- Page 3 040-1190-4 PACKAGING CONTENTS TOOLS REQUIRED • 5/8" (16 mm) wrench (for two bolts on the stinger assembly). PART NUMBER DESCRIPTION QUANTITY ILLUSTRATION/ • 3/4" (19 mm) wrench (for the anti-sway hitch pin bolt). • 1/2" (13 mm) wrench and 3" (7.6 cm) extension (optional) (to secure the centre mast).
- Page 4 040-1190-4 STINGER INSTALLATION FOR 2" (5 CM) HITCH RECEIVER Insert step bolt (I) into the aligned holes and secure using flat washer (J) and nylon lock nut (K). Tighten Insert the 2" (5 cm) receiver adaptor (4) of the them using 1/2"...
- Page 5 040-1190-4 STINGER INSTALLATION FOR 1 1/4" (3.2 CM) HITCH RECEIVER LOADING BICYCLES ON THE BIKE CARRIER Disassemble the 2" (5 cm) receiver adaptor (4) of the Place the bicycles (8) in an alternating direction on stinger (D) by removing the two #3 cross-head the bike carrier in such a way that the wheels of screws (6) using a screwdriver.
- Page 6 040-1190-4 Secure the bicycle wheels with the left and right Hold the centre mast (E) and remove the top wheel trays using straps (8). quick-release pin (1) from the bike carrier. Tilt the centre mast (E) completely away from the vehicle.
- Page 7 040-1190-4 FOLDING THE BIKE CARRIER Ensure that the bike carrier is not loaded with bicycles. NOTE: The wheel trays can be folded up while the rack is not in use or for storage. Rotate the bottom quick-release pins (1) upwards and remove the pins from the centre bracket.
Need help?
Do you have a question about the 040-1190-4 and is the answer not in the manual?
Questions and answers
Stringer with receiver adaptor. My box of didn’t have it.