
Subscribe to Our Youtube Channel
Related Manuals for ADVENOR X-BIKE


Summary of Contents for ADVENOR X-BIKE
- Page 1 ADVENOR X-BIKE Assembly & Operation Manual Scan to view assembly video or visit https://youtu.be/1bwOlfdNHOU...
-
Page 2: Read Before Assembly
When installing the pedals, please make sure that you install each pedal to the corresponding crank by checking L or R labels. ADVENOR shall not take the responsibility for the damages of the pedal which was installed to the unmatching crank by customers. -
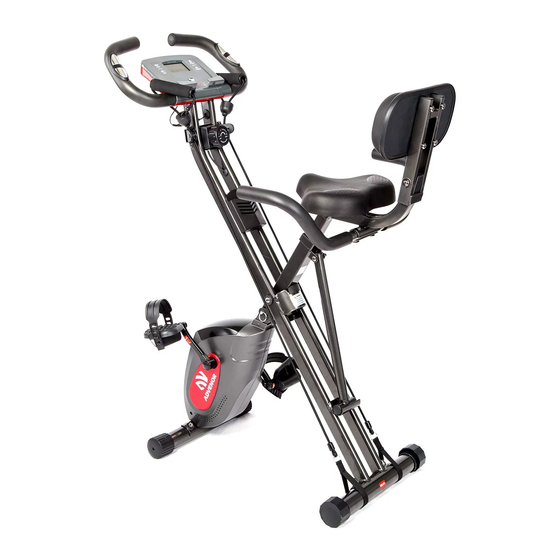
Page 3: Name Of Parts
1. Name of Parts FRONT HANDLE BAR MONITOR CONTROL BUTTON BACKREST TENSION KNOB MAIN FRAME SUPPORTING TUBE DEVICE HOLDER ADJUSTING KNOB SEAT SAFETY PIN REAR HANDLE BAR RIGHT STRAP LEFT STRAP RIGHT PEDAL LEFT PEDAL UPRIGHT STABILIZER FRONT STABILIZER RESISTANCE BAND REAR STABILIZER ANTI-SKID ENDCAP... - Page 4 2. Parts in the Package Main Frame x1 Front Handle Bar with Monitor x1 Resistanece Band x2 Seat & Seat post Seat post x1 Seat x1 Supporting Tube Backrest x1 Rear Handle Bar x1 Rear stabilizer x1 for Backrest x1 Front stabilizer x1 (with transportation wheels) (Foldable)
-
Page 5: Assembly Instruction
3. Assembly Instruction Tip: Please wear gloves and assemble in the order listed in the manual. 1. Unfold the main frame by adjusting the safety pin from position A to position B as shown in the picture 1. (To adjust the position of safety pin, please press the small spring button and pull the ring on the other side simultaneously to remove from position A and insert the safety pin at the position B) EXPANDED... - Page 6 3. Use Tool A to install the left and right pedals to the matching cranks corre- spondingly. ADVENOR shall not take the responsibility for the damages of the pedal which was installed to the unmatching crank by customers. Steps: ① Confirm the labels marked as L and R on the pedals and cranks as shown in the picture 4 before assembly.
- Page 7 ③ Use Tool A3 to tighten the nuts in the opposite direction of the arrow on the crank as shown in the picture 5. Left Right Picture 5 Tip 1: Please be sure that each pedal is connected to the correct crank. Otherwise, the screw thread will be worn causing permanent damage to the exercise bike.
- Page 8 5. Install the seat post to the seat tube. Steps: ① Remove the adjusting knob which has been pre-assembled on the seat tube by rotating anticlockwise. (See Picture 8-1) ② Install the seat post into the seat tube and adjust to the suitable height. (See Picture 8-2) ③...
- Page 9 7. Remove the elastics which have been used to prevent four screws and spring washers on the supporting tube for backrest from scattering and please also remove the screws and spring washers . Use Tool B1 to install the backrest to the supporting tube as shown in the picture 10.
- Page 10 9. Use Tool A1 and Tool B1 to remove the washer, domed nut and screw which have been pre-assembled on the upright stabilizer. Put the supporting end into the holder as the picture 12 shows. Use Tool A1 and Tool B1 to tighten the screw that connects the upright stabilizer with the main frame.
- Page 11 11. Connect the cables by referring to the picture 14. Picture 14 12. Install two AAA batteries into the monitor and then put the lid on. Tip: Please change the battery once the monitor stops working. 13. Use Tool A4 and B1 to remove the two domed nuts and screws which have been pre-assembled on the main frame next to the tension adjusting knob.
- Page 12 4. Operation Instruction ※ Please use the exercise bike in good physical condition and wear suitable clothes and shoes for fitness. ※ Check all the screws and nuts are tightened and adjust the seat to the suit- able height before getting on. ※...
- Page 13 Functions on the monitor (See Picture 17): Scan : The monitor tracks the real-time date automatically. Speed: It shows the speed for every second. The highest speed is 99.99 km/h. Time: It shows how long you have been riding and counts from 0’0’’ to 99’99’’. Distance: It ranges from 0.00 km to 99.99 km and increases by 0.01 km.
- Page 14 5. Storage and Move ① For space-saving storage, Advenor exercise bike can be folded by adjusting the safety pin from position B to position A as shown in the picture 18. Tip: In order to protect the plastic device holder which is fixed to on the front main frame, please adjust the seat position to the highest level before folding the exercise bike.
- Page 15 Acknowledgements Dear customer, Thank you for choosing ADVENOR. We commit to provide the best products and services to every customer. If you have any inquiries or require further assistance, please contact ADVENOR customer support by Phone: +1 323-686-3277 Email: service@advenorfitness.com Your feedback and suggestions are always important and valuable to us.
Need help?
Do you have a question about the X-BIKE and is the answer not in the manual?
Questions and answers