
Related Manuals for JASION EB7


Summary of Contents for JASION EB7
- Page 1 User Manual COPYRIGHT©2021 JASION. ALL RIGHTS RESERVED. The manufacturer reserves the right to make changes to the product and manual at any �me. Visit www.jasionride.com to download the latest user manual.
-
Page 2: Table Of Contents
Home Page Product Safety No�ce Warning Message Package Contents Product Overview Assembly Ba�ery Key Posi�ons Start-up Procedure Remove the Ba�ery Charge Your E-Bike Display and Se�ng Troubleshoo�ng Specifica�ons FAQS Limited Warranty Contact Us... -
Page 3: Product Safety No�Ce
Product Safety No�ce This user manual will help you assemble Don't Ride Un�l You Read This: and operate your new electric bike. Be sure to read all of the informa�on in this manual before riding. Always wear a helmet when riding your electric bike. NOTE TO ALL RIDERS UNDER 18 YEARS OF AGE: It's very important that you get parental permission before riding your... -
Page 4: Warning Message
Abuse - We do not cover physical damage due to negligent care and extreme riding. Whenever you ride the Jasion Electric Bike, you risk severe injury or even death from loss of control, collisions, and falls. Use cau�on and ride at your own risk. -
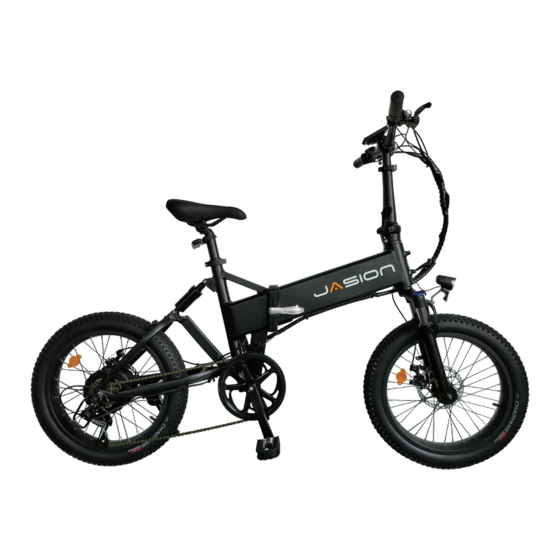
Page 5: Product Overview
Product Overview Assembly LCD Display Visit www.jasionride.com for addi�onal help with assembly, including a step-by-step video walk-through. Display Controls Derailleur If you do not feel comfortable assembling the bike yourself, we recommend taking your new bike to a bike shop for assembly and inspec�on. If you are willing to assemble the bike yourself, be sure to follow all Grip instruc�ons, properly adjust gears and brakes, and set �re pressure. -
Page 6: Assembly
Assembly Assembly 6. Make sure the LCD display and logo are 5. Insert the handlebar into the 1. Locate the stem and insert the 2. Unlock and pull up the latch on the align with the center of the front fork. Note: stem. - Page 7 Assembly Assembly 1. Locate the front wheel. Adjust the posi�on of the 2. Keeping the safety hook inside and the nut outside. front wheel to align the axle at the center of the Make sure the sa�y hook is locked into the front fork. 1.
- Page 8 Assembly Assembly For be�er pedaling, safety and overall riding comfort, posi�oning the seat at the right height is important. The rider's leg length is used to determine the seat's posi�on. When you pedal, your hips should remain level and your legs should be almost fully extended at the bo�om o�he pedal stroke, but not over-extended.
- Page 9 Assembly Assembly NOTICE: Ensure the seatpost and seat are Adjus�ng the Suspension Fork properly adjusted before riding. DO NOT raise the seatpost beyond the minimum The suspension fork can move up and down up to 80mm to inser�on marking etched into the seatpost cushion bumps in the riding surface, which can make riding √...
-
Page 10: Ba�Ery Key Posi�Ons
NOTICE: You have to press the key then you can switch to unlock posi�on Note: If the pedal/ chain doesn't run smoothly or something seems misaligned, please contact Jasion Support Team. -
Page 11: Start-Up Procedure
Start-up procedure Remove the ba�ery For your convenience, the jasion ba�ery can be removed. A�er the bike has been properly assembled according to the assembly video, all components are secured correctly, a cer�fied, reputable mechanic has checked the assembly, and you have read this en�re manual, turn on the bike and select a pedal assist level following the steps below: 1.Test the ba�ery lock security. -
Page 12: Charge Your E-Bike
Charge Your E-Bike Charge Your E-Bike Before using the electric bike, you must fully charge the ba�ery. The ba�ery can be removed from the bicycle for charging. To remove the ba�ery, turn the key to the posi�on 3. (see the previous remove ba�ery sec�on for details). -
Page 13: Display And Se�Ng
Display and Se�ng LCD Display Controls Opera�on Direc�ons Error Display USB Turn on bike Press and hold un�l power engages (1) Display Backlight Power Level Press and hold un�l power off (1). If you ride for 5 minutes (the �me can Turn off... - Page 14 For more the se�ng parameter flashes, press or bu�ons to adjust the parameter, press M detailed instruc�ons, please visit Jasion Help Center to save,and press M bu�on twice again to quit the Se�ng Mode. 1.BACKLIGHT: A�er toggling to P1 MODE, press boutons to choose the backlight level from 1 to 5, 1 is the darkest backlight, 5 is the brightest backlight.
- Page 15 Number Set up the item Specific The screen appears Magnet sensor se�ng Do not change Ba�ery voltage se�ng Do not change Press +/- boutons to set the gear range Thro�le se�ng Do not change Pedal assist se�ng 3/5/9/6. Press +/- bu�ons to adjust the speed limit Speed limit se�ng value.
- Page 16 Recommended Service Intervals Daily Care and Maintenance Regular inspec�on and maintenance are the key to ensure bikes from jasion func�on as intended, and to reduce wear and tear on their systems. Recommended service intervals are meant to be Cleaning and Storage used as guidelines.
- Page 17 Pre-Ride Safety Checklist Safety Check No�ce: Before every ride, and a�er every 25-45 miles(40-72 km), we advise following the 8. Frame, Fork, and Check that the frame and fork are not bent or broken. If either frame or fork are bent or broken, they should be replaced. Seat pre-ride safety checklist.
-
Page 18: Troubleshoo�Ng
3. Ba�ery not fully seated in tray 3. Install ba�ery correctly Jasion recommends that the max inflate is to 35 PSI for the stock �res on the jasion. Always stay within the manufacturer’s 4. Improper turn on sequence 4. Turn on bike with proper sequence recommended air pressure range as listed on the �re sidewall. -
Page 19: Specifica�Ons
: What if the e-bike arrived missing accessory or broken part? ITEM SPECIFICATIONS : Please take a photo and send to Jasion Support Team by sending email: Model support@Jasionride.com and Jasion Support Team will reply you soon and send correct Product Dimensions 172*64.5*118.5 CM (68*25*47 inch) -
Page 20: Limited Warranty
(10) miles on the odometer, be 6. If you return a product to Jasion, (a) without an RMA from Jasion(b) without all parts free of any wear and tear, dirt, dust, fragrance, or any other signs of use and must include included in the original package, Jasion retains the right to refuse delivery of such return. -
Page 21: Contact Us
● For the avoidance of doubt, Jasion will not be liable and/or responsible for any damage, failure or loss caused by any unauthorized service or use of unauthorized parts. ● The ba�ery is not warranted from damage resul�ng from power surges, use of an @JasionrideOfficial...
Need help?
Do you have a question about the EB7 and is the answer not in the manual?
Questions and answers