Table of Contents
Advertisement
Advertisement
Table of Contents

Related Manuals for FRANKLINWH APower


Summary of Contents for FRANKLINWH APower
- Page 1 Franklin Home Power Installation Guide...
- Page 2 All information in this Manual is protected by the copyrights and other intellectual property rights of FranklinWH Technologies Co., Ltd. and its licensors. No modification, reproduction or replication should be made to this Manual, in whole or in part, without the prior written consent of FranklinWH Technologies Co., Ltd. and...
-
Page 3: Table Of Contents
Step 5: Electrical Conduits ···································································································36 Step 6: Switches and Optional Parts·························································································40 Step 7: Communication Wiring ·····························································································50 Step 8: Electrical Wiring ·····································································································53 Step 9: aPower Wiring Closet Cover Board················································································62 Step 10: aGate Panel ··········································································································63 Debugging ······················································································································64 Appendix 1: Data sheet ·······································································································75 Appendix 2: About FHP Energy Metering ·················································································78... -
Page 4: Safety
DANGER: Please follow the FranklinWH Battery Emergency Response Guide in case the battery pack catches fire. DANGER: aPower units are heavy. Use of proper tools is recommended when handling and lifting the units. Special care should be taken to avoid injury. - Page 5 DANGER: If aPower is found giving off smoke, please disconnect the AC power supply on aGate, and turn off the switch mounted on the aPower unit, if possible and safe to stop the charging and discharging of aPower.
- Page 6 ① use aerogel extinguisher, if safe. Flood ① If the wiring sections of aPower or aGate are submerged, please stay away from the water. Electric leakage may result in electric shock. ② Drain the water to protect the system if it is safe and possible.
-
Page 7: Franklin Home Power Overview
Franklin Home Power Overview Franklin Home Power (“FHP”) is a whole-house energy solution for family users. FHP is composed of aPower as the built-in accumulator for the inverter and aGate as the energy management unit. With proven AC coupling battery technologies, FHP provides a reliable household backup and load control solution for family users and supports connection to residential power generators. - Page 8 Lower priority loads should be excluded from the backup power supply in the system configuration process. Generator Solar Solar inverter Meter Backup Panel aGate Electric Meter Grid Backup loads Panel Non-backup Panel Non-essential loads Smart loads aPower 1 aPower 2 aPower 3...
-
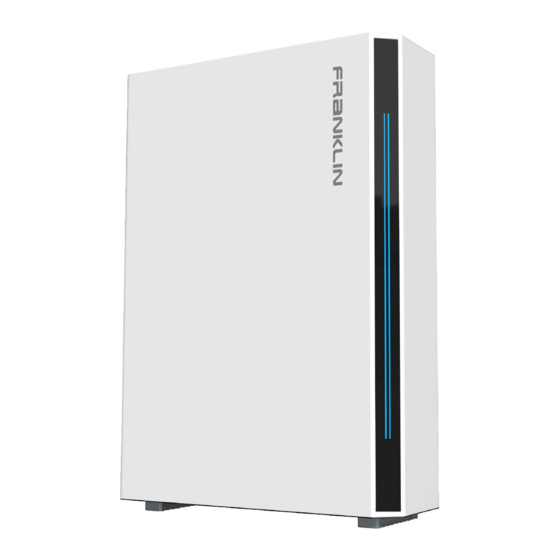
Page 9: Apower
½” plug: ½” electric conduit may be run through the hole once plug is removed. Leveling screw: Helps keep the equipment well leveled where the floor is not Snap joint 1: Snaps onto the mounting bracket to support the body of aPower. even. - Page 10 Battery pack converter. CAN resistor terminal: Controls the current balance on the CAN cable. aPower AC charging/discharging terminal: An external AC source may be connected to this terminal to charge the aPower, or aPower may discharge AC power via this terminal.
-
Page 11: Agate
aGate 7/8” plug 2-1/2” plug Internal panel Reset button 1-23/64” knockout 1/4” mounting External Lock Breaker knockout Breaker knockout panel hole hole hole hole hole Breaker knockout hole: A breaker may be mounted and operated at the hole Purposes: after the steel knocked out is removed. External panel: The external decoration and protection panel of aGate. - Page 12 Earthing bar: The junction of all earthing cables. aPower switch zone: Allows installation of 80A and lower rated switches to control the aPower AC circuit. Bonding jumper: The jumper to bind N bar and earthing Solar switch zone: Allows installation of 80A and lower rated switches to control the Solar side circuit.
- Page 13 DO is the output signal terminal (a current of no less than 10mA is required for DO relay to close reliably), and EPO is the emergency stop input signal contact terminal. CAN interface: the communication interface between aPower and aGate. Smart loads terminals: The Smart Loads relay control interface.
-
Page 14: Installation Preparations
DANGER: aPower may be installed on the floor or on walls. In both cases mounting brackets will be needed to stabilize the unit. aPower units are very heavy and wall mounted installation is more difficult. Floor mounted installation is recommended. - Page 15 Optional: Customer external CT aPower combiner box (for parallel operation of multiple aPowers, depending on the number of aPower available) Reducing Washer Conduit Fittings Sealant (for use on outdoor conduits) 5/8 in Type X plasterboard Network cable and registered jacks...
- Page 16 ● Camera, to record the installation process. ● Fork hand truck. aPower is heavy at a little less than 400lbs. Several well trained workers are required to maneuver the unit. Use of a fork hand truck is recommended to avoid potential injury or death of workers. The maximum length of fork hand truck should be less than 72 inches.
-
Page 17: Step 1: Site Planning
● The installation area for aPower and aGate must consider not only the space to be taken by the equipment, but also the necessary space for wiring connections and the mandatory minimum clearances required for equipment to operate properly. - Page 18 Plan the positions of inputs and outputs of the equipment ● The main cable connection for aPower is located at the rear of the unit case. The following scenarios offer variations on the cable inlets and outlets of aPower to accommodate variations in the existing residential wiring layout.
- Page 19 Step 1: Site Planning ● The cable inlets and outlets are located on the four side panels of aGate: upper, lower, left and rear. The following scenarios illustrate different configurations accounting for variations in the existing residential wiring layout. Scenario 1: Cables pass through the electric conduits and enter aGate from the same side of the wall.
-
Page 20: Step 2:Mobilization And Unboxing
30Kg (66lbs) aPower Package weight: 240Kg(529lbs) aPower Package weight: 7Kg(15lbs) ● Since aPower is heavy and large, fork cart hand truck will be needed to unload aPower from the truck. 1560mm (61 .5 in) ● Lower the fork. Transport aPower and aGate to an open area for unloading and unboxing Special care must be taken to protect personal safety. - Page 21 ● The aGate unit and its mounting brackets are light in weight and small in size allowing them be carried to the installation site. The aPower unit’s packaging is large and bulky making it very hard to move it into a confined space. Installers will need to disassemble...
- Page 22 Step 2: Mobilization and Unboxing Unboxing ● Remove the sides of the wooden box from aPower. ● Remove the protective carton and upper foam. Do NOT touch or operate the switch on the right side of the aPower case.
- Page 23 Stand up aPower ● Two installers will be needed. Push aPower along the wooden pallet horizontally until the feet of aPower slide off the pallets area and the upper case of aPower tilts upward. The two installers can work together to fully stand up the aPower.
-
Page 24: Step 3: Apower
Mounting brackets ● The mounting bracket couples mates with the installation hangers on the back of aPower through a wedged structure to keep aPower tightly in position. Mounting brackets are required for both floor mount and wall mount installation. Mounting brackets should be fastened to the wall at a minimum of 4 points. - Page 25 Step 3: aPower Metal Studs Metal Studs Metal Studs (spaced at 12, 16, 20 or 24 inches) (spaced at 12, 16, 20 or 24 inches) (spaced at 12, 16, 20 or 24 inches) If anchoring directly to metal studs, studs...
- Page 26 Skirting Sunken Wall decoration ● The height of mounting brackets depend on the installation type of aPower: floor mounted or wall mounted installation. Two scenarios below illustrate differences in the height of mounting bracket over the floor. Floor Installation Wall Installation...
- Page 27 Step 3: aPower ● The following are basic steps to use the mounting bracket on concrete or brick structures: 1/2 in Ø ≥1-1/2in Hammer Hammer drill 2. Set the nut flush with the top of the sleeve anchor. Use a 1.
- Page 28 Drill cable inlet holes on the wall (applies only when connecting cables run in wall, not exterior conduit) ● Drill holes at the cable inlet on the back of aPower (this step is not necessary if cables do not enter aPower from inside the wall or through the wall).
- Page 29 Step 3: aPower aPower lifting ● For both floor mounting or wall mounting, a fork hand truck will be needed to lift aPower so that the installation clips on the unit back are higher than the top of the mounting bracket.
- Page 30 ● Lower the fork until the upper and lower snap joints are locked by the mounting brackets firmly. In this process, the installer must push the front side of aPower, to ensure the back is firmly locked into the mounting brackets.
- Page 31 ● If aPower is installed on over an uneven floor, the leveling screws on the bottom of aPower cabinet can be adjusted until the screw directly contacts the floor. Both the floor and the wall mounted bracket will provide sufficient support for aPower.
-
Page 32: Step 4: Agate
Step 4: aGate Unboxing ● Find a clear, level site of at least 40” x 40” to remove the external and internal panels of aGate. 1000mm 40 in 1000mm 40 in WARNING: The site needs a protective mat on the ground or the painting at the back of aGate may be scratched during prep and unboxing which will affect the anti-corrosion performance. - Page 33 Step 4: aGate Remove the internal and external panels from aGate ● Put your hand at the small notch on the right panel of aGate and pull it outward. Lift it slowly until the external panel of aGate is completely open. Notch on external panel of aGate Lift this way WARNING: The external panel of aGate is...
- Page 34 Step 4: aGate ● Use a #3X4” Phillips head cross screwdriver or an electric screwdriver with a Phillips head cross screw bit. Turn the 6 combination screws fastening the internal panel counterclockwise to remove the screws. Please keep the internal panel of aGate out of the way.
- Page 35 Step 4: aGate Prepare aGate cable inlets ● Based on the preplanned installation position and electric conduit arrangement, the installer may choose to remove the knockouts or plug in aGate, where all knockout holes are 1-23/64” in diameter while the plugged holes are 7/8” and 2-15/32” in diameter respectively.
- Page 36 Step 4: aGate Wall installation of aGate ● To install aGate on the wall, please follow the basic procedures below to install aGate on a concrete or brick wall. 1/2 in Spirit level Guide board ≥1-1/2in Marker ≤1219mm (48 in) Wall Floor 1.
-
Page 37: Step 5: Electrical Conduits
#3X4” Phillips head cross equipment. This is very important because the nameplate of screwdriver. aPower must correspond to the aPower. If there are multiple aPowers installed mixed up covers may affect the product warranty. WARNING: There is a unique SN on the nameplate on the internal cover board, and the SN must correspond with the aPower equipment. - Page 38 Step 5: Electrical Conduits Remove aPower charging cable ● Unplug the charging cable Push the clips on both sides of the plug and pull it out. ● Open the adjustable wrench to 41mm. Turn the nut at the end of the water-tight lock counterclockwise with one hand, while hold the nut inside the wiring closet in position with the other hand, to prevent it from turning until the water-tight lock is completely removed from the cable hole (the lock and the charging cables are not to be used and may be recycled once they are removed).
- Page 39 Step 5: Electrical Conduits Install pull box after aPower cable hole 1. Select appropriate pull box according to the cable Diameter: 35mm distribution direction. Max. size: 4.8inx2.75inx2.2in (L*W*H) Diameter: 22.5mm 2. Use a #3X4” Phillips head cross screwdriver to take the junction box apart.
- Page 40 Step 5: Electrical Conduits Conduit Connection and Installation Description ① ① ② Threadless rigid metal conduit or intermediate metal conduit Threaded rigid metal conduit or intermediate metal conduit Threadless fittings Screw fitting ③ ④ ⑤ Sealing hub locknuts bonding locknut bonding&...
-
Page 41: Step 6: Switches And Optional Parts
Step 6: Switches and Optional Parts Install solar switch in aGate Solar breaker location, solar generation system available at the residence. Installation process of BR series switches: Table Optional circuit breakers for PV Model Current Description BR230 Eaton#Circuit Breaker;2-Pole,10kAIC,30A/240V BR240 Eaton#Circuit Breaker;2-Pole,10kAIC,40A/240V BR250 Eaton#Circuit Breaker;2-Pole,10kAIC,50A/240V... - Page 42 Step 6: Switches and Optional Parts Install aPower AC switch in aGate The AC switch of aPower. The switch is locally installed in the aGate only when there are 1 to 3 aPowers installed. Installation process of BR series switches:...
- Page 43 Step 6: Switches and Optional Parts Install optional smart load module in aGate The smart load modules and switches are optional parts. If the user did not purchase them, please skip this step. The smart load module enable remote control of the on/off status for three branch circuits. Both branch circuit 1 and circuit 2 are 1-pole circuits, while circuit 3 is a 2-pole circuit.
- Page 44 Step 6: Switches and Optional Parts Install optional smart load module in aGate Installation process for CH series switches: Table Optional circuit breakers for Smart Circuit 1 (1Pole) Model Current Description Eaton#Circuit Breaker ; 1-Pole , 10kAIC , 20A/240V CH120 Eaton#Circuit Breaker ;...
- Page 45 Step 6: Switches and Optional Parts Install optional smart load module in aGate Installation process for CH series switches: Table Optional circuit breakers for Smart Circuit 1+Circuit2 (2Pole) Model Current Description Eaton#Circuit Breaker ; 2-Pole , 10kAIC , 30A/240V CH230 Eaton#Circuit Breaker ;...
- Page 46 Step 6: Switches and Optional Parts Install optional smart load module in aGate Installation process for CH series switches: Table Optional circuit breakers for Smart Circuit 3 Model Current Description CH230 Eaton#Circuit Breaker;2-Pole,10kAIC,30A/240V CH235 Eaton#Circuit Breaker;2-Pole,10kAIC,35A/240V CH240 Eaton#Circuit Breaker;2-Pole,10kAIC,40A/240V CH245 Eaton#Circuit Breaker;2-Pole,10kAIC,45A/240V CH250 Eaton#Circuit Breaker;2-Pole,10kAIC,50A/240V...
- Page 47 Step 6: Switches and Optional Parts Install grid power supply switch in aGate 4.63 lbf.ft or 56 in.-lbs. Tighten the 2 M6x16 combination bolts by turning Loosen the (2) M6x16 combination bolts by Tighten the (1) M4x12 clockwise turning counterclockwise using a #3X4”Phillips combination bolt by turning using a torque clockwise using a #3X4”...
- Page 48 Step 6: Switches and Optional Parts Install optional fuel generator switch in aGate Please refer to the installation instructions included with the optional parts.
- Page 49 Step 6: Switches and Optional Parts Install fuel generator switch in aGate (optional) 4.63 lbf.ft or 56 in.lbs. Tighten the (2) M6x16 combination bolts by turning Tighten the (1) M4x12 Loosen the (2) M6x16 combination bolts by clockwise combination bolt by turning turning counterclockwise using a #3X4”...
- Page 50 Step 6: Switches and Optional Parts Install the optional load centers switch Install BR series switches in the distribution box Installation process of BR series switches: Breaker Model Current Description Eaton # Circuit Breaker;2-Pole,10kAIC,30A/240V BR230 BRH230 Eaton # Circuit Breaker;2-Pole,22kAIC,30A/240V BRH240 Eaton # Circuit Breaker;2-Pole,22kAIC,40A/240V...
-
Page 51: Step 7: Communication Wiring
Step 7: Communication Wiring Wire the 4G&Wi-Fi communication module in aGate Insert the USB connector from the antenna module into the 4G&Wi-Fi ports on the EMS module and the antenna module to enable wireless connection optionality. 4G&Wi-Fi The aGate cannot be activated if this step is not finished. - Page 52 “daisy chained.” Insert the network cable between aGate and aPower 1 into the “CAN OUT” port of aGate and the “CAN IN” port of aPower 1; insert the network cable between aPower 1 and aPower 2 into the “CAN OUT” port of aPower 1 and the “CAN IN”...
- Page 53 100ft. Insert the network cable between aGate and aPower 1 into the “CAN OUT” port of aGate and the “CAN IN” port of aPower 1; insert the network cable between aPower 1 and aPower 2 into the “CAN OUT” port of aPower 1 and the “CAN IN” port of aPower 2; insert the network cable between aPower 2 and aPower3 into the “CAN OUT”...
-
Page 54: Step 8: Electrical Wiring
Breakers to be installed on the breaker. grid power supply or fuel generators should be wired following the breaker manufacturer’s instructions Solar AC breaker aPower AC breaker Smart Load breaker L1 L2 L1 L2 Generator lugs Grid lugs L1 L2 Non –Backup lugs... - Page 55 Step 8: Electrical Wiring aGate terminal information and wiring requirements DANGER: The wiring should comply with NFPA 70 and local laws and regulations. Terminals: Copper alloy Surface Finish: Tinning Hex head screw: 5/8-18 UNF Stripping Length:1in Applicable Cable: 4AWG~250 MCM Wiring Torque: 3/0AWG~250 MCM 275LB-IN 4AWG~2/0AWG 110LB-IN...
- Page 56 Step 8: Electrical Wiring Bonding jumper in aGate DANGER: The bonding of neutral and grounding wires should comply with NFPA 70 and local laws and regulations. According to NFPA 70 -250 Grounding and Bonding Part V, when installed as service equipment, the neutral and ground should be bonded together, as shown in the figure to the left.
- Page 57 DANGER: The installation, service and replacement operations on aPower and aGate equipment must be done by installers certified and recognized by FranklinWH. DANGER: Before starting any electrical work, please ensure that aPower is powered OFF to reduce the risks of electric shock.
- Page 58 Step 8: Electrical Wiring Make AC Power Connections to aGate L1 L2 Neutral Neutral Ground Ground Optional Generator Power Connections to aGate (Parts for fuel generator are configured in Step 8) CAUTION: The fuel generator requires a signal interchange connection with aGate. Please connect it to the L1 L2 terminals as shown in...
- Page 59 Step 8: Electrical Wiring Make PV inverter Connections to aGate (If solar AC switch is configured in Step 8) Neutral Ground Make Smart load Connections to aGate (If Smart load module is configured in Step 8) 1 pole 2 pole 1 pole 2 pole 2 pole...
- Page 60 Step 8: Electrical Wiring Make aPower Connections to aGate (In case of (1) aPower) Neutral Ground...
- Page 61 Step 8: Electrical Wiring Make aPower Connections to aGate (In case of (2) to (3) aPowers) Neutral Ground Ground Ground Ground L1 N L2 L1 N L2 L1 N L2 aPower 1 wiring compartment aPower 2 wiring compartment aPower 3 wiring compartment...
- Page 62 Step 8: Electrical Wiring Make aPower Connections to aGate (In case of more than (3) aPowers) L1 L2 Neutral Ground Ground Ground Ground Ground L1 N L2 L1 N L2 L1 N L2 L1 N L2 aPower 4 wiring compartment...
-
Page 63: Step 9: Apower Wiring Closet Cover Board
1. Remove the internal cover board of the wiring closet. Please check to make sure the cover label’s S/N corresponds with the Phillips head cross screwdriver. equipment S/N, otherwise the nameplates of aPower will be incorrectly swapped, which may adversely affect the warranty. Tighten the (1) M4x12... -
Page 64: Step 10: Agate Panel
Step 10: aGate Panel re-installation ● Two installers will be needed to re-install the aGate external panel. One installer lifts the aGate external panel up and adjusts it to the correct position. The other installer fastens the (6) screws M4X8 sunk screws. Tighten it clockwise using a #3X4 Phillips head cross screwdriver. -
Page 65: Debugging
Register the customer account parameters and other electrical Close the mains breaker switch and device S/N information parameters Turn on the aPower switch to Close the photovoltaic solar test the charge and discharge User Account login breaker switch function of the battery... - Page 66 ④ Close the aPower AC input breaker switch on aGate. ⑤ Press the side cabinet switch on aPower, and wait for about half a minute until the power LED of aPower turns on and flashes at a frequency of 1 cycle/sec. aPower has been started up normally.
- Page 67 User Agreement”. Log in to the installer account Log in using the installer account info assigned by FranklinWH for installers in order to activate and set up the equipment.
- Page 68 Commissioning Connect mobile phone to Wi-Fi of aGate After the installer logs in using the installer account, a window will pop out prompting you to select your Wi-Fi. Click on “Yes” to turn to the mobile phone Wi- Fi setting page, where please choose the Wi-Fi SSID “AP_XXXXXX”.
- Page 69 Commissioning Click on “User Common Settings” to set up the installation site. Click on “User Common Settings” to enter the setting page. Choose Home Power network connection setting. Set the “longitude and latitude” of the installation site. Click on the drop menu “Network settings”...
- Page 70 Click on “First Install” to redirect. Input the Input the number complete of aPowers numbers and installed, such as click on “1”, “2” … “Complete”. aPower will automatically generate window icons for them. Click on “Next”. aPower will automatically show the numbers of each aPower.
- Page 71 Commissioning Click on “System parameter setting” to enter the parameter setting page. “System Click on parameter” “System page parameter setting” to enter the parameter Redirection setting page. On the “System parameter” setting page, set up the local resources and policies. On the “Local resource Set up the local resources Choose the region of the...
- Page 72 Commissioning On the “System parameter” setting page, set up the 2030.5 address. Click on the position as shown in the picture and input the 2030.5 address. Please skip this step, Redirection if it is not Click on “2030.5 required by local resource address”...
- Page 73 Commissioning On the “System parameter” setting page, set up the 2030.5 address. On the “System parameters Click on Redirection setting” page, “System set up the parameters”. parameters of family solar generation system and electric generators. Return to the home page, and click on “Device settings” to register the user E-mail account with the equipment.
- Page 74 Commissioning Return to the home page, and click on “Device settings” to register the user E-mail account with the equipment. On the “System Click on parameters Redirection “System setting” page, parameters”. set up the parameters of family solar generation system and electric generators.
- Page 75 Commissioning Operate aGate and close the solar input switch. Return to the Home page of the application and check the commissioning mode. Set up the charging power and discharging power to test the charging and discharging functions of the system. ①...
-
Page 76: Appendix 1: Data Sheet
Appendix 1: Data sheet aPower Model: aPower X BAT DC terminal, Bi-directional: Nominal voltage (Vdc) 51.2 Vdc Range of DC charging voltage (Vdc) 32 - 58 Vdc Range of DC discharging voltage (Vdc) 32 - 58 Vdc Max. charging/output current (Adc) 100A Max. - Page 77 Appendix 1: Data sheet aGate Model: aGate X (1) Grid terminal (QF1 2P), Bi-directional: Nominal AC Grid voltage (Vac) 120/240 V, (L1, L2, N) Nominal AC Grid frequency (Hz) 60Hz Nominal AC input/absorb current (Aac) 160A Nominal AC input/absorb power (W) 38400W Max.
- Page 78 Appendix 1: Data sheet aGate (6) AC terminal (QF4 2P), Bi-directional: Nominal AC output voltage (Vac) 120/240 V, (L1, L2, N) Nominal AC output frequency (Hz) 60Hz Nominal AC output/inject current (Aac) Nominal AC output/inject power (W), (L-N) 2500W Nominal AC output/inject power (W), (L-L) 5000W Max.
-
Page 79: Appendix 2: About Fhp Energy Metering
Energy visibility data on power and energy usage is needed for the FHP system, including metering for site energy, solar energy, and BESS advanced inverter by measuring voltage (by voltage tap) and current (by current transformer, CT) building-in the units of aGate and aPower. FHP metering have complied with the standard IEEE 1547, section 4.4 Measurement accuracy, table 3-Minimum measurement and calculation accuracy requirements for manufacturers. -
Page 80: Appendix 3: Fhp Non-Export Compliance Mode For Solar And Bess Utility Programs
“non-export” built-in function according to the compliance and management there is no power export to the grid. 1), When the FHP system detects that the export current is over zero, the aPower unit will dynamically absorb the excess power generated from solar to balance the current export is zero. -
Page 81: Appendix 4: Fhp Bess Interconnection Compliance Activation And Reset
Appendix 4: FHP BESS interconnection compliance activation and reset. Click on “More” on the Home page to The installer enter the will select a navigation compliance menu, where activation by click on “Grid Redirection local location compliance”. and the commissioning guidance details.
Need help?
Do you have a question about the APower and is the answer not in the manual?
Questions and answers
Is an aGate unit required for a stand alone battery system without solar