
Related Manuals for Sorama L642


Summary of Contents for Sorama L642
- Page 1 L642 Acoustic Monitor User Manual Date of issue: 10/05/2022 Firmware version: 2.3.0...
-
Page 2: Table Of Contents
Protection ......................... 10 Installation ..........................11 System Requirements ......................11 Connecting the L642 ......................12 Setting up the L642 ......................14 Performing a firmware update ................... 17 LED Indicator ........................19 General Mounting solution ....................19 L642 Dashboard ........................21 Home Page ........................ -
Page 3: Conformity
EU2015/863 Technical Compliance Data held by: Sorama B.V. Achtseweg Zuid 153H 5651 GW Eindhoven, NL Signed for and on behalf of Sorama B.V. Name: Rick Scholte, CEO Address: Achtseweg Zuid 153H, 5651 GW, Eindhoven Achtseweg Zuid 153H Eindhoven The Netherlands +31 (0)40 3041019 info@sorama.eu... -
Page 4: Safety Information
Earth grounding of the cable shield o Installing the unit’s metallic enclosure on an earth grounded mounting bracket or on any other grounded bases o Protect the operator from electrostatic discharge Achtseweg Zuid 153H Eindhoven The Netherlands +31 (0)40 3041019 info@sorama.eu www.sorama.eu... -
Page 5: Contacts
+31 (0) 40 247 4484. After receiving a detailed description of the occurring error(s), Sorama will evaluate the problem. When the issue does not have any relations to the services of Sorama or support is requested outside the warranty period, costs will be charged to the customer. -
Page 6: Description
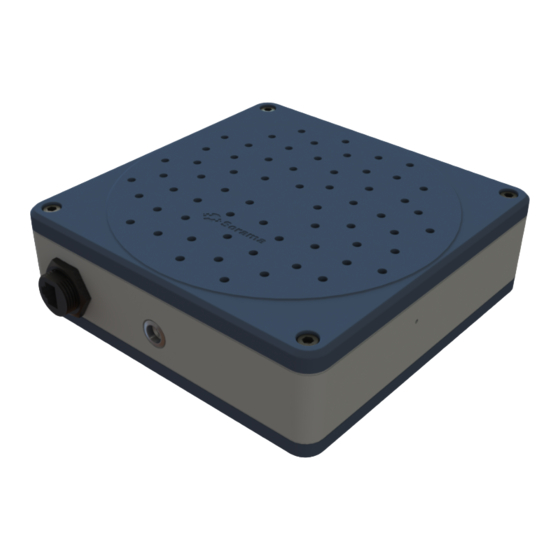
Page 6 of 40 1 Description The Sorama L642 is the evolution in acoustic monitoring solutions. It combines the powerful use of acoustic imaging, detection of sound levels, and accurate localization. The Sorama L642 supports edge computing, all powered and connected with one single network cable. -
Page 7: Available Models
Page 7 of 40 Available models The following model variants from L642 series. Sorama L642 Sorama L642+ Sorama L642V Sorama L642V+ • • • • 64 MEMS 64 MEMS 64 MEMS 64 MEMS microphones microphones microphones microphones • • •... -
Page 8: System Overview
Page 8 of 40 System Overview Achtseweg Zuid 153H Eindhoven The Netherlands +31 (0)40 3041019 info@sorama.eu www.sorama.eu... -
Page 9: Technical Data
Acoustic Overload Point 120 dB SPL At 1 kHz, <10% THD General Ingress Protection IP54 Operating Temperatures -20 °C to 50 °C (4 °F to 122 °F) Warranty 2-year Achtseweg Zuid 153H Eindhoven The Netherlands +31 (0)40 3041019 info@sorama.eu www.sorama.eu... -
Page 10: Environment
3 Environment Ambient Temperature The L642 is designed for ambient operating temperatures between -20°C to 50°C (4°F to 122°F). It is necessary to verify the environmental temperature. Make sure to install the housing at a safe distance of any nearby heating sources. Note that too cold water can cause condensation, which can lead to damage in the device, the ambient operating relative humidity is between 10-100% RH(non- condensing). -
Page 11: Installation
Stability: The L642 device is able to recover from network failures. However, if a network is down for a longer time, data might get dropped. The L642 buffers all data for at least 30 seconds. This data can retroactively be retrieved. -
Page 12: Connecting The L642
If you want to configure the L642 to connect it in mode 3 or 4, you will first need to connect it in mode 1 or 2 and change the configuration of the L642 via the dashboard as explained in section 4.3. - Page 13 2. Connect the L642 via a suitable PoE injector to an ethernet-usb dongle plugged into your PC/Laptop The L642 will assign itself an IP address in the 169.254.0.0/16 range, also known as the Auto IP range. 4.2.3 Mode 3: Connect to a Network using Static IP In mode 3, connect the L642 to any network (with or without DHCP server).
-
Page 14: Setting Up The L642
Wait until the indicator light (on the side of the L642) becomes solid green. Step 1 Keep the serial number of the L642 ready. The serial number can be found on the back of the device at the bottom-left. Step 2... - Page 15 Set the device coordinates and relevant installation information such as angles and target distances (if known) http://100110001 Step 7 Go back to the “Device Configuration” page and click on Networking. http://100110001 Achtseweg Zuid 153H Eindhoven The Netherlands +31 (0)40 3041019 info@sorama.eu www.sorama.eu...
- Page 16 1 or 2 as described in section 4.2. No additional configuration is required. Select “Use a Static IP address” if you want to run the L642 in either mode 3 or 4 as described in section 4.2. You will need to specify the following: •...
-
Page 17: Performing A Firmware Update
On the Firmware Update page, click “Click here to select a file”. A file selection menu will appear. Step 3 Select the firmware file from the file selection menu and click “Open”. Achtseweg Zuid 153H Eindhoven The Netherlands +31 (0)40 3041019 info@sorama.eu www.sorama.eu... - Page 18 When the firmware update is complete, the progress bar turns green. The device will now be reset. Wait until the led on the device turns green again, then refresh the dashboard and you can start using the device with the new firmware. Achtseweg Zuid 153H Eindhoven The Netherlands +31 (0)40 3041019 info@sorama.eu www.sorama.eu...
-
Page 19: Led Indicator
Solid Ready General Mounting solution L642 has three main ways to be placed in the environment. No matter the mounting choice, we advise to make use of the Vesa 10 mounting on the back of the unit. 4.6.1 Pole mounted Sorama has a pole mounting bracket available that can be ordered as a separate accessory which can be connected to a pole mount adapter. - Page 20 Page 20 of 40 4.6.2 Wall mounted Sorama has a 45 degree wall mounting bracket available that can be ordered as a separate accessory. The orientation should be so that the RJ45 connector points to the wall. 4.6.3 Mounting height The mounting height is depending on your situation and differs from area to area.
-
Page 21: L642 Dashboard
Page 21 of 40 5 L642 Dashboard L642 devices have (almost) all functionality visible on the dashboard. All functions provided via the dashboard are also available by directly using the API. Use the navigation menu to the left to go the following pages: Only on “V”... -
Page 22: Insight
Use the Reset Graph View button to reset the graph back to live view mode. • If internet is available, you can see where the unit is located on Google Maps. Achtseweg Zuid 153H Eindhoven The Netherlands +31 (0)40 3041019 info@sorama.eu www.sorama.eu... - Page 23 Use the Max slider or input box to set a maximum value. Any value above this value will be colored dark red. • Rescale will reset the min/max values to scale with the data coming from the device at the moment the button is pressed. Achtseweg Zuid 153H Eindhoven The Netherlands +31 (0)40 3041019 info@sorama.eu www.sorama.eu...
- Page 24 5.2.3 SoundSurface™ Each acoustic monitor has a specified GPS-position, height and orientation. The L642 uses spatial filtering to detect where sound is coming from. The sound intensity of its monitored area is plotted on a background image (map). An example for the User Interface is given in the figure below.
- Page 25 In “Single Mode”, only the latest instance of the triggered event is displayed, and refreshed whenever the event is triggered again. More on events on the management page. Achtseweg Zuid 153H Eindhoven The Netherlands +31 (0)40 3041019 info@sorama.eu www.sorama.eu...
-
Page 26: Streaming Page
Show Spectrum: will change the time based spectrogram to a Realtime spectrum plot. • Show selected spectrogram zoomed view: will show a more zoomed in visualization of the selected frequency range. Achtseweg Zuid 153H Eindhoven The Netherlands +31 (0)40 3041019 info@sorama.eu www.sorama.eu... -
Page 27: System Configuration
“+” devices. Multiple models from the L642 series can be linked to work as a single unit. An L642+ or L642V+ can function as a server to a maximum of 10 other models as clients. Any model can be a client. With this server-client setup, you can manage all devices within this setup using only the server device as entry point. - Page 28 SoundSurfaces™ of all devices within this server-client setup. These SoundSurfaces™ can be viewed on the SoundSurface™ page in the dashboard of the server device. Achtseweg Zuid 153H Eindhoven The Netherlands +31 (0)40 3041019 info@sorama.eu www.sorama.eu...
-
Page 29: Device Configuration
• Swap network settings by choosing between automatic or static IP • Only use the static IP configuration if you know what you are doing. Check “Setting Up the L642” for further information Achtseweg Zuid 153H Eindhoven The Netherlands +31 (0)40 3041019 info@sorama.eu... - Page 30 Google NTP server. • You can also set the time manually. Use the “sync with computer time” flag to automatically fill in your device’s time or fill in a time manually. Achtseweg Zuid 153H Eindhoven The Netherlands +31 (0)40 3041019 info@sorama.eu www.sorama.eu...
- Page 31 Page 31 of 40 5.5.4 Device Information Achtseweg Zuid 153H Eindhoven The Netherlands +31 (0)40 3041019 info@sorama.eu www.sorama.eu...
- Page 32 V units. In this mode camera distance should be filled in, which corresponds with the mean distance between the L642 and the target. o Area mode is used to create a SoundSurface™ which can be projected on a selected area.
-
Page 33: Management
“Stop All Measurements”: Stops and removes all configured Entities (e.g. Measurements and SoundSurfaces) from the device and reboot. • “Delete Config”: Deletes the configuration file of the L642’s software. Resets the device to default settings and reboots afterwards. • “Factory Reset”: Resets the device, including firmware, to the original firmware on the device when it was shipped. - Page 34 “Reporting Interval” is how often the measurement will produce a result. Audio is averaged over this duration. o “frequency ranges” can be selected and edited, added or removed. Achtseweg Zuid 153H Eindhoven The Netherlands +31 (0)40 3041019 info@sorama.eu www.sorama.eu...
- Page 35 “frequency ranges” can be selected and edited, added or removed. Note that there is a maximum total range the device can analyze. In this release this is 8000Hz. Achtseweg Zuid 153H Eindhoven The Netherlands +31 (0)40 3041019 info@sorama.eu www.sorama.eu...
- Page 36 This could be “Above” or “Below” for a “Threshold”, and “Inside” or “Outside” for a range. The classification events will trigger when an anomaly is detected or a vehicle is classified. Achtseweg Zuid 153H Eindhoven The Netherlands +31 (0)40 3041019 info@sorama.eu www.sorama.eu...
- Page 37 “Register Type” the type of register the L642 should control ▪ “Address” is the address number of the register ▪ “Value” is the value the L642 should set if we trigger this Modbus connection o Modbus input settings ▪ “Address” is the address number of the register ▪...
- Page 38 Page 38 of 40 ▪ “Trigger High Value” which value the L642 should treat as a high value ▪ “Trigger Edge” on which edge the input should trigger o “Test” can be used to test if the input/output channel is reachable. If clicked and successful the button turns green, red if it could not be reached.
-
Page 39: Api) Documentation
This page contains documentation on the L642 device. This is for advanced development and integrations with third party systems or software. The Sorama API is based on a HTTP REST API. All calls are communicated via HTTP or WebSocket. The device hosts the following documents: 1. -
Page 40: Troubleshooting
It is possible that there is a large difference between the time the L642 thinks it is and between what your PC thinks it is. To resolve this, you can set the device time to match your PC’s time. Check the “5.4.3 Date and Time”...
Need help?
Do you have a question about the L642 and is the answer not in the manual?
Questions and answers