Table of Contents
Advertisement
Quick Links
Advertisement
Table of Contents

Related Manuals for Fopo S12


Summary of Contents for Fopo S12
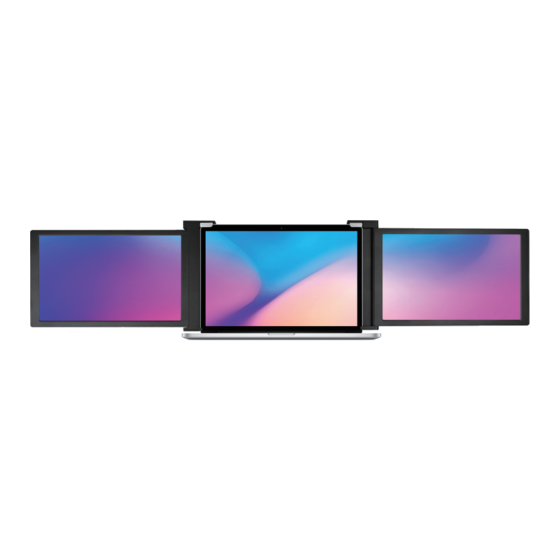
- Page 1 Portable Monitor Triple Portable Monitor...
-
Page 3: Table Of Contents
Contents 1. Overview ------------------------------------------------------------------------------------ ------------------------------------------------------------------------- 2. Package Contents 3. Inputs and Buttons ----------------------------------------------------------------------- 4. Set It Up -------------------------------------------------------------------------------------- 5. Connect the Monitor with Your Laptop ---------------------------------------------- 6. Choose Your cables ---------------------------------------------------------------------- 7. Connection Methods --------------------------------------------------------------------- -------------------------------------------------- 7.1 Two Type-C or Thunderbolt 3 Ports ------------------------------------------------------- 7.2 One Type-C and One HDMI Port --------------------------------------------------------------------------... -
Page 4: Overview
1. Overview Triple Monitor 2*Mini HDMI to 2*USB-C to USB-C HDMI Cables (90-degree) Cables VIDEO ONLY VIDEO & POWER 2*USB-C to USB-A 1* Hook-and-loop Cables Fastener POWER ONLY 1*Power Adapter... -
Page 5: Package Contents
Please kindly check out all the accessories in the package. If you find anything missing here, please don’ t hesitate to contact us via the email address fopo@afterservice.vip and we will help you solve the problems as soon as possible. -
Page 6: Inputs And Buttons
3. Inputs and Buttons Type-C Full Function Port: Power Supply, Video Signal Transmission Mini HDMI Port (No Power Supply): Video Signal Transmission Type-C Port (Power Supply Only): Power Supply, Reverse Charging, Compatible with PD2.0 power supply protocol, Supporting 5-20V voltage input Press the Menu to enter the OSD (On-Screen Display) menu. - Page 7 Warning Note: Please handle the triple monitor with care and do not press the screens to avoid damages. Do not unfold it to exceed its maximum turning angle showing as below. Turning Angle of Screens Left Screen(0°-235°) Right screen(0° - 180°)
-
Page 8: Set It Up
4. Set It Up Unpack the triple monitor. Open two screens in the directions as shown in Fig. 2. Place the bracket at the back of the laptop screen and install it well with the bracket clamping the screen firmly. Lift up the stand and stretch to its end. -
Page 9: Connect The Monitor With Your Laptop
first to make sure it can be compatible with the monitor. If it is not within this range, please feel free to contact us via the email address fopo@afterservice.vip and we will help you solve the problems as soon as possible. -
Page 10: Choose Your Cables
6. Choose Your Cables Notes: To determine which cables you will use, first identify your laptop’ s ports accord- ing to the figure below or your laptop’ s user manual. VIDEO & POWER: VIDEO ONLY POWER ONLY *Make sure your USB-C port on the laptop is full-functioned Port. Please refer to your laptop's user manual. -
Page 11: Connection Methods
And make sure that the laptop has a power supply. If you can't connect the monitor with the laptop, please contact us via the email address fopo@afterservice.vip, and inform the customer service of the model number of your laptop to quickly determine the compatibility of the connecting... - Page 12 An external power supply of 5V/2A or above is needed for normal use (adjust brightness and volume above 50). If you can't connect the monitor with the laptop, please contact us via fopo@afterservice.vip, and inform the Tech. Support of the model number of your laptop to quickly solve your issues. fopo@afterservice.vip...
-
Page 13: One Type-C And One Hdmi Port
7. Connection Methods 7.2 One Type-C and One HDMI Port There is one Type-C and one HDMI port on the laptop. 1) Plug the Type-C cable into Type-C port on one side of the monitor. 2) Meanwhile, plug the HDMI cable into the Mini HDMI port on the other side of the monitor. -
Page 14: One Hdmi Port
USB-C to USB-A Notes: You can contact us via the email address fopo@afterservice.vip for the connection adapter and inform the customer service of the model number of the laptop, and we will find the connection adapter for you. (5V/2A or Above)... -
Page 15: Laptop Display Configuration
8. Laptop Display Configuration 8.1 PC/WINDOWS 1.Enter the Display Settings interface. (Start >Settings > System > Display) 2.Identify the Screen/Set Display Direction Click and drag the screens to the configuration shown. 3.Start Duplication/Extension Setting If you need to set different display modes on the triple monitor, please click 1/2/3 (click the “Identify” Button down the screen to find the corresponding screen). -
Page 16: Mac
8. Laptop Display Configuration 8.2 MAC 1. Identify the Screen/Display Direction Setting Open the “System Preferences” . Select “Display” from the menu. And then Click “Arrangement” . Click and drag the screens to the configuration shown. 2. Start Duplication/Extension Setting Duplication Setting: Select “Mirror Display”... -
Page 17: Osd Function Introduction
9. OSD Function Introduction 1. Press the “ ” Menu button to activate the OSD menu. 2. Press “+” button to choose your settings. 3. Press the “ ” Menu button to confirm. 4. Press “-” button to return to the previous page. BRIGHTNESS BRIGHTNESS CONTRAST... -
Page 18: Osd Setting
10. OSD Setting BRIGHTNESS Brightness BRIGHTNESS Brightness: The adjusting range is from 0 to 100. CONTRAST Contrast: The adjusting range is from 0 to 100. BLACK LEVEL Black Level: The adjusting range is from 0 to 100. SHARPNESS Sharpness: The adjusting range is from 0 to 100. Image IMAGE ECO: Presets the display settings for various... - Page 19 10. OSD Setting COLOR TEMP Color Temp COLOR TEMP COOL Color Temp: Enables the adjustment of each RGB color, or select a Warm or Cool preset level. GREEN Red: The adjusting range is from 0 to 100. BLUE Green: The adjusting range is from 0 to 100. Blue: The adjusting range is from 0 to 100.
- Page 20 10. OSD Setting RESET Reset RESET Reset: Selects RESET to revert all settings to the factory default mode. MISC Signal Source: MISC. Contains two signal sources: Type-C and HDMI. Low Blue Light: SIGNAL SOURCE TYPE C Decreases the amount of blue light in the LOW BLUE LIGHT display.
-
Page 21: Supported Brands & Models
11. Supported Brands & Models Brands Models MacBook Air 13 2018, 13 2019 13 2016, 13 2017, 13 2018, 13 2019, 13 2020(Intel CPU), 15-inch 2016, MacBook pro 15-inch 2017, 15-inch 2018, 15-inch 2019, 16 2020 100 Series, 1 (14") Intel, 1 (14", AMD), Flex 5G 14, Flex 5 15 (Intel), Flex 5 14 (Intel), 3 (15") Intel, 3i (15", Intel), Gaming Laptops, 5 (14") IdeaPad AMD, 5 (15") Intel, S540 (13", Intel), Slim 7 (14", Intel), Slim 9... - Page 22 11. Supported Brands & Models Brands Models dq1020nl, dq1041ur, dq1044ur, dq1057nm, dq1062nf, dq1191nb, HP Laptop 14s dq1246no Zbook Zbook, Zbook (AMD R7), Zbook (Intel), Victus Air 15-dk0125TX, 15-dk1116TX Air 15-dh0006TX PRC (15.6inch), Plus 17-cb0001TX/ 17-cb0002TX OMEN (15.6inch), R5 (AMD R7), Pro 15.6inch, 16.1inch, X 15 15-dg0003TX ELITEBOOK 735 G6, 745 G6, 830 G6 Other Models...
- Page 23 11. Supported Brands & Models Brands Models ThinkPad P Series P15 15.6'', P15v 2020 15.6'', P1 Gen 3 15.6'', P15s Gen 2 15.6'', P14 T14 2021 14'', T490 14'', T15 15.6'', T14s 2021 14'', T15P 15.6'', ThinkPad T Series ThinkPad T590 15.6'' X1 Extreme Gen1 15.6'', X1 Nano 13'', X13 13.3'', X1 Yoga 2020 14'', ThinkPad X Series...
- Page 24 11. Supported Brands & Models Brands Models Young, SF114-32-C8H2, SF314-41-R0X8, Shadowrider15.6", Shadow Knight Dragons 15.6", Concept D 3 15.6", SF515-51T-71QD Other Models 15.6", Travel Mate P6 14", TMX45-51-53RW 14", TMX514-51-50PJ 14", Predator Blade 500 15.6", Concept D 7 Ezel 15.6", Book RS 14" gram 14 2020 14", 15 2020 15.6", 16 2021 16", 14 2021 14"...
-
Page 25: Tech Specs
12. Tech Specs Display Inputs and Connectivity (Per Screen) Power Consumption: 5V 2A Thunderbolt3/USB-C 3.1 Input Adaptive Laptop Dimensions: 12 inch (Video and Power) Resolution: 1920*1080 Mini-HDMI Input (Video Only) Panel Type: Full HD LCD IPS Panels USB-C Input (Power Only) Aspect Ratio: 16:9, 4:3 Brightness: 220-350 cdm²... -
Page 26: Cleaning & Maintenance
The screen will recover slowly or you can power it off for hours. When the screen becomes black or flashes, or cannot work anymore, please contact us via the email address fopo@afterservice.vip for help. Do not repair the screen by yourself! -
Page 27: Contact Us
14. Contact Us If you need any help, please don't hesitate to contact us via the email address fopo@afterservice.vip and we will help you solve the problems as soon as possible.
Need help?
Do you have a question about the S12 and is the answer not in the manual?
Questions and answers