Table of Contents
Advertisement
Quick Links
Advertisement
Table of Contents

Summary of Contents for SUNTECK RIVA Series
- Page 1 INSTALLATION MANUAL RO- RIVA...
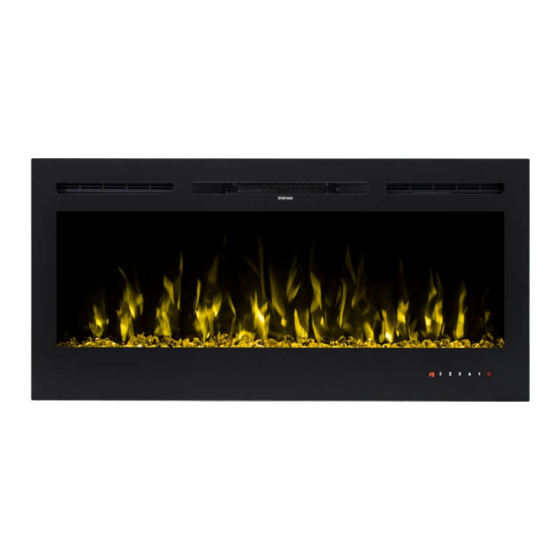
- Page 2 STFP 40 STFP 50 STFP 60 SF-BG72 STFP 100 OWNER’S MANUAL – RIVA SERIES 40”/50"/60"/72”/100” Wall Mounted / Built-in Electric Fireplace AC 120V 60Hz 1500W Read and understand this entire owner's manual, including all safety information, before plugging in or using this product. Failure to do so WARNING could result in fire, electric shock, or serious personal injury.
-
Page 3: Important Safety Information
IMPORTANT SAFETY INFORMATION! WARNING Read all instructions before using this heater! This heater is hot when in use. To avoid burns, DO NOT let bare skin touch hot surfaces. If provided, use handles when moving this heater. Keep combustible materials, such as furniture, pillows, bedding, papers, clothes, and curtains at least 3 feet (0.9m) from the front of the heater and keep them away from the sides and rear. - Page 4 ALWAYS store this heater in a dry location. NEVER use the fireplace if it has become wet. NEVER plug this heater into an outlet that is old, cracked, or has any loose wires or connections. Plugging this heater into a faulty outlet could result in electric arcing within the outlet that could cause the outlet to overheat or catch fire.
-
Page 5: Parts And Hardware
Parts and Hardware B – Wood Screws C – Drywall anchors √ A – Fireplace Remote Control D - Metal Bracket E-Wall Bracket F- Drift Log Piece G-Decorative H - Log set I - Plastic Tray Crystals Fixed on back of firebox Specification and Dimension Electric Fireplace Description... -
Page 6: Installation And Assembly
Installation and Assembly Your appliance is a wall-mounted, recessed and/or mantel installed appliance. Select a suitable location that is not susceptible to moisture and is away from drapes, furniture and high traffic areas. NOTE: Follow all National and local electrical codes. MINIMUM CLEARANCE TO COMBUSTIBLES Measurements are taken from the glass front. - Page 7 RECESSED TO WALL INSTALLATION Hole Size (B ) STEP A. Selection a dry wall to open a hole for fireplace box. Size of hole as below chart Figure ( A ) FRAMING HOLE SIZE Model Number (83.82CM) 20.75” (52.71CM) RIVA 50 "...
- Page 8 ( C ) STEP C. Take off the two screws in both sides of the glass panel. Figure ( C ) STEP D. Have two person to take the glass panel out of the fireplace box. Place it to a soft and clean place.
-
Page 9: Wall Mounted Installation
Wall Mounted Installation Due to the many different materials used on different walls, it is highly recommended that you consult your local builder before you install this appliance on the wall. Select a location that is not prone to moisture and is located at least 36" (914mm) away from combustible materials such as curtain drapes, furniture, bedding, paper, etc. -
Page 10: Hard Wiring Installation
Wall Bracket Illustrated SF-BG72 HARD WIRING INSTALLATION WARNING TURN OFF THE APPLIANCE COMPLETELY AND LET COOL BEFORE SERVICING. ONLY A QUALIFIED SERVICE PERSON SHOULD SERVICE AND REPAIR THIS ELECTRIC APPLIANCE. HARD WIRING CONNECTION If it is necessary to hard wire this appliance, a qualified electrician must remove the cord connection, and wire the appliance directly to the household wiring. - Page 11 Take the new cover plate, supplied in the hardware bag. Punch out the 7/8" (22.2mm) hole and install a box connector through, into the junction box. Snap the box connector clamp onto the supply wires. Using the wire connectors, connect the ground green wires (G), the common white wires (N) together, then the hot black wires (L) and then the refer to Figure 3.
-
Page 12: Operation
Figure 1. Figure 2. Figure 3. (Crystal medias) Figure 3. (Pebbles medias) Operation Read and understand this entire owner’s manual, including all safety information, before plugging in or using this product. Failure to do so could result in electric shock, fire, serious injury, or death. - Page 13 Touch Panel Touch Panel / Remote Control Operation BUTTON FUNCTION ACTION & INDICATION ON: Enables control panel functions and 1. Press once. Indicator light turns on. remote control. Turns on flame effect. Power turns on. All functions enabled. OFF: Disables control panel functions and 2.
- Page 14 TIMER button: Controls timer settings to 1. Press once. Indicator light turns on. turn off fireplace at selected time. Timer is set to 0.5 hours. Settings range from 0.5 hours to 7.5 hours. 2. Press again until desired setting is TIMER reached.
-
Page 15: Care And Maintenance
Remote Control Battery Information • Small remote control uses one CR2025 battery (Included) • Big remote control uses two AAA batteries (Not Included) NOTE: Remote control battery used depends on the remote-control type which selected above. NEVER dispose of batteries in fire. Failure to observe this precaution may result in an explosion. - Page 16 info@sunteck.ca...

Need help?
Do you have a question about the RIVA Series and is the answer not in the manual?
Questions and answers