Table of Contents
Advertisement
Quick Links
Advertisement
Table of Contents

Related Manuals for YFRobot 3WD OMNI WHEEL Robot Car


Summary of Contents for YFRobot 3WD OMNI WHEEL Robot Car
- Page 1 YFRobot 3WD OMNI WHEEL Robot Car User’s Manual for Omnidirectional Car...
- Page 2 A. Assembly 1. Check the list Before the assembly of the car model, please check the list of items to see if there are any missing parts, flawed pieces, and make sure the parts are complete before assembly. 2. Test Please test whether the motor is running normally before assembling the chassis.
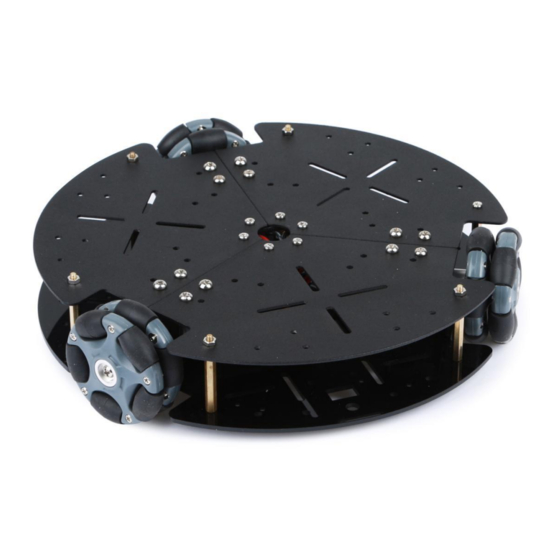
- Page 3 4. Assembly of the chassis 4.1 Fix the chassis The left metal material and the right acrylic material are used to install the ➢ upper and lower chassis, respectively. When fixing, the chassis shall be pieced together completely, and the ➢...
- Page 4 Select the metal chassis to fix the motor bracket and nuts are not required ➢ for fixation. Motor brackets x 3 M4 * 6mm x 12 ➢ ➢ 4.3 Fix the motor bracket and the coupling...
- Page 5 Fix the motor to the L-shaped bracket, pay attention to the position of the ➢ line and the angle of the encoder during installation. If it cannot be installed normally, the motor can be rotated for fixing. Fix the coupling on the motor shaft, the screws on the D-shaped surface of ➢...
- Page 6 电源正极:Positive Pole 电源负极:Negative Pole 接入电源:Access to Power Supply 接入负载:Access to Load I 代表电路导通:I stands for circuit conduction O 代表电路断开: O stands for circuit disconnection The upper and lower chassis are connected by copper cylinders. The upper ➢ chassis is acrylic, which is easy to expand and can be used on both sides. Alternatively, the metal chassis can be reversed to fix the acrylic chassis on the top and extend to be a double-layer structure.
Need help?
Do you have a question about the 3WD OMNI WHEEL Robot Car and is the answer not in the manual?
Questions and answers