Advertisement
Installation and Operation Manual of
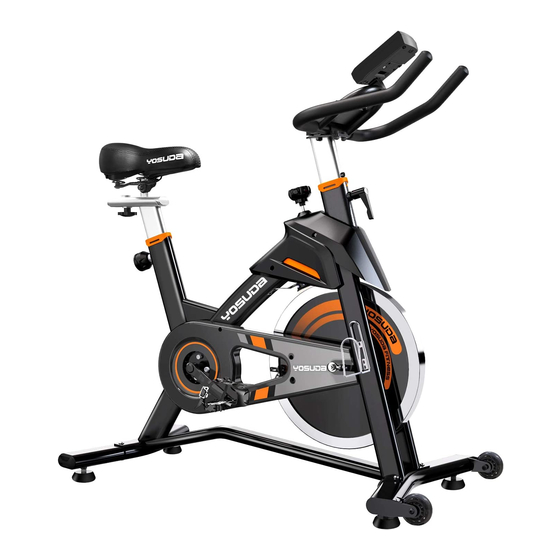
Spinning Bike
L-007A
Please read this manual before installing and using spinning. In
accordance with the principle of sustainable development, the product may be
updated when necessary, and no notice will be given at that time. In case of
any discrepancy between the specification and the product, the actual product
shall prevail.
Advertisement

Related Manuals for YOSUDA L-007A


Summary of Contents for YOSUDA L-007A
- Page 1 Installation and Operation Manual of Spinning Bike L-007A Please read this manual before installing and using spinning. In accordance with the principle of sustainable development, the product may be updated when necessary, and no notice will be given at that time. In case of any discrepancy between the specification and the product, the actual product shall prevail.
-
Page 2: Table Of Contents
Catalog Customer Service…………………………………………....0 Safety Attentions & Warning Descriptions…………………………1 Product Profile…………………………………………......3 Installation Instructions …………………………….……………….5 Maintenance…………………………………………......11 Sports Advice & Guideline……………………………………….….15... -
Page 3: Customer Service
Customer Service If you have any questions or concerns, please feel free to contact us. Email address: service@yosudabikes.com Contact Us... -
Page 4: Safety Attentions & Warning Descriptions
Safety Attentions & Warning Descriptions Please properly keep this instruction book, so that you can refer to it. 1. Before starting any exercise program, you should consult your physician to determine if you have any medical or physical conditions that could put your health and safety at risk or prevent you from using the equipment properly. - Page 5 9. Please wear proper sport suits during the exercise, please don’t wear loose clothes, to avoid getting involved in any movable parts. 10. This instrument has already pass through the relevant test of ASTM, it is applicable to the household appliance. Maximum user weight limit is 330 lbs. 11.
-
Page 6: Product Profile
Product Profile Main configure list Name Name Name IPAD Holder Front Stabilizer piece piece Seat Belt Cover piece piece Seat Slider Right Crank piece Brake Knob Right Pedal piece piece Plum Blossom Flywheel piece piece Knob Seat Post Main Frame piece Inner Bush Flywheel Cover... - Page 7 Tools & Screws...
-
Page 8: Installation Instructions
Installation Instructions Step1: Install the Front and Rear Stabilizer Required parts: #18-Rear Stabilizer #30-Front Stabilizer #16-Bolts 4Pcs #17-Washer 4Pcs #43-Main Frame #64-Inner Hexagon Spanner 1. Attach the #18-Rear Stabilizer and #30-Front Stabilizer to the #43-Main Frame. 2. Put the #17-Washers into the #16-Bolts, tighten and secure with #64-Inner Hexagon Spanner. - Page 9 3. Align the #33-Right Pedal with the #32-Right Crank at 90°. Turn the pedal bolt on the #33- Right Crank CLOCKWISE as tightly as you can with your hand. Then use #65- Allen Wrench to tighten and secure. Step 3: Install the Adjustable Seat Post Required parts: #7 - Seat post #9 - Adjustment Pull Pin 1PC...
- Page 10 Step 4: Install the Seat Required parts: #2- Seat #3- Seat Slider #6- Plum blossom knob #65- Allen Wrench #70-Washer 1. Unscrew the #6- Plum Blossom Knob on the #3- Seat Slider, put #3- Seat Slider on the #7-Seat Post. 2.
- Page 11 Step 5: Install the Handlebar Post Required parts: #56-L Knob 1PC #57-Handlebar Post 1. Unscrew #56-L Knob counter-clockwise, and insert the #57 - Handlebar Post to the handlebar tube. 2. Adjust the #57 - Handlebar Post height to a suitable location and screw down clockwise the #56-L Knob to tighten.
- Page 12 Step 7: Install the Monitor Required parts: #59- Monitor #60-Handlebar Insert the #59-Monitor in the #60-Handlebar according to the direction shown on the picture, adjust the monitor view angle well, insert the Sensing Cable which remained from the #43-Main Frame into the speed hole of monitor. Note: There are two ends of the Sensing Cable.
- Page 13 Step 8. Installation of water bottle holder Required parts: #35- Water Bottle Holder Place #35- Water Bottle Holder on the flywheel support pipe, and fix it with #65 - Allen Wrench. Attentions: After completing the installation of exercise bike as the above steps, lock all bolts and check them again, ensure all bolts are firmly locked, then you can use the exercise bike.And we have an extra brake pad in the package.
-
Page 14: Maintenance
Maintenance This is general information for daily, weekly, and monthly maintenance to be performed on your bike. 1. Daily Maintenance After each exercise session, wipe down all the equipment: seat, frame, and handlebars. Pay special attention to the seat post, handlebar post, and belt guard. Sweat is very corrosive and may cause problems that require parts replacement later. - Page 16 Name Qty. Name Qty. IPAD Holder Seat Seat Slider End Cap 50*25 Brake Knob Plum Blossom Knob Seat Post Inner Bush Adjustment Pull Pin C-Type Buckle M20*1.0 Left Crank Flange Nut M10*1.25 Crank End Cap Left Pedal Bearing 6004 Bolt M10*25 Washer φ...
- Page 17 Inner Hexagon Screws Spring Washers φ8 M8*16 Meter Carrier Inner Hexagon Spanner Allen Wrench Umbrella Head Inner Hexagon M4*10 Umbrella Head Cross Umbrella Head Cross Self Tapping 4.8*16 Self Tapping 4.2*13 Umbrella Head Cross Washer φ10 *φ20*t3 Self Tapping 4*14 Washer φ5*12*t1.5φ...
-
Page 18: Sports Advice & Guideline
Sports Advice & Guideline...
Need help?
Do you have a question about the L-007A and is the answer not in the manual?
Questions and answers
Could you please tell me how to work the monitor and what the meaning of the words are
The monitor on the YOSUDA L-007A operates using an LCD display powered by batteries. It shows all tracked values at once, so you don’t need to press buttons to cycle through them. The display terms mean:
- Time cycled: Duration of your workout.
- Speed of pedaling: How fast you are pedaling.
- RPM (Rotations Per Minute): The number of pedal rotations per minute.
- Distance: The virtual distance traveled during the workout.
- Calories burned: An estimate of calories burned.
- Odometer: The total distance accumulated over time.
Additionally, there is a dedicated slot below the console to place a tablet or smartphone for extra functionality.
This answer is automatically generated
I have a wire with a spring attached to the bike and have no idea where it should be plugged im??
What does the letter P represent on the monitor?