Table of Contents
Advertisement
For further assistance with your EnfaSafe car seat,
please do not hesitate to call us on +353 1 2952111 or you can get in touch by email at reachout@euroactiveproducts.com
EUROACTIVE HK LTD.
79/ 80 FURZE ROAD, SANDYFORD BUSINESS ESTATE, DUBLIN, D18 C5P9, IRELAND
INTERNATIONAL HOUSE, 12 CONSTANCE STREET, LONDON, E16 2DQ, UNITED KINGDOM
MADE IN CHINA
Instruction Manual
IMPORTANT: PLEASE KEEP
FOR FUTURE REFERENCE
READ CAREFULLY
Advertisement
Table of Contents

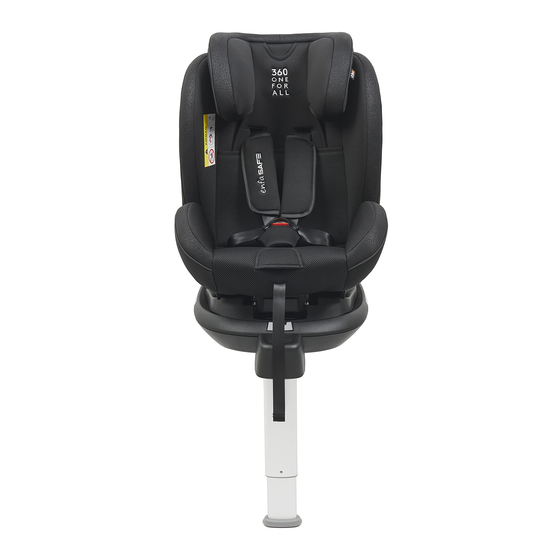
Summary of Contents for EnfaSafe 360 ONE FOR ALL
- Page 1 Instruction Manual For further assistance with your EnfaSafe car seat, please do not hesitate to call us on +353 1 2952111 or you can get in touch by email at reachout@euroactiveproducts.com IMPORTANT: PLEASE KEEP EUROACTIVE HK LTD. FOR FUTURE REFERENCE...
-
Page 2: Table Of Contents
CONTENTS 1. Notice ................3 5.1.2. Installed in forward facing position with belt ..21 5.1.2.1. Group I (9-18kg) ..........21 2. Parts labelled ..............5 5.1.2.2. Group II III (15-36kg) .........22 3. Warning ................6 5.2. Installed in the car with ISOFIX connector ....23 IMPORTANT: READ THESE 4. -
Page 3: Notice
1. NOTICE Notice regarding ISOFIX child restraint system Notice regarding ISOFIX child restraint system (Group 0 I Rearward facing): (Group I Forward facing): We recommend customer checks compatibility of the child restraint with the intended vehicle prior to fitting. 1. This is an ISOFIX CHILD RESTRAINT SYSTEM. 1. -
Page 4: Parts Labelled
2. PARTS LABELLED 3. WARNING NEVER use this child restraint with any other base Belt guidance except ones that the manufacturer permits. IMPORTANT: Please carefully read and make sure sure you understand all instructions DO NOT use a child safety seat that has been in a in this manual and in the vehicle owner’s crash. -
Page 5: Safety Seat Use Method
3. WARNING 4. SAFETY SEAT USE METHOD 4.1.2. When using as Semi-Universal category The child restraint must not be used without the cover. The seat cover should not be replaced with (Group 0 0+ I II III), this child restraint system is Any straps holding the restraint to the vehicle any other than the one recommended by the 4.1 INSTALL LOCATION:... -
Page 6: How To Use The Harness Buckle
4.2. HOW TO USE THE HARNESS BUCKLE: 4.3. ADJUST THE HEADREST: Hold the two buckle tongues together. A. When in Group 0 0+I (use level 1-6) Make sure the right side is up. The shoulder straps are adjusted as follows: Engage them before putting them into the harness Loosen the shoulder straps of the child seat as buckle, which should hear an audible CLICK. -
Page 7: Adjusting The Safety Belt
4.3. ADJUST THE HEADREST: CAUTION! The shoulder straps must not run behind the child’s back, at ear height or above B. When in Group II III (use level 7-10) the ears. When child grows up above 15kg, the headrest should be used at the 7-10 level height. 4.4. -
Page 8: To Rotate The Seat
4.5. TO ROTATE THE SEAT: 4.6. TO ADJUST THE RECLINE OF THE SEAT Pull the rotation adjuster out with your thumb, Push the recline handle up and pull the seat outward then rotate the safety car seat to 360° angle. (see picture a), then the seat can be adjusted. -
Page 9: Removing The 5-Point Harness And Storing The Parts
4.7. REMOVING THE 5-POINT HARNESS AND STORING THE PARTS Step 1: Open the storage compartment at the rear of the car seat. Step 2: Remove the shoulder pads. Step 3: Loosen the 5-point harness to maximise extension. Remove the harness from the metal link area at the rear backrest (Picture A and Picture B). -
Page 10: Adjusting The Support Leg
4.7. REMOVING THE 5-POINT HARNESS AND 4.8. ADJUST THE SUPPORT LEG STORING THE PARTS Pull out the support leg to the maximum angle. Step 3: Storing the buckle: a. Press the adjust button of support leg, hold the Open the buckle, take out buckle tongues from support leg using the other hand and then shoulder belt. -
Page 11: Removing The Triangle Pad And Sleeping Pad
4.9. REMOVING TRIANGLE PAD AND 4.10. REMOVING THE FABRIC COVER 5. INSTALLED IN THE CAR DO NOT twist the belt! SLEEPING PAD Ensure that the buckle tongues are properly 1. Remove the 5-point harness. 5.1. INSTALLED IN THE CAR WITH BELT locked into the vehicle seat buckle - you will When your child’s weight exceeds 8kg, remove the 2. -
Page 12: Installed In Forward Facing Position With Belt
5.1. INSTALLED IN THE CAR WITH BELT 5.1. INSTALLED IN THE CAR WITH BELT CAUTION! The diagonal seat belt section must run diagonally backward. You can adjust the course of 5.1.2. Installed in forward facing position with belt 5.1.2.2. Group II III (15-36kg) the belt with your vehicle's adjustable belt deflector 5.1.2.1. -
Page 13: Installed In The Car With Isofix Connector
5.2. INSTALLED IN THE CAR WITH ISOFIX CONNECTOR 5.2. INSTALLED IN THE CAR WITH ISOFIX CONNECTOR 5.2.1. Installed in rearward facing position with ISOFIX 5.2.2. Installed in forward facing position with ISOFIX CLICK connector and support leg; Group 0 1 (0-18kg). connector and support leg;... -
Page 14: Group I (9-18Kg)
5.2. INSTALLED IN THE CAR WITH ISOFIX CONNECTOR CAUTION! The diagonal seat belt section must 6. CARE AND MAINTENANCE Press the adjust button of support leg, adjust the support leg upwards to the shortest, allowing it run diagonally backward. You can adjust the 5.2.3. -
Page 15: Main Technical Parameter
6. CARE AND MAINTENANCE 7. MAIN TECHNICAL PARAMETER CLEANING THE HARNESS AND SHELL: Length: 510mm Sponge clean using warm water and mild soap; Width: 436mm do not use any other cleaning agents. Height: 640-840mm STORAGE: Store in a safe, dry place and away from heat and direct sunlight.


Need help?
Do you have a question about the 360 ONE FOR ALL and is the answer not in the manual?
Questions and answers