Advertisement
Available languages
Available languages
Quick Links
Advertisement

Related Manuals for novostella NTF71


Summary of Contents for novostella NTF71
- Page 1 Smart LED Flood Light User Guide...
-
Page 2: Table Of Contents
Contents English 1-18 Deutsch 19-36 Français 37-54 Español 55-72 Italiano 73-90... -
Page 4: English
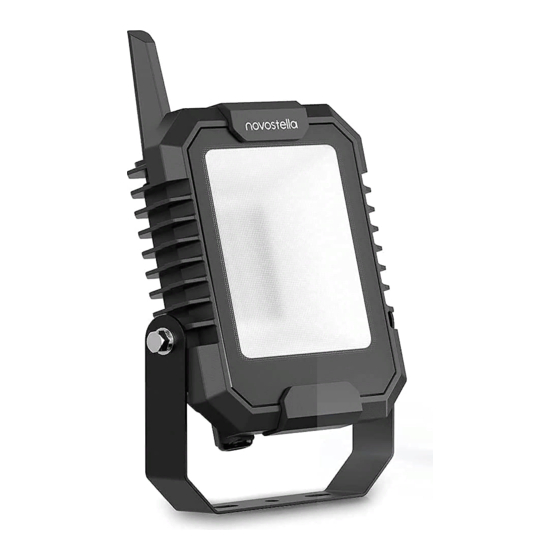
Thank you for ordering from Novostella. Set-up is easy and takes only a few minutes by following the instruc�ons. Part One How to insall the light? Part Two How to pair the light to Smart Life app? Part Three How to connect the lights to Internet, and control with Amazon Alexa and... - Page 5 3. Dimension 15cm/5.9in 4.5cm/1.8in 20cm/7.87in 5cm/1.97in NTF71 NTF72 Weight: 1.1lb/0.5kg Weight: 2.2lb/1kg Max Projected Area: 30㎡ Max Projected Area: 50㎡...
- Page 6 4. Installa�on Step A: According to the spacing of two screw bits on the bracket, drill two holes on the moun�ng panel. Note: Maximum moun�ng height is over 5m. Step B: Aim the bracket at the holes and fix it with two bolts. Step C: Adjust the ligh�ng direc�on up or down as per your need and plug in to power the light on.
- Page 7 Note: 01 Make sure that the distance between the light and the object being lits is more than 1 meter, so as to avoid high temperature caused by short distance. The light source of this Iuminaire is not replaceable. Limita�on of Indoor and Outdoor Use (1) This light is waterproof and damp proof.
- Page 8 Part Two - How to pair the light to Smart Life app? Before star�ng the paring, please make sure to turn on the Bluetooth on your phone, and connect to the Internet. Step A: Smart Life app installa�on Please choose either way below to download and install the app. (1) As per your phone system, choose the QR code to scan.
- Page 9 Step C : Add the light to Smart Life App 1. Tap '+' bu�on on top right corner to add devices. Tap 'Ligh�ng', then choose 'Light Source (BLE)' to add the lights. 2. Power on the light with your own switch. Repeatedly turn on-off-on-off- on-off-on switch to ac�vate the light into rapid blinking status (about 0.5s per blink).
- Page 10 3. Give a name to the light. Note: A simple name is recommended. 4. The named light will be shown on the app homepage. Now you can control the light (turn on/off, change colors, adjust brightness ect.) with Smart Life on the se�ng page. Turn on or off the light by tapping the bulb icon.
- Page 11 How to group the lights? Make sure all the lights have been paired to “Smart Life” app, then group the lights by following these steps. 1. Choose any light on the app, click the edit bu�on on the top right corner, then click “Create Group”...
- Page 12 Part Three – How to connect the lights to Internet, and control with Amazon Alexa and Google Assistant? If you want to connect the lights to Internet, and control with Amazon Alexa and Google Assistant, you can easily expand the smart flood lights with our Hub accessory (sold separately).
- Page 13 1. Tap ‘+’ bu�on on top right corner to add device. Tap ‘Gateway Control’, then choose ‘Wireless Gateway (BLE)’ to add the hub.
- Page 14 2. Plug the hub into a socket. Long press the power bu�on on the hub �ll the indicator lights rapidly blink, tap the ‘Next ’ bu�on, then click ‘+’ bu�on to add the hub. 3. Choose your WiFi network, enter your password, and tap the ‘Next’ bu�on.
- Page 15 Step B : Add the lights to the Hub. Please make sure all the lights have been paired to ‘Smart Life’ App first. Choose the hub on the app, click the ‘add device by list’ bu�on, select all the lights, and click the ‘Confirm’ bu�on.
- Page 16 How to control the light with Amazon Alexa?
- Page 19 How to control the light with Google Assistant?
-
Page 22: Deutsch
Deutsch Vielen Dank, dass Sie bei Novostella bestellt haben. Das Einrichten ist einfach und dauert nur wenige Minuten, wenn Sie die Anweisungen befolgen. Erster Teil Wie schaltet man das Licht ein? 20-23 Zweiter Teil Wie koppelt man die Leuchte mit der Smart Life App? 24-27 Dri�er Teil... - Page 23 Leuchte beschädigt ist, muss es ausschließlich durch den Hersteller oder seinen Kundendienst oder eine ähnlich qualifizierte Person ersetzt werden, um eine Gefährdung zu vermeiden. 3. Abmessung 15cm/5.9in 4.5cm/1.8in 20cm/7.87in 5cm/1.97in NTF71 NTF72 Gewicht: 1.1lb/0.5kg Gewicht: 2.2/1kg Max. projizierte Fläche: 30㎡ Max. projizierte Fläche: 50㎡...
- Page 24 Deutsch 4. Installa�on Schri� A: Bohren Sie entsprechend dem Abstand der beiden Schraubenbits an der Halterung zwei Löcher in die Montagepla�e. Hinweis: Die maximale Montagehöhe beträgt über 5m. Schri� B: Richten Sie die Halterung an den Löchern aus und befes�gen Sie sie mit zwei Schrauben.
- Page 25 Deutsch Hinweis: 01 Achten Sie darauf, dass der Abstand zwischen der Leuchte und dem zu beleuchtenden Objekt mehr als 1 Meter beträgt, um eine hohe Temperatur aufgrund der geringen En�ernung zu vermeiden. Das Leuchtmi�el dieser Leuchte ist nicht austauschbar. Einschränkung der Verwendung im Innen- und Außenbereich (1) Diese Leuchte ist wasserdicht und feuch�gkeitsbeständig.
- Page 26 Deutsch Zweiter Teil - Wie koppelt man das Licht mit der Smart Life App? Bevor Sie mit dem Paring beginnen, stellen Sie bi�e sicher, dass Bluetooth auf Ihrem Telefon eingeschaltet ist und eine Verbindung zum Internet besteht. Schri� A: Installa�on der Smart Life-App. Bi�e wählen Sie eine der folgenden Möglichkeiten zum Herunterladen und Installieren der App.
- Page 27 Deutsch Schri� C: Hinzufügen der Leuchte zur Smart Life App 1. Tippen Sie auf die Schal�läche "+" in der oberen rechten Ecke, um Geräte hinzuzufügen. Tippen Sie auf "Beleuchtung", wählen Sie dann "Lichtquelle (BLE)", um die Leuchten hinzuzufügen. 2. Schalten Sie das Licht mit Ihrem eigenen Schalter ein. Drehen Sie wiederholt den Ein-Aus-Aus-Ein-Aus-Ein-Schalter, um das Licht in einen schnell blinkenden Zustand zu versetzen (ca.
- Page 28 Deutsch 3. Geben Sie der Leuchte einen Namen. Hinweis: Es wird ein einfacher Name empfohlen. 4. Das benannte Licht wird auf der Startseite der App angezeigt. Nun können Sie das Licht steuern (ein-/ausschalten, Farben ändern, Helligkeit einstellen ect.) mit Smart Life auf der Einstellungsseite. Schalten Sie das Licht ein oder aus, indem Sie auf das Glühbirnensymbol �ppen.
- Page 29 Deutsch Wie gruppiert man die Lichter? Vergewissern Sie sich, dass alle Leuchten mit der "Smart Floodlight" App gekoppelt wurden, und gruppieren Sie dann die Leuchten anhand der folgenden Schri�e. 1. Wählen Sie ein beliebiges Licht in der App, klicken Sie auf die Schal�läche "Bearbeiten"...
- Page 30 Deutsch Dri�er Teil - Wie verbindet man die Leuchte mit dem Internet und steuert sie mit Amazon Alexa und Google Assistant? Wenn Sie die Lichter mit dem Internet verbinden und mit Amazon Alexa und Google Assistant steuern möchten, können Sie die intelligenten Flutlichter einfach mit unserem Hub-Zubehör (separat erhältlich) erweitern.
- Page 31 Deutsch 1. Tippen Sie auf die Schal�läche "+" in der oberen rechten Ecke, um ein Gerät hinzuzufügen. Tippen Sie auf "Gateway-Steuerung", wählen Sie dann "Drahloses Gateway (BLE+Wi-Fi)", um den Hub hinzuzufügen.
- Page 32 Deutsch 2. Stecken Sie den Hub in eine Steckdose. Drücken Sie lange auf die Einschal�aste am Hub, bis die Anzeigeleuchten schnell blinken, �ppen Sie auf die Schal�läche "Weiter" und klicken Sie dann auf die Schal�läche "+", um den Hub hinzuzufügen. 3.
- Page 33 Deutsch Schri� B: Hinzufügen der Leuchten zum Hub Bi�e stellen Sie sicher, dass alle Leuchten zuerst mit der "Smart Floodlight" App gekoppelt wurden. Wählen Sie den Hub in der App aus, klicken Sie auf die Schal�läche "add device by list", wählen Sie alle Leuchten aus und klicken Sie auf die Schal�läche "Confirm".
- Page 34 Wie steuert man das Licht mit Amazon Alexa?
-
Page 40: Français
Français Nous vous remercions d'avoir choisir Novostella. La configura�on est simple et ne prend que quelques minutes en suivant les instruc�ons. Première Par�e Comment installer la lumière? 38-41 Deuxième Par�e Comment coupler la lumière à l'applica�on Smart Life? 42-45 Troisième Par�e Comment connecter les lumières à... - Page 41 être remplacé exclusivement par le fabricant, son agent de service ou une personne qualifiée similaire, afin d'éviter toutes les risques. 3. Dimension 15cm/5.9in 4.5cm/1.8in 20cm/7.87in 5cm/1.97in NTF71 NTF72 Poids: 1.1lb/0.5kg Poids: 2.2lb/1kg Max Surface Projetée: 30㎡ Max Surface Projetée: 50㎡...
- Page 42 Français 4. Installa�on Étape A: En fonc�on de l'espacement des deux embouts de vis sur le support, percez deux trous sur le panneau de montage. Remarque: Hauteur maximale de montage est supérieure à 5m Étape B: Dirigez le support vers les trous et fixez-le avec deux boulons. Étape C: Ajustez la direc�on de l'éclairage vers le haut ou le bas selon vos besoins et branchez-la pour allumer la lumière.
- Page 43 Français Note: 01 Assurez-vous que la distance entre la lumière et l'objet éclairé est supérieure à 1mètre, afin d'éviter les températures élevées causées par une distance courte. La source lumière de ce�e lampe n'est pas remplaçable. Limite d'u�lisa�on Intérieure et Extérieure (1) Ce�e lumière est imperméable et hydrofuge.
- Page 44 Français Deuxième Par�e - Comment apparier la lumière à l'applica�on Smart Life? Avant de commencer l'appariement, assurez-vous d'ac�ver le Bluetooth sur votre téléphone et de vous connecter à Internet. Étape A: Installa�on de l'applica�on Smart Life Veuillez choisir l'une des méthodes ci-dessous pour télécharger et installer l'applica�on.
- Page 45 Français Étape C: Ajoutez les appareils à l'applica�on Smart Life 1. Appuyez sur le bouton «+» dans le coin supérieur droit pour ajouter un appareil, puis appuyez sur « Source de Lumière (BLE)» pour accéder à la page suivante. 2. Allumez la lumière. Brancher et débrancher l'interrupteur à plusieurs reprises: marche-arrêt-marche-arrêt-marche-arrêt-marche pour laisser la lumière entrer dans un état de clignotement rapide (environ 0, 5 s par clignotement).
- Page 46 Français 3. Donnez un nom à la lumière. - Un nom simple est recommandé. 4. La lumière nommée sera affichée sur la page d'accueil de l'applica�on. Vous pouvez maintenant contrôler la lumière (allumer / éteindre, changer les couleurs, régler la luminosité, etc.) avec Smart Life sur la page des paramètres. Allumer ou éteindre la lumière en appuyant sur l'icône de l'ampoule.
- Page 47 Français Comment grouper les lumières? Assurez-vous que toutes les lumières ont été associées à l'applica�on «Smart Life», puis regroupez les lumières en suivant ces étapes. 1. Choisissez n'importe quelle lumière sur l'applica�on, cliquez sur le bouton Modifier dans le coin supérieur droit, puis cliquez sur «Créer un groupe» 2.
- Page 48 Français Troisième Par�e - Comment connecter les lumières à l'internet et contrôler avec Amazon Alexa et Google Assistant? Si vous souhaitez connecter les lumières à l'internet et contrôler avec Amazon Alexa et Google Assistant, vous pouvez facilement étendre la fonc�onement des projecteurs intelligents avec notre accessoire Hub (vendu séparément) Veuillez cliquer sur le lien ci-dessous pour acheter l'accessoire Hub dans notre bou�que:...
- Page 49 Français 1. Appuyez sur le bouton «+» dans le coin supérieur droit pour ajouter un appareil. Appuyez sur "Contrôle de la passerelle", puis choisissez «Passerelle (BLE)» pour ajouter le hub.
- Page 50 Français 2. Branchez le hub. Appuyez longuement sur le bouton d'alimenta�on du hub jusqu'à le voyant clignotent rapidement, appuyez sur le bouton «Suivant», puis cliquez sur Bouton «+» pour ajouter le hub. 3. Choisissez votre réseau Wi-Fi, saisissez votre mot de passe et appuyez sur «Suivant»...
- Page 51 Français Étape B: Ajoutez les lumières au hub. Veuillez vous assurer que toutes les lumières ont été associées à l'applica�on «Smart Life». Choisissez le hub sur l'applica�on, cliquez sur le bouton "Ajouter un appareil par liste", sélec�onnez toutes les lumières et cliquez sur le bouton «Confirmer».
- Page 52 Comment contrôler la lumière avec Amazon Alexa?
- Page 53 Étape C: Entrez votre compte et votre mot de passe pour l'applica�on Smart Life. Appuyez sur “Se connecter maintenant ”, puis appuyez sur “Autoriser” sur la page suivante pour lier le compte Smart Life à Alexa Étape D: Lorsque votre compte Smart Life est lié à Alexa, appuyez sur “DÉTECTER DES APPAREILS”...
-
Page 58: Español
Español Gracias por realizar el pedido de Novostella. La configuración es fácil y solo lleva unos minutos por siguiendo las instrucciones. Parte 1 ¿Cómo instalar el foco led inteligente? 56-59 Parte 2 ¿Cómo emparejar el led con la aplicación Smart Life? - Page 59 3. Dimensión 15cm/5.9in 4.5cm/1.8in 20cm/7.87in 5cm/1.97in NTF71 NTF72 Peso: 1.1lb/0.5kg Peso: 2.2lb/1kg Área Proyectada Máxima: 30㎡ Área Proyectada Máxima: 50㎡...
- Page 60 Español 4. Instalación Paso A: De acuerdo con el espaciado de dos brocas de tornillo en el soporte, taladre dos orificios en el panel de montaje. Nota: La altura máxima de montaje es superior a 5 metros. Paso B: Apunte el soporte en los orificios y �jelo con los dos pernos. Paso C: Ajuste la dirección del led arriba o abajo según su necesidad y encienda el led.
- Page 61 Español Nota: 01 Asegúrese de que la distancia entre la luz y el objeto sea más de 1 metro, para evitar la temperatura alta causada por la distancia corta. La fuente luminosa de la luz no es reemplazable. Limitación del Uso en Interiores y Exteriores (1) Esta luz es resistente al agua y a la humedad.
- Page 62 Español Parte 2 - ¿Cómo emparejar el led con la aplicación Smart Life? Antes de iniciar el emparejamiento, asegúrese de encender el Bluetooth en su teléfono y conectarse al Internet. Paso A: Instalación de la aplicación Smart Life. Elija cualquiera de las siguientes formas para descargar e instalar la aplicación. (1) Según su sistema telefónico, elija el código QR para escanear.
- Page 63 Español Paso C: Añade el led a la aplicación Smart Life 1. Toque el botón '+' en la esquina superior derecha para agregar disposi�vos. Toque ‘Iluminación', luego elija ‘Fuente de luz(BLE)' para agregar las luces. 2. Enciende el led con su propio interruptor. Encienda repe�damente el interruptor de encendido-apagado-encendido-apagado-encendido-apagado para ac�var la luz en un estado de parpadeo rápido (aproximadamente 0,5 segundos por parpadeo).
- Page 64 Español 3. Da un nome al foco led inteligente Nota: Se recomienda un nombre sencillo. 4. La luz nombrada se mostrará en la página de inicio de la aplicación. Ahora puede controlar el led(encender / apagar, cambiar colores, ajustar el brillo, etc.) con Smart Life en la página de configuración.
- Page 65 Español ¿Cómo agrupar las luces? Asegúrese de que todas los leds se hayan emparejado con la aplicación "Smart Life", luego agrupe los leds siguiendo estos pasos. 1. Elija cualquier led en la aplicación, haga clic en el botón editar en la esquina superior derecha, luego haga clic en "Crear grupo".
- Page 66 Si quiere conecta el led al Internet, y lo control con Amazon Alexa y Google Assistant, puede ampliar fácilmente los leds inteligentes con nuestro accesorio Hub (se vende por separado). Puede buscar”Novostella Hub”en Amazon o haga clic en el enlace de abajo para comprar el accesorio Hub en nuestra �enda: h�ps://www.amazon.es/dp/B08WWXH59K Después de obtener el accesorio Hub, siga los pasos a con�nuación para...
- Page 67 Español 1. Toque el botón "+" en la esquina superior derecha para agregar el disposi�vo. Toque “Control de puerta de enlace", luego elija “Puerta de enlace (BLE)" para agregar el hub.
- Page 68 Español 2. Enchufe el hub en un enchufe. Mantenga presionado el botón de encendido en el hub.hasta que las luces indicadoras parpadeen rápidamente, toque el botón "Siguiente" y, a con�nuación, haga clic en el botón "+" para agregar el hub. 3.
- Page 69 Español Paso B: Agregue los leds al Hub. Primero, asegúrese de que todos los leds se hayan emparejado con la aplicación "Smart Life". Elija el centro en la aplicación, haga clic en el botón “add device by list", seleccione todos los leds y haga clic en el botón "Confirm".
- Page 70 ¿Cómo controlar el foco led inteligente con Amazon Alexa?
- Page 71 el LED. Paso E: Cuando el LED nombrada se empareja con Alexa desde Smart Life, se mostrará en la página del disposi�vo (consulte el ejemplo de Smart light)
- Page 72 Paso F: Ahora puede controlar el LED con la aplicación Alexa en la página de configuración. Para encender 0 apagar el LED, simplemente toque el icono del LED. Paso G: También puede controlar el LED por voz con Alexa dando estos comandos: Alexa, ac�va “el nombre del disposi�vo".
- Page 74 Paso E: Encontrará el LED nombrada mostrará en la página de inicio. Ahora puede controlar el LED en la aplicación Asistente de Google 0 controlarla por voz con estos comandos: Ok Google, ac�va el“nombre del disposi�vo". Ok Google, desac�va“nombre del disposi�vo". Ok Google, pon“nombre del disposi�vo"...
-
Page 76: Italiano
Italiano Grazie per aver ordinato da Novostella. La configurazione è facile e richiede solo pochi minu� seguendo le istruzioni. Prima Parte Come installare il fare�e led intelligente? 74-77 Seconda Parte Come accoppiare il fare�e led all’app Smart Life? 78-81 Terza Parte Come controllare il fare�o led al Internet e controllarlo con Amazon Alexa... - Page 77 è danneggiato, deve essere sos�tuito esclusivamente dal produ�ore o dal suo agente di servizio o da una persona qualificata simile per evitare il pericolo. 3. Dimension 15cm/5.9in 4.5cm/1.8in 20cm/7.87in 5cm/1.97in NTF71 NTF72 Peso: 1.1lb/0.5kg Peso: 2.2lb/1kg Area Proie�ata Massima: 30㎡ Area Proie�ata Massima: 50㎡...
- Page 78 Italiano 4. Installazione Passo A: In base alla spaziatura di due punte a vite sulla staffa, pra�care due fori sul pannello di montaggio. Nota: l'altezza massima di montaggio è superiore a 5 metri. Passo B: Puntare la staffa nei fori e fissarla con i due bulloni. Passo C: Regolare la direzione del led verso l'alto o verso il basso in base alle proprie necessità...
- Page 79 Italiano Nota: 01 Assicurarsi che la distanza tra la luce e l'ogge�o sia superiore a 1 metro, per evitare l'alta temperatura causata dalla breve distanza. Le fon� luminose di la luce non è sos�tuibili. Limitazione dell'uso Interno ed Esterno (1) Questa luce è resistente all'acqua e all'umidità. È prote�o dalla pioggia, ma non può...
- Page 80 Italiano Seconda Parte - Come accoppiare il fare�e led all’app Smart Life? Prima di iniziare l'associazione, assicura� di a�vare il Bluetooth sul telefono e di conne�er� a Internet. Passo A: Installa l'applicazione Smart Life. Scegli uno dei seguen� modi per scaricare e installare l'applicazione. (1) A seconda del sistema telefonico, scegli il codice QR da scansionare.
- Page 81 Italiano Passo C: Aggiungi il led all'app Smart Life 1. Tocca il pulsante "+" nell'angolo in alto a destra per aggiungere disposi�vi. Tocca "Illuminazione", quindi scegli " Fonte di luce (BLE)" per aggiungere le luci. 2.Accendi il led con il suo interru�ore. Accendere ripetutamente l'interru�ore on-off-on-off-on-off...
- Page 82 Italiano 3. Dare un nome al Fare�e LED Intelligente Nota: Si consiglia un nome semplice. 4. La luce denominata verrà visualizzata nella home page dell'applicazione. Ora puoi controllare il led (accendere / spegnere, cambiare i colori, regolare la luminosità, ecc.) Con Smart Life nella pagina delle impostazioni. Accendi o spegni il led toccando l'icona della lampadina.
- Page 83 Italiano Come raggruppare le luci? Assicura� che tu� i LED siano sta� accoppia� con l'applicazione "Smart Life", quindi raggruppa i LED seguendo ques� passaggi. 1. Scegli qualsiasi luce nell'app, fai clic sul pulsante di modifica nell'angolo in alto a destra, quindi fai clic su "Creare un gruppo". 2.
- Page 84 Se desideri conne�ere il led a Internet e controllarlo con Amazon Alexa e Google Assistant, puoi espandere facilmente i LED intelligen� con il nostro accessorio Hub (venduto separatamente). Puoi cercare "Novostella Hub" su Amazon o fare clic sul collegamento so�ostante per acquistare l'accessorio Hub nel nostro negozio: h�ps://www.amazon.it/dp/B08WWXH59K Dopo aver o�enuto l'accessorio Hub, segui i passaggi seguen�...
- Page 85 Italiano 1. Toccare il pulsante "+" nell'angolo in alto a destra per aggiungere il disposi�vo. Toccare "Controllo gateway", quindi scegliere "Gateway (BLE)" per aggiungere l'hub.
- Page 86 Italiano 2. Collegare l'hub a una presa. Tieni premuto il pulsante di accensione sull'hub. Finché le spie non lampeggiano rapidamente, tocca il pulsante“Avan�", quindi fai clic sul pulsante "+" per aggiungere l'hub. 3. Scegli la tua rete WiFi, inserisci la password e tocca il pulsante "Avan�", dai un nome all'hub e tocca il pulsante “Done".
- Page 87 Italiano Passo B: Aggiungere i LED all’Hub. Innanzitu�o, assicura� che tu� i LED siano sta� accoppia� con l'app "Smart Life". Scegli il centro nell'applicazione, fai clic sul pulsante “add device by list", seleziona tu� i LED e fai clic sul pulsante "Confirm".
- Page 88 Italiano Come controllare i fare�o led con Amazon Alexa? Assicura� che la tua app Alexa sia collegata ad Amazon Echo ed entrambi collaborano corre�amente so�o la tua rete Wi-Fi. Passo A: Accedi all'app Alexa e clicca il menù in alto a sinistra poi tocca la voce “Abilità...
- Page 89 Italiano Passo C: Inserisci il tuo account Smart Life a la sua password, clicca “link ora” poi “Autorizzare” nella pagina successiva per collegare I’ app Smart Life ad Alexa. Passo D: Quando il tuo account Smart Life è collegato ad Alexa, tocca“SCO- PRI DISPOSITIVI"...
- Page 90 Italiano Passo F: Ora puoi controllare il lED con Ilapplicazione Alexa nella pagina di configurazione. Per accendere 0 spegnere il LED, è sufficiente toccare Iicona del LED. Passo G: Puoi anche controllare il LED a voce con Alexa dando ques� comandi: Alexa, a�va “il nome del disposi�vo".
- Page 91 Italiano Parte 4 - Come controllare i fare�o LED intelligen� con Google Assistant? Passo A: Apri l'app Google Home, premi“Home Control”nel menù laterale a sinistra. Passo B: Clicca il pulsante“+”per accedere alla schermata successiva. Passo C: Cerca “Smart Life" nella lista del menù laterale.
- Page 92 Italiano Passo D: Inserisci L'account e la password dell'applicazione Smart Life per collegare I'account all' Google Assistante. Passo E: Troverete il LED nominata sulla home page. Ora puoi controllare il LED nell'applicazione Google Assistant 0 controllarla a voce con ques� comandi: Ok Google, a�va il “nome disposi�vo".
- Page 93 E-manual Step 1: Scan the QR code Step 2: Click E-manual PDF file Step 3: Read file online or download Go paper-free, make life easier, and do something good for the environment.
Need help?
Do you have a question about the NTF71 and is the answer not in the manual?
Questions and answers