
Related Manuals for Inovus Medical LapAR


Summary of Contents for Inovus Medical LapAR
- Page 1 LapAR™ Setup Manual www.inovus.org +44 (0)1744 752 952 info@inovus.org...
- Page 2 1 | When opening your simulator it is recomended that you unpack all package contents and arrange them before starting construction. Once you have done this, take the first part labelled AR20_BTM01 and lay it on a secure flat surface. 2 | Now take the following parts 2x MA01, AR20_U02, 2x WN14 &...
- Page 3 4 | Repeat the last two steps with the same parts on the front panel AR20_U01 as shown in the image. 5| Take 4x AR20_M-BKT, position them in the keys provided. In a practical sense this will need to be done one at a time with the simulator positioned on its side.
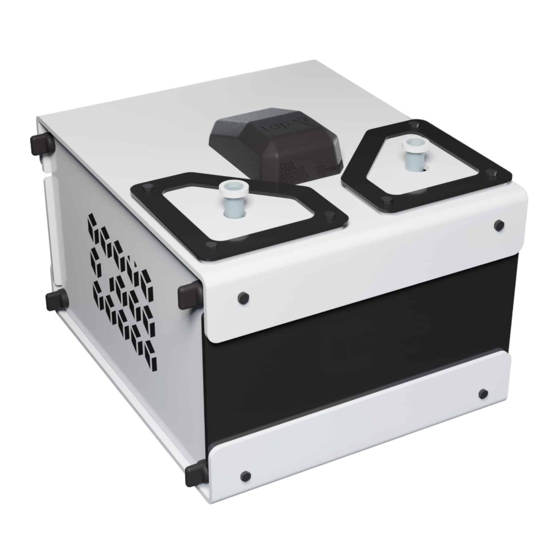
- Page 4 7 | At this stage the simulator should look exactly like the reference image. If something appears to be incorrect, go back through the steps again. 8 | Locate the following parts 1x AR20_TPB01, 2x AR20_BKT, 2x AR20_SK, 6x M5B24 & 6x WN14 to begin the top bracket sub-assembly.
- Page 5 10 | Remove the AR20_CAM from its packaging and place into positon as shown. 11 | Take 2x M5B24 bolts and affix the AR20_CAM into position. DO NOT plug-in at this stage. 12 | Take the sub-assembly from the last four steps and place it over the upright panel of the simulator as shown.
- Page 6 13 | Using 4x MA01, 4x WN14 & 4x M5B24, repeat the process from steps 2,3 & 4. Do this on each corner so that a magnet is in place for the side panels to connect into. 14 | It is important to note that the simulator is capable of multiple platform positions.
- Page 7 16 | Snap into place both side panels and move on. 17 | Connect the USB micro into the back of the camera. 18 | Connect the other end of this cable into your Laptop or PC. You will have received a link from us shortly after purchase.
- Page 8 Warranty This limited warranty applies to any order, purchase, receipt, delivery or use of any products and services (collectively, in a “purchase”) from Inovus Ltd or any of its subsidiaries or affiliates or authorised reseller (“reseller”). If you enter into a separate written agreement with any of the aforementioned this warranty may be declared null and void.
Need help?
Do you have a question about the LapAR and is the answer not in the manual?
Questions and answers