Table of Contents
Advertisement
Quick Links
Advertisement
Table of Contents

Related Manuals for Hantle T4000


Summary of Contents for Hantle T4000
- Page 1 Hantle Inc. Hantle 4000 Operator Manual...
-
Page 2: Table Of Contents
Table of Contents Operator Manual TABLE OF CONTENTS 1. INTRODUCTION 1.1 Features 1.1.1 About the Hantle 4000™ 1.2 Specifications 1.2.1 Dimensions 1.2.2 Front Panel Identification 1.2.3 Cash Dispensing Unit 1.2.4 Receipt Printer 1.2.5 Main Control Board 1.2.6 Operating Environment 1.3 Warranty/Service 2. - Page 3 6.5 Closing Procedure 6.6 Error Recovery APPENDIX A. Error Codes B. Clearing NVRAM C. TDES Master Key Installation D. Graphics Installation (On screen and Receipt) E. CDU Preventative Maintenance 4000 Installation Instructions / Specs 4000™ (Rev 1) © Hantle 2010...
-
Page 4: Features
ATMs. Providing the look and function of a true bank ATM, an eye-catching design coupled with numerous enhancements to ensure ADA, TDES and VISA/PCI/Interac PIN security compliance, makes the Hantle 4000 ™ the clear choice for any through-the-wall retail ATM deployment. -
Page 5: Specifications
Introduction Operator Manual 1.2 SPECIFICATIONS Hantle 4000™ SPECIFICATIONS 1.2.1 Dimensions Fig. 1 Hantle 4000™ Dimensions (mm) WEIGHT: 390 lbs. HEIGHT: 31.5” WIDTH: 20” DEPTH: 27.5” (dimensions of main body, not including front bezel) See Section 2 for installation / construction dimensions. -
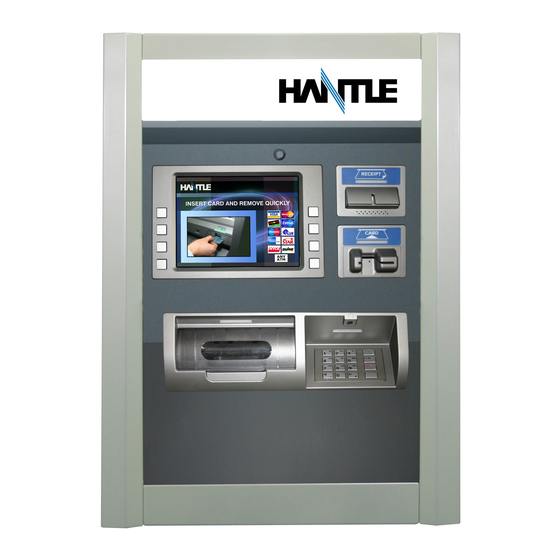
Page 6: Front Panel Identification
, , CANCEL, CLEAR, ENTER, BLANK Keypads Voice Guidance Port Voice assisted operation available through the headphone jack on the front bezel Lighted Guidance System LED lights guide the customer through the transaction. Includes keypad light during PIN entry. 4000™ (Rev 1) © Hantle 2010... -
Page 7: Cash Dispensing Unit
Cash Dispensing Unit (Rear-Load model – MCDUx1) CASH DISPENSING UNIT Dispensing Speed: 2.5 notes/second Cassette Capacity of 1700 new notes Reject Bin Ultrasonic double-detect module Auto-recovery error system (automatically clears note jams by reversing motors) 4000™ (Rev 1) © Hantle 2010... -
Page 8: Receipt Printer
200 DPI Monographic images can be printed on receipt PAPER SPECIFICATIONS One sided thermal paper Factory paper is thermal side out (can work either way) 6.5” outside diameter roll 3.125” inch wide Core inside diameter 11/16 inch 21# weight (paper thickness) 4000™ (Rev 1) © Hantle 2010... -
Page 9: Main Control Board
110/220 VAC 10%, 50/60 Hz, 145 Watts POWER CONNECTIONS For warranty purposes, the Hantle 4000™ series ATM must be connected to a dedicated power circuit. This circuit must consist of line, neutral, and ground leads connected directly to the power circuit breaker panel. This circuit should not be shared with any other equipment. -
Page 10: Warranty/Service
Dial and Electronic locks will be covered by a limited 90-day warranty (based on shipping date). Should the lock fail under normal use, Hantle will replace the lock only. Services required to open the vault and or replace the lock are at the expense of the ATM owner. -
Page 11: Installation
There are 4 screws used for each leg to secure it to the base. NOTE: It may be necessary to use a mallet to fully seat the legs. 4000™ (Rev 1) © Hantle 2010... - Page 12 The purpose of the feet is to provide a finer adjustment to the overall height of the pedestal. Alternately, if the feet are not necessary, you can anchor the base to the floor using the 2 holes provided. 4000™ (Rev 1) © Hantle 2010...
-
Page 13: Physical Installation
Position the base as close to the wall as possible. The holes on top of the pedestal are elongated to give you several inches of horizontal movement. You want the pedestal as close to the back side of the wall as possible. 4000™ (Rev 1) © Hantle 2010... - Page 14 There are 3 screws on either side of the machine (identified by red arrows - #1 below) as well as two brackets located behind the light up sign (identified by black thumbscrews #2 below) The lift the bezel upwards - #3 below. 4000™ (Rev 1) © Hantle 2010...
- Page 15 For additional security, the pedestal base includes holes for anchors. Allow for additional anchor length if adjustable feet are used in the pedestal installation. PLEASE SEE END OF MANUAL FOR ADDITIONAL INSTALLATION INSTRUCTIONS AND SPECS. 4000™ (Rev 1) © Hantle 2010...
-
Page 16: Hardware Setup
115V. See the circled portion in the picture at right. Step 3 Next open the rear door and remove the shipping screw from the slide tray. It is not necessary to replace this screw. 4000™ (Rev 1) © Hantle 2010... - Page 17 Install the cassette (enclosed) into the dispenser. DO NOT force the cassette into the dispenser! Doing so may damage the cassette and/or dispenser. Once verified that the cassette fits properly, close the vault and power on the 4000™. 4000™ (Rev 1) © Hantle 2010...
- Page 18 Using the red switch on the power supply, turn the power on and verify that all systems are operational. The exterior lights should turn on and as the programming initializes, the cash dispenser should cycle. If the ATM has not been programmed, proceed to Section 3 for programming instructions. 4000™ (Rev 1) © Hantle 2010...
-
Page 19: Programming
ATM. Your dealer/distributor will provide you with default password information. WARNING: Hantle USA, Inc. highly recommends changing your passwords from default as soon as possible. Keep all passwords safe and restrict access to non-authorized personnel. Passwords MUST be 6 digits in length, use of anything other than a 6 digit password may cause the passwords to revert back to factory default. - Page 20 (operators, service, master) you may not see certain functions. For example, if you use an operator password you will not see the Host Setup button, as you will not have access to that menu. 4000™ (Rev 1) © Hantle 2010...
-
Page 21: When An Error Occurs
Master, Service or Operator Password to continue. Contact your distributor for default passwords. Remember to press the ENTER key after typing password! Step 3 When the screen is in current display, press “OP” key to access the “OPERATOR FUNCTION.” 4000™ (Rev 1) © Hantle 2010... - Page 22 Section 3: Programming Operator Manual 3.1.3 PROGRAMMING CONTROLS Fig. 1 Hantle 4000™ keypad and LCD display Programming is done via the Keypad and LCD Function Keys. From within text entry screens, use the function keys to select from the three character maps below, including upper case, lower case and numeric + special characters.
-
Page 23: The Host Setup Menu
Passwords from default before any Master Keys can be entered. After changing the Secure Mode Passwords, you must exit completely from the Operator Menu, and reboot the machine. After this step, you can enter Master Keys. 4000™ (Rev 1) © Hantle 2010... - Page 24 Generally, you should use index 0 or 1 unless otherwise instructed. When entering keys, you must put both halves of the key on the same index. See Appendix C for detailed Master Key entry instructions. 4000™ (Rev 1) © Hantle 2010...
- Page 25 Use the chart below for entering Master Keys from the main pin pad. Master Keys (or Key Management) cannot be entered from the optional Rear Service Panel. Please see Appendix for specific Master Key instructions. 4000™ (Rev 1) © Hantle 2010...
-
Page 26: Set Terminal Id Number
These phone numbers are available from your dealer or the processor (you can also reference the quick installation guide enclosed with this ATM for numbers for the common processors). 4000™ (Rev 1) © Hantle 2010... - Page 27 Step 4 Hantle always recommends using a dedicated, data-quality phone line for all ATM installations, however if you are using a phone line that is dialing out through a PBX type system (where you dial a number for an outside line), then you may insert commas ( , ) to create a pause between digits.
-
Page 28: Health Check Message
Check’ may appear. This option is for 4 cassette dispensers and is not used in the 4000™ 3.2.7 REMOTE MONITOR Remote Monitoring is the ability to dial into your ATM and send or retrieve information using Hantle Remote Management Software (RMS). RMS EN/DISABLE This will allow the ATM to be monitored remotely. Enable The ATM will answer incoming RMS calls. -
Page 29: Trial Day Total
Your dealer or processor can provide you with the appropriate cut off time. Trial Day Total Set Enables or Disables the function Change Time Sets the time for the ATM to total itself 4000™ (Rev 1) 3.11 © Hantle 2010... -
Page 30: The System Setup Menu
Set Clock button and press the key corresponding to the function you want to set (month, day, year, etc.) NOTE: The ATM will not automatically adjust for daylight savings time. You must set this manually if you wish it to change. 4000™ (Rev 1) 3.12 © Hantle 2010... -
Page 31: Optional Languages
4000™ speaker volume is adjusted via a screw located on bottom right corner on the main circuit board (located on the back side of the LCD panel) insert a small screwdriver into the volume adjustment and turn left (softer) or right (louder). 4000™ (Rev 1) 3.13 © Hantle 2010... -
Page 32: Iso #1, #3 Enable / Disable
Simply enter the master password when it requests the operator or service password and then enter the new password. You are required to change the master password from default before the ATM can go in service. 4000™ (Rev 1) 3.14 © Hantle 2010... - Page 33 Operator level commands. In this example, you’d have to change the Operator Password to something else, and then 123456 would then allow you to log in as Master. If you forget the passwords, you’ll need to reload the AP software to reset. 4000™ (Rev 1) 3.15 © Hantle 2010...
-
Page 34: Device Setup
Under normal circumstances you should not need to make changes to these parameters. The default settings are optimized for your particular machine. Hantle recommends only using these tools under the direction of an Authorized Service Provider (ASP) or Hantle Technical Support. -
Page 35: Modem Setup
Since these different card readers use alternate ways to communicate, it’s necessary to reboot. 4000™ (Rev 1) 3.17 © Hantle 2010... -
Page 36: Cdu Setup
3.3.7 SET REBOOT TIME 4000™ contains a feature which automatically reboots the machine at a 24 hour interval. By default this will occur at 03:00 am. This adjustable in 1 hour increments. 4000™ (Rev 1) 3.18 © Hantle 2010... - Page 37 Operator Manual 3.3.8 SERIAL NUMBER The serial number is a unique number programmed into your machine at Hantle. It not only identifies your machine for warranty purposes, but also for remote monitoring using TranRMS. The first 4 digits refer to the model type, and the last 6 is production cycle.
-
Page 38: Customer Setup Menu
The Welcome message allows line of 35 characters, which will appear at the top of the main screen (above the center graphic). The receipt header is up to 4 lines of 25 characters, which will appear at the top of each receipt. 4000™ (Rev 1) 3.20 © Hantle 2010... - Page 39 Menu, you will be prompted with the following screen. RECEIPT HEADER Once you have selected Receipt Header from the Change Message Menu, you will be prompted with the following screen. See the above instructions for navigating this menu. 4000™ (Rev 1) 3.21 © Hantle 2010...
-
Page 40: Bin Lists
Operator Function Menu, go to Reports, then Print All Setup. Any numbers added to the BIN list will be visible from this report. NOTE: Numbers loaded via the extra BIN file will not display on the Print Setup or any other report. 4000™ (Rev 1) 3.22 © Hantle 2010... -
Page 41: Optional Features
CHECK BALANCE Enabling this option will ask each customer if they would like to check their balance before each transaction. 4000™ (Rev 1) 3.23 © Hantle 2010... -
Page 42: Change Host Processor
** See page 3.31 for TCP/IP Setup Instructions ** Use the Message Format button to select the appropriate Host Processing Mode. Available formats are: Standard 1 (Hantle Spec) Standard 2 (CSP200 Emulation) Standard 3 (Extended Message) If Standard 3 is selected, you’ll see a Standard 3 Options button which will give access to the Extended Messaging options. -
Page 43: Surcharge Mode
To set the surcharge amount, press the amount button and type the dollar amount using the main keypad. Next set the decimal point using the Enter key on the keypad. Then type the cents using the keypad and finally press Enter to finish. 4000™ (Rev 1) 3.25 © Hantle 2010... - Page 44 0% or $0.00. Be careful when setting the Percentage Surcharge values. SURCHARGE OWNER The surcharge owner can be up to 25 characters long. This owner name will appear at the bottom of each transaction receipt. 4000™ (Rev 1) 3.26 © Hantle 2010...
-
Page 45: Graphics
ATM either directly at the ATM using a SDRAM card or by using the Hantle Remote Management Software (TranRMS). When the advertisements are loaded and enabled they will rotate in order while the ATM is waiting for a transaction and also while the transaction is processing. - Page 46 While viewing a graphic, press the On/Off button to enable or disable that image. Step 3 Only Banner or Advertise graphics which have been enabled will display to the customer using the machine. 4000™ (Rev 1) 3.28 © Hantle 2010...
-
Page 47: Transaction Setup
Maximum is $900 (using either $50 or $100 bills) To set the dispense limit, press the Dispense limit button and then enter the number using the keys on the main keypad. Press Enter key to set the value. 4000™ (Rev 1) 3.29 © Hantle 2010... -
Page 48: Denomination
To set denomination on the first cassette, press the First CST Denomination button and then using the main keypad enter the type of bill. Options are $1, $5, $10, $50 and $100. 4000™ (Rev 1) 3.30 © Hantle 2010... -
Page 49: Fast Cash
To set the fast cash amounts, select Fast cash from the Transaction Setup menu and then choose from the 6 possible keys to program. Select a button and then enter the value from the main keypad. Press Enter to confirm the setting. 4000™ (Rev 1) 3.31 © Hantle 2010... -
Page 50: Tcp/Ip Setup
Configuration Schedule allows you to force the ATM to update configuration with the host upon boot up. You might use this command if the terminal gets consistent Key Errors and you want to force download of a new working key. 4000™ (Rev 1) 3.32 © Hantle 2010... - Page 51 Ping to Host: This test attempts to verify communication with the IP address or URL that is programmed in the ‘Processor IP Address’ menu. Note that most processors or switches do not allow ‘pinging’ for security reasons. 4000™ (Rev 1) 3.33 © Hantle 2010...
-
Page 52: Operation
Enter the combination on the keypad of the lock (See lock manual for default combination) Once the combination is successfully entered, turn the T-handle to the left (counter clockwise) to open the vault door. 4000™ (Rev 1) © Hantle 2010... - Page 53 With the vault door open, you have access to the cash dispenser, reject bin and cassette. Grab the green handle to slide out the dispenser. Note the vault door sensor switch is located along the front edge of the slide tray. 4000™ (Rev 1) © Hantle 2010...
- Page 54 Enter the combination and turn the handle counter clockwise. Step 3 Always make sure the vault is securely locked after closing the door by trying to turn the T- handle counter-clockwise again. 4000™ (Rev 1) © Hantle 2010...
- Page 55 Section 4: Operation Operator Manual 4.1.3 Component Identification. The diagram below shows the 4000™ with the rear access door and vault door open to highlight the main components. 4000™ (Rev 1) © Hantle 2010...
-
Page 56: Operating And Changing The Electronic Lock
WARNING: While orienting your self with the lock, making changes to the lock programming (including changing the combination) ALWAYS work with the vault door open. Do not close the vault until the lock has been thoroughly tested. Hantle does NOT program a master combination! 4000™ (Rev 1) - Page 57 The LG Basic series lock includes several options including multiple user / manager passwords. Please consult the LA Gard manual included in the “Open Me First” box for instructions. 4000™ (Rev 1) © Hantle 2010...
-
Page 58: Cash Operations
“Open Me First” box. Step 3 Remove the cassette from the dispenser and use the cassette key to open the lock (the key remains in the cassette while the lock is open). Step 4 4000™ (Rev 1) © Hantle 2010... - Page 59 1. Fan the notes so that the notes are not sticking together. 2. Remove all the notes with holes or notes that are torn. 3. Unfold the folded notes. 4. Place all the notes correctly. 4000™ (Rev 1) © Hantle 2010...
-
Page 60: Emptying The Reject Bin (Tcdu)
Once the rejected notes are removed, close and then lock the reject bin door. NOTE: Inspect all notes before returning them to the cassette! If you believe your dispenser is rejecting notes excessively, contact your service personal. 4000™ (Rev 1) © Hantle 2010... -
Page 61: Loading The Receipt Paper
Make sure the roll is in its proper roll form. (A deformed roll may cause jamming problems.) When replacing the new roll, make sure the end of the roll paper is cut straight 4000™ (Rev 1) 4.10 © Hantle 2010... - Page 62 If the printer is feeding paper, however no printing appears on the receipts make sure the outer side of the paper is facing up. The printer can only print on the coated side of the paper. 4000™ (Rev 1) 4.11 © Hantle 2010...
-
Page 63: Settlement Menu
Bills = 50. You wish to add 25 more bills to the same cassette, you press Add Cassette, then type 25 from the keypad and press enter. The current number of bills will now be 75. (continued) 4000™ (Rev 1) 4.12 © Hantle 2010... - Page 64 If you are unable to do your Day Total at the same time each day you can program the machine to do a “Trial Day Total” automatically (see section 3.2.8). 4000™ (Rev 1) 4.13 © Hantle 2010...
- Page 65 Press Enter when finished to return to the Settlement Menu. NOTE: Trial Day Total can be set to process automatically at a preset time. See Section 3.2.8 for information on automated scheduling of a Trial Day Total. 4000™ (Rev 1) 4.14 © Hantle 2010...
-
Page 66: Journal Menu
The ATM will then print all journals in memory up to the last time you printed a journal. Each time you print a journal a marker is set at that point. The next time you print the journal, the ATM will print from that marker to the current time. 4000™ (Rev 1) 4.15 © Hantle 2010... - Page 67 Mark Journal Read. Now if you press Print Journal, nothing will happen because there are no current journal entries, however if you used Last X Journal, you could enter 100 and get all the records. 4000™ (Rev 1) 4.16 © Hantle 2010...
-
Page 68: Reports Menu
/ distributor. Occasionally check with your dealer / distributor for software updates. Press the S/W Version button to view the current revisions. Press Enter key to print a copy of the displayed information. 4000™ (Rev 1) 4.17 © Hantle 2010... - Page 69 Balance Transactions per day Transfer Transactions per day Notes Dispensed per day Surcharge amount collected per day Use the Enter key on the main keypad to print, Cancel to return to the reports menu. 4000™ (Rev 1) 4.18 © Hantle 2010...
- Page 70 Above is the reject analysis screen. Press the Clear button next to the screen to clear the summary and start at zero. Press the Print button next to the screen to print a copy of the reject information. 4000™ (Rev 1) 4.19 © Hantle 2010...
-
Page 71: Diagnostics
NOTE: You must have bills entered into Settlement before running this test. RECEIPT PRINTER This test will print a test receipt. If the test is successful you should receive a receipt with three sets of sample characters for each time the test is run. 4000™ (Rev 1) © Hantle 2010... - Page 72 During normal operation of the ATM only ISO Track 2 is read, however during the card swipe test all three tracks are read at once. 4000™ (Rev 1) © Hantle 2010...
-
Page 73: Service Panel
The Status Lights give the current condition of the ATM. An Error condition will cause the red Error LED to activate. In Service or Supervisor mode shows the condition at the front ATM screen. 4000™ (Rev 1) © Hantle 2010... - Page 74 Service Panel, you may want to instruct your Operators to slide the component tray back so that they can retrieve the printed reports from the front of the receipt printer without having to go to the front of the machine. 4000™ (Rev 1) © Hantle 2010...
-
Page 75: Opening Procedure
1. Determine if the phone line is properly connected; 2. Determine if all communication parameters are correct; 3. If, after doing the above steps, the ATM is still not in service, contact your service personnel. 4000™ (Rev 1) © Hantle 2010... -
Page 76: Withdrawal Transaction
Enter the pin number and press the “ENTER” key. Step 3 Press the “WITHDRAWAL” screen key. Step 4 If a “SURCHARGE” option is enabled, the “SURCHARGE” screen will be displayed. Select “YES” to continue, or “NO” to cancel. 4000™ (Rev 1) © Hantle 2010... - Page 77 After the desired amount is entered, the ATM dials the processor and requests approval for the transaction. Step 8 When authorization is received from the processor, the cash will be dispensed and the receipt will be printed. 4000™ (Rev 1) © Hantle 2010...
-
Page 78: Balance Inquiry Transaction
Step 1 Dip the card. Step 2 Enter the pin number and press the “ENTER” key. Step 3 Press the “BALANCE” screen key. Step 4 The following screen will be displayed. Select the desired option. 4000™ (Rev 1) © Hantle 2010... - Page 79 Step 5 The ATM dials the processor and requests approval for the transaction. Step 6 When authorization is received from the processor, the following screen will be displayed and the receipt will be printed. 4000™ (Rev 1) © Hantle 2010...
-
Page 80: Transfer Transaction
Step 2 Enter the pin number and press the “ENTER” key. Step 3 Press the “TRANSFER” screen key. Step 4 The following screen will be displayed. Select the desired account to be transferred “FROM.” 4000™ (Rev 1) © Hantle 2010... - Page 81 Step 7 The ATM dials the processor and requests approval for the transaction. Step 8 When the authorization is received from the processor, the following screen will be displayed and the receipt will be printed. 4000™ (Rev 1) © Hantle 2010...
-
Page 82: Closing Procedure
If the result of the DAY TOTAL and CASSETTE TOTAL does not match the amount counted in the Cash Cassette, refer to the Journal for verification. Step 5 Turn the power off and close the security door. 4000™ (Rev 1) © Hantle 2010... -
Page 83: Error Recovery
“ERROR CODE” of the “REPORT MENU” in the “OPERATOR FUNCTION,” and perform the corrective action, then press the “DEVICE INITIALIZE” screen key. If the Error is not corrected after resetting, contact your service personnel. 4000™ (Rev 1) © Hantle 2010... -
Page 84: Error Codes
Check dispenser for jammed bills and reinitialize the not cleared. machine. C0022 cassette inlet sensor Check dispenser and cassette for jammed bills. not cleared. C0023 Cassette exit sensor (L+R) Check dispenser for jammed bills and reinitialize the not cleared. machine. 4000™ (Rev 1) © Hantle 2010... - Page 85 Clear any jammed notes or obstructions from the exit sensor during dispense sensor. C0056 Short note detected at exit Clear any jammed notes or obstructions from the exit sensor during dispense sensor; mismatch of rejected notes. 4000™ (Rev 1) © Hantle 2010...
- Page 86 Verify phone connection. D0012 Invalid transaction. Network denial code. D0013 Invalid Amount. Network denial code. D0014 Invalid Card Number. Network denial code. D0020 Surcharge screen should Network denial code. have been displayed. 4000™ (Rev 1) © Hantle 2010...
- Page 87 FS omitted (after Verify that version of ATM Software matches host authorization response processor. Contact host processor. text). D00A4 ETX is in wrong place. Verify that version of ATM Software matches host processor. Contact host processor. 4000™ (Rev 1) © Hantle 2010...
- Page 88 Valid Denomination are $10, $20, $50, $100 – (Transaction Setup) F0008 Fast Cash Set error Check the Fast Cash amount. (Transaction Setup) (exceeded dispense limit). F0009 Master Key index is Check Master Key index – verify checksum (Host Setup) invalid. 4000™ (Rev 1) © Hantle 2010...
- Page 89 Serial Number not Set Set Serial number in Operator Menu F0016 Master Password left at ATM will not go into service with the default master default password. The master password must be changed from default. 4000™ (Rev 1) © Hantle 2010...
- Page 90 D0120 Contact card user D0121 Routing lookup problem D0122 Message edit error D0123 Transaction not supported D0124 Insufficient funds D0125 Western Union sender data error D0126 Western Union receiver data error D0127 CRC error 4000™ (Rev 1) © Hantle 2010...
-
Page 91: Clearing Nvram
This option performs both of the options listed above. Both the programmed parameters and journal are permanently deleted and all settings are returned to default. USE CAUTION WITH THESE FEATURES – DATA LOST CANNOT BE RECOVERED 4000™ (Rev 1) © Hantle 2010... -
Page 92: Tdes Master Key Installation
Access the Key Mode selections by entering the operator function menu [ENTER]+[CLEAR]+[CANCEL] – 1, 2, 3 (see operator manual). Enter Master Password and choose Host Setup Note: Master Password is required to change master key. 4000™ (Rev 1) © Hantle 2010... - Page 93 ID automatically. In cases where the processor provides a serial number that is less than 10 digits, zeros must be added at the beginning of the number to equal 10 digits. 4000™ (Rev 1) © Hantle 2010...
- Page 94 (Part A first, or Part B first). If a technician is dispatched to enter a key part, choose Check Key from the Key Management menu to determine which part of the key has already been entered. 4000™ (Rev 1) © Hantle 2010...
- Page 95 10 digits. In the example shown at left, the serial number is 235913. This 6 digit number would be changed to 0000235913 to create 10 digits. 4000™ (Rev 1) © Hantle 2010...
- Page 96 The 16 digit alpha-numeric key is entered using the pin-pad only. Letters are entered by using the arrow and function keys. Use the pin-pad layout below. EPP (Encrypted Pin Pad) Master Key Alpha-Numeric Key Layout 4000™ (Rev 1) © Hantle 2010...
- Page 97 Compare the check digit against the number located at the top of the key component. This represents a check digit for the combined keys. There is not a check digit shown for left and right portions individually. 4000™ (Rev 1) © Hantle 2010...
- Page 98 At this point, the master key is successfully entered. If all other parameters have been entered properly, power off the ATM and power on to connect to host and initialize the keys. 4000™ (Rev 1) © Hantle 2010...
-
Page 99: Graphics Installation (On Screen And Receipt)
Appendix D: Graphics Installation Operator Manual APPENDIX D: Graphics Installation Banner or Advertisement screens can be loaded to the Hantle 4000™ machine either using a SDRAM card (at the ATM) or by using TranRMS monitoring software (to load remotely). Please see below for basic file format specifications and instructions for use with a SDRAM card. - Page 100 Save the blank document as “update.txt” in the SD card. c. Once it’s saved rename the file to “update.acu”. once renamed, the icon changes After the “update.acu” file has been created, copy it to the root folder of the SD card. 4000™ (Rev 1) © Hantle 2010...
- Page 101 Specifically the “Hide extensions for known file types” option which needs to be unchecked. If these options are not set properly, the update.acu file may not function, causing the graphics to not load. 4000™ (Rev 1) © Hantle 2010...
- Page 102 Appendix D: Graphics Installation Operator Manual How to install Coupon Graphic for Hantle 4000™ 4000™ is capable of printing a low resolution graphic on each receipt. To use this feature, you’ll need to create the graphic (BMP file format) to the specifications listed below, and then add the file to the machine using the SD RAM card slot located on the rear of the main circuit board.
- Page 103 APPENDIX E: CDU Maintenance Dispenser Sensor Cleaning Instructions The Hantle MCDU dispensers contain several optical sensors used to count and measure notes as well as time note delivery. Through normal use, dust can collect on the sending side of the sensor pairs, causing the readings to skew which can cause C00xx errors.
- Page 104 Reject Bin. These can be reached by the lid of the dispenser and reach inserting a cotton swab through the between the belts. Be careful to not front bracket. bump the top sensor boards. 4000™ (Rev 1) © Hantle 2010...
- Page 105 Appendix E: Preventative Maintenance CDU Operator Manual MCDU Sensor Locations Rear There is a sensor located on the lower rear portion of the dispenser. 4000™ (Rev 1) © Hantle 2010...
- Page 106 Appendix F: T4000 Installation Instructions Operator Manual T4000 Installation Instructions Overall Dimension of T4000 4000™ (Rev 1) © Hantle 2010...
- Page 107 Appendix F: T4000 Installation Instructions Operator Manual Overall ATM Installation Procedure Prepare an opening of 20”(W)x31 ½”(H) for ATM body at the height of 26 ½” from the ground Assemble ATM and pedestal and insert ATM body (after removing fascia frame) into the opening...
- Page 108 Appendix F: T4000 Installation Instructions Operator Manual Step 1 Prepare an opening through the wall Dimension of ATM body only (not including fascia frame) is about 20”(W)x31 ½”(H). The Opening on the wall should be a little bit bigger than the body of ATM so that it can be plugged into the opening.
- Page 109 Appendix F: T4000 Installation Instructions Operator Manual Step 2 Assemble ATM and Pedestal Step 2.1 Assemble pedestal The height of pedestal should be calculated based on the difference of height from the bottom line of opening on the wall to the floor inside the building. The one step change is comparable to an inch (1”) moving up or down.
- Page 110 Appendix F: T4000 Installation Instructions Operator Manual Step 2.2 Attach ATM pedestal (Adjust Height) Use two nuts to fasten the ATM body to the pedestal from the bottom of ATM body. The fastening points can change according to the position of ATM on top of pedestal. Please find the threaded holes matching to your configuration of ATM and pedestal from the bottom of ATM body.
- Page 111 Appendix F: T4000 Installation Instructions Operator Manual Step 2.3 Remove the fascia frame You should remove the fascia frame or collar before pushing ATM body to the opening on the wall from inside the building. 4000™ (Rev 1) © Hantle 2010...
- Page 112 Appendix F: T4000 Installation Instructions Operator Manual Step 2.4 Insert ATM body into the wall and level it through the adjustable pads at the four bottom corners Finalize the ATM position through the wall after leveling the ATM and securing room for fascia frame. Seal the gap on the wall along the ATM body before installing the fascia frame.
- Page 113 Appendix F: T4000 Installation Instructions Operator Manual Step 2.5 Install fascia frame back on the ATM (reverse procedure at Step 2.3) 4000™ (Rev 1) © Hantle 2010...
- Page 114 Appendix F: T4000 Installation Instructions Operator Manual Step 2.6 Securing the ATM body to the wall from inside by applying two adjustable fastening brackets to both sides of ATM body This bracket protects the ATM body from being pulled out of the wall from outside the building.
Need help?
Do you have a question about the T4000 and is the answer not in the manual?
Questions and answers