Advertisement
Quick Links
Advertisement

Related Manuals for Harison DISCOVER 1049


Summary of Contents for Harison DISCOVER 1049
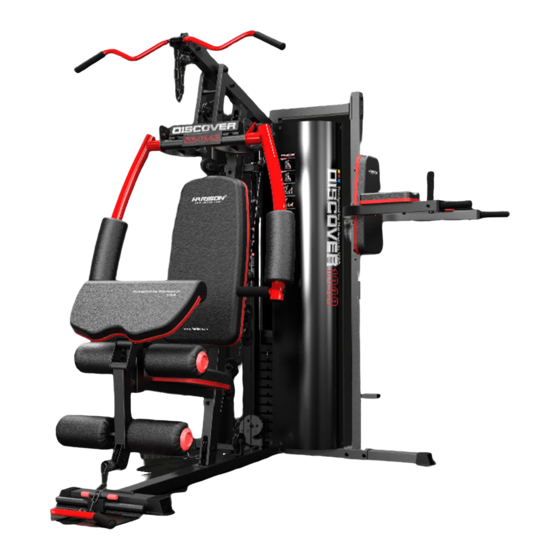
- Page 1 Operation Manual...
-
Page 2: Table Of Contents
Catalogue ....................1 Key Knowledge for Safety ......................2-3 Assembly Drawing ......................4-5 List of Spare Parts .....................6-22 Assembly Instructions ......................23 Training Guidance ....................24-25 Chart of Training Guidance Warning........................26... -
Page 3: Key Knowledge For Safety
Key Knowledge for Safety Please keep this manual well for future reference. Matters to be attended: There are some safety precautions to be followed during the operation although the safety considerations have been taken into consideration in the design and manufacture of this training machine. -
Page 4: Assembly Drawing
Assembly Drawing... -
Page 6: List Of Spare Parts
List of Spare Parts A- List of Spare Parts Item Desc.& Spec. Qty. Item Desc.& Spec. Qty. Rear bottom tube assembly 50 Circular tube plug Floor tube assembly Spherical circular tube plug Front floor tube assembly Tube lining Pedal 25 Circular tube plug Counterweight guide rod weldment Plastic sleeve Front inclined tube assembly... - Page 7 Small elastic pin knob Locknut M8 Training rope assembly Hexagon bolt (M10*95) Round tape assembly Nut cap (M16) Big sponge stick High tension PVC sleeve Sponge stick Back cushion adjusting tube Sponge grip Spacer bush Elastic pin knob PVC plastic sleeve Shock pad Top tube connection weldment Kick cushion...
-
Page 8: Assembly Instructions
Assembly Instructions Installation Instructions for Body Section(A) Important: Please make sure that all the accessories are complete after unpacking. Remark: It is better for two or more people to assemble together during the assembly process to avoid any injury. Step1 1.Place the rear bottom tube assembly (1) and floor tube assembly (2) as shown in the figure and secure them with M10*90 pan head square neck bolt (70), D10 flat gasket (87) and M10 locknut (85). - Page 9 Step2 1.Place the front inclined tube assembly (6) on the assembled floor tube assembly (2) as shown in the figure and secure it with M10*65 pan head square neck bolt(71), D10 flat gasket (87) and M10 locknut (85). 2.Place the front bottom bracket support tube assembly (1) and the front inclined tube assembly (6) as shown in the figure and secure them with M10*90 pan head square neck bolt (70), D10 flat gasket (87) and M10 locknut (85).
- Page 10 Step3 1.First, load the shock pad (44) and the weight (31) into the counterweight guide rod weldment (5) as shown in the figure, them insert it in the direction shown. Lead the cylindrical pin(62) through the first hole (from top to bottom) of the weight head bush (48) and the weight adjusting rod assembly (10), and then install the weight head assembly (30).
- Page 11 Step4 1.Align the holes on the cross pipe on the top beam assembly (12) with the counterweight guide rod weldment (5), then lock the M10*20 hexagon bolt(77), D10 flat gasket (87) and shield connection plate1(9) in from the top, and do not lock it for the time being. Align the top beam assembly (12) with the hole of the front inclined tube assembly (6) as shown in the figure and secure it with M10*90 pan head square neck bolt(70), D10 flat gasket (87) and M10 locknut (85).
- Page 12 Step5 1.Place the limiting tube assembly (14), front inclined tube assembly (6), U-seat connecting tube assembly (15) as shown in the figure and secure them with M10*95 hexagon bolt (90), M10*90 hexagon bolt (74), D10 flat gasket (87) and M10 locknut (85). 1.Assemble the cantilever assembly (13) into the hole corresponding to the top beam assembly (12) as shown in the figure, and lock and fix it with M10*135 hexagon bolt (73) and M10 locknut (85).
- Page 13 Step6 1.Insert the shaft (67) into the front bottom bracket support tube assembly (7) as shown in the figure, then align the kick assembly (16) with the front bottom bracket support tube assembly (7) as shown, and secure with M10*20 hexagonal socket head bolt (72) and D10 flat gasket (87). 2.Insert the hand pad assembly (17) into the front bottom bracket support tube assembly (7) as shown in the figure and secure it with the elastic pin knob (43).
- Page 14 Step7 1.Assemble the right arm swinging assembly (18) and the left arm swinging assembly (20) on the hole corresponding to the cantilever assembly (13) as shown in the figure, and lock and fix them with M16 locknut (84) and D16 big flat gasket (86). 2.Assemble the big sponge stick (40) on the right arm swinging assembly (18) and left arm swinging assembly (20) as shown in the figure.
- Page 15 Step8 1.Take the wire (32) out and assemble it according to the sequence in the figure after placement 2.Assembly pulley A, B and D in the same manner as shown in the figure, of which the sequence is M10*65 hexagon bolt (75), pulley assembly (46), and M10 locknut (85). 3.As shown in Figure C, fix the M10* 135 hexagon bolt (73), D10 flat gasket (87), pulley assembly (46), D10 flat gasket (87), and M10 locknut (85) on the cantilever assembly (13);...
- Page 16 Step9 1.Take the wire (98) out and assemble it according to the sequence as shown in the figure after the placement; 2.As shown in Figure A, following the sequence of M10*65 hexagon bolt (75), pulley (46), and M10 locknut (85)and fix them in the front inclined pipe assembly (6); 3.
- Page 17 Step10 1.Take the butterfly arm wire (33) out and assemble according to the sequence as shown in the figure after placement; 2. As shown in Figure A and E, hang both ends of the wire (33) in the right arm swinging assembly (18) and the left arm swinging assembly (20);...
- Page 18 Step11 1.Take the wire (32) out and assemble it according to the sequence in the figure after placement 2. As shown in Figure A, follow the sequence of M10*45 hexagon bolt (76), D10 flat gasket (87), pulley component (46), D10 flat gasket (87), and M10 locknut (85) and fix them in the kick assembly (16);...
- Page 19 Step12 1. Take the back cushion (35) out and fix with the M8*40 hexagon bolt (79) and D8 flat gasket (88) on the cushion regulating tube (93), insert the back cushion regulating tube (93) into the front inclined tube assembly (6), and lock and fix it with the elastic pin knob (43); 2.
- Page 20 Step13 1.Place the top tube connecting weldment (96) and top beam assembly (12) according to the figure;and lock and secure it with M10*90 hexagon bolt (74), D10 flat gasket (87) and M10 locknut (85); 2.Put the iron-net protective cover (25) and the shield junction plate 2 (11) in place according to the figure, and lock and fix it on the installed body with M10*10 hexagonal socket pan bolt (78) and D10 flat gasket (87).
- Page 21 Step14 1. Assemble high tension rod assembly (26), eight-ring chain (66), shackle (65), low tension handlebar assembly (27), training rope assembly (38) and nut cap (91) as shown in the figure; then place the round tape component (39) well. 2. After the assembly, check whether the screws are locked and secured...
- Page 22 Installation Instructions for Accessories (B) Step1 1.Place the lower squat bracket (1) as shown in the figure, and fix it with M10*95 hexagon bolt (13), D10 flat gasket (20) and M10 locknut (22). 2. Place the lower squat bracket (1) and the upper squat bracket (2) according to the figure, and fix them with M10* 20 hexagon bolt (15) and D10 flat gasket (20).
- Page 23 Step2 1. Put the parallel bars left arm-resting tube (3), the parallel bars right arm-resting tube (4) and the parallel bars upper supporting frame (2)in place as shown in the figure, and fix them with M10*195 hexagon bolt (14), D10 flat gasket (20) and M10 locknut (22). 2.
- Page 24 Step3 1. Insert the parallel bars upper supporting frame(2) with the hole position of backrest assembly (9), and then secure it with M8*70 hexagon bolt (17), D8 flat gasket (21) . 2. Align the parallel bars left arm-resting tube(3) and the parallel bars right arm-resting tube (4) with the hole s in the hand pad assembly (7) as shown in the figure, and then lock and fix them with M8*65 hexagon bolt (19) and D8 flat gasket (21).
-
Page 25: Training Guidance
Training Guidance Apart from the enhancement to physical fitness and exercise muscles, this product also plays the role of weight loss through a reasonable diet. Warm-up exercises before training Warm-up exercises in this stage helps to improve the blood circulation of the trainers' body and make the muscles in a good training state, while reducing the risks of cramps and muscle injury during the training process. -
Page 26: Chart Of Training Guidance
Chart of Training Guidance Seated Row (Trapezius) Bent-Knee Training (Rectus Abdominis) Biceps Training (Biceps - Forearm Muscles) Install the low tension "T" handlebar assembly to Place the low tension "T" handlebar assembly on Install the low tension "T" handlebar assembly to the lower pulley, sit on the floor and support the the lower pulley, lie flat on your back with legs almost the lower pulley, and grasp the T-handle assembly... -
Page 27: Warning
Straight Arm Pull-down (Pectoralis Major and Pull-Down Training (Triceps) Chest Training (Pectoralis Major) Deltoid) Install the handlebar assembly at the high pulley Connect the high tension "T" shaped handle and adjust the round sponge stick to the highest Adjust the pre-stretch and upper arms to be assembly to the high pulley and sit on the cushion to position.
Need help?
Do you have a question about the DISCOVER 1049 and is the answer not in the manual?
Questions and answers