
Subscribe to Our Youtube Channel
Related Manuals for Harison HR-407


Summary of Contents for Harison HR-407
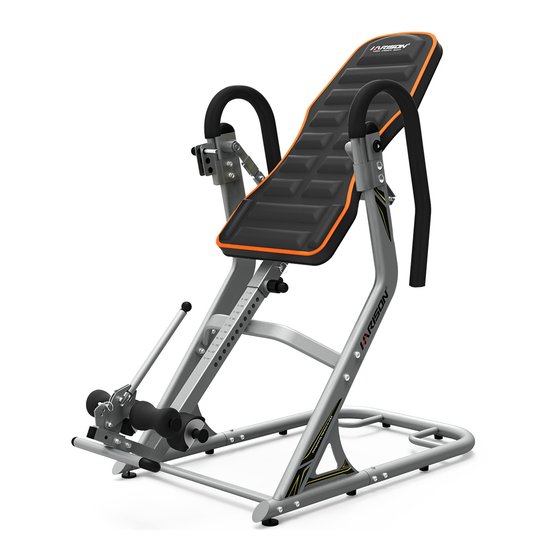
- Page 1 INVERSION TABLE OWNER’S MANUAL HR-407 Attention: Read and follow all instructions in this owner’s manual.
- Page 2 Heavy Duty Deluxe Inversion Therapy Table WARNING: DO NOT USE this inversion table without the approval of a licensed physician. Some medical conditions may not be suitable for use with this product. CAREFULLY READ all Warnings and Instructions before using this inversion table.
- Page 3 BEFORE BEGINNING ASSEMBLY… Take a few moments to familiarize yourself with the specific parts and hardware included with your product. Make sure all the parts and hardware are included in the carton and examine them for any damage that may have occurred in transport. Some parts may be pre-assembled and pre-installed. CAUTION WARNING: Before commencing any exercise program, consult your licensed physician.
- Page 4 ADDITIONAL WARNINGS AND PRECAUTIONS Innova Products Inc. assumes no responsibility for personal injury or property damage sustained by or through the use of the Inversion Table. DO NOT USE THIS INVERSION TABLE WITHOUT A LICENSED PHYSICIAN’S APPROVAL. THIS PRODUCT MAY NOT BE APPROPRIATE FOR USE WITH CERTAIN MEDICAL CONDITIONS.
-
Page 5: Table Of Contents
TABLE OF CONTENTS IMPORTANT SAFETY NOTICES..........1 EXPLODED DIAGRAM...............2 PARTS LIST………………………………………………………..…..3 ASSEMBLY INSTRUCTIONS............4 ADJUSTABLE GUIDE...............10 HOW TO INVERT..............11 EXERCISE INSTRUCTIONS.............12... -
Page 6: Important Safety Notices
IMPORTANT SAFETY NOTICE PRECAUTIONS This exercise machine is built for optimum safety.However, certain precautions apply whenever you operate a piece of exercise equipment. Be sure to read the entire manual before you assemble or operate your machine.In particular, note the following safety precautions: 1. -
Page 7: Exploded Diagram
EXPLODED DIAGRAM... -
Page 8: Parts List
PARTS LIST Part# Description Part# Description Left Frame Square Tube Cap Right Frame Round Tube Cap 1 Base Frame Hexagonal Bolt M8x16 Spring Washer Φ 8 Base Connector Curve Washer Φ8, R25 Limit Bracket Back Support Hexagonal Bolt M8x70 Left Handlebar Lock Nut M8 Right Handlebar Cross Screw M6x12... -
Page 9: Assembly Instructions
ASSEMBLY INSTRUCTIONS STEP 1 Lock the Left Frame (1), Right Frame (2) and Base Frame (3) with 10PCS Hexagonal Bolt M8x16 (33), 10PCS Spring Washer Φ8 (34), 10PCS Curve Washer Φ8, R25 (35) and make sure the main frame is stable. - Page 10 ASSEMBLY INSTRUCTIONS STEP 2 Lock the Base Connector (4) to main frame with 4PCS Hexagonal Bolt M8x70 (36), 4PCS Lock Nut M8 (37), 8PCS Curve Washer Φ8, R25 (35). Fix the Limit Bracket (5) on left & right frame with 4PCS Hexagonal Bolt M10x50 (39), 4PCS Flat Washer Φ10 (40), 4PCS Lock Nut M10 (41), 4PCS Big Flat Washer Φ10 (57).
- Page 11 ASSEMBLY INSTRUCTIONS STEP 3 Lock the Left Axis Frame (9) & Right Axis Frame (10) to Back Support (6) with 4PCS Hexagonal Bolt M8x20 (42), 8PCS Flat Washer Φ8 (46) & Lock Nut M8 (37).
- Page 12 ASSEMBLY INSTRUCTIONS STEP 4 Lock the Left Handlebar (7) & Right Handlebar (8) to main frame with 4PCS Hexagonal Bolt M10x50 (58), 4PCS Flat Washer Φ10 (40), 4PCS Lock Nut M10 (41).
- Page 13 ASSEMBLY INSTRUCTIONS STEP 5 Lock the 2PCS Foot Tube (15) to Height Adjustable Tube (11) & Adjustable Base (13) with 2PCS Hexagonal Bolt M8x20 (42), and assemble the 2PCS Foam Roller (20), 2PCS Foot Lock (19), 4PCS Round Tube Cap 1 (32). Lock the Foot Rest (12) to Height Adjust -able Tube (11) with 2PCS Hexagonal Bolt M8x50 (45), 4PCS Flat Washer Φ8 (46) and 2PCS Cap Nut M8 (48)
- Page 14 ASSEMBLY INSTRUCTIONS STEP 6 Unlock the Spring Latch (30), insert Height Adjustable Tube (11) into Back Support (6), adjust to a appropriate position and lock it with Ring Latch Φ8x50 (47), put Adjustable Latch (29) accordingly.
-
Page 15: Adjustable Guide
ADJUSTABLE GUIDE How to use the Height Adjustable Tube (11) There are holes on Height Adjustable Tube (11) to fit different users’ height. Pull the Spring Latch (30) before using Height Adjustable Tube (11), slip the tube until it fits your height. And make sure the patch under Back Support (6) is locked tight in the hole. -
Page 16: How To Invert
HOW TO INVERT To Invert: Before inversion, you should: 1) Adjust the Height Adjustment Tube to your height number, 2) Tighten the Angle Selector Pin, 3) Make sure your feet are secured snugly, 4) Lie flat on the backrest pad. TO INVERT the inversion table, slowly raise one arm and move it up and over your head. -
Page 17: Exercise Instructions
EXERCISE INSTRUCTIONS Using your EXERCISECYCLEwill provide you with several benefits, it will improve your physical fitness, tone muscle and in conjunc?on with calorie controlled diet help you lose weight. 1. The Warm Up Phase This stage helps get the blood flowing around the body and the muscles working properly. It will also reduce the risk of cramp and muscle injury. - Page 18 HARISON FITNESS LTD 113 BARKSDALE PROFESSIONAL CENTER NEWARK, DE 19711 USA www.harisonfitness.com info@harisonfitness.com...
Need help?
Do you have a question about the HR-407 and is the answer not in the manual?
Questions and answers