Advertisement
Quick Links
READ THIS BEFORE USING
YOUR SEASUCKER RACK!
The Rack's Responsibility
With all SeaSucker vacuum mounts fully
engaged, the rack will securely hold
bicycles up to 45 pounds each at speeds up
to 75 mph. The rack will indicate if the
SeaSuckers are not maintaining vacuum:
each SeaSucker has a power indicator
band in the pump that will extend out and
become visible upon loss of vacuum. If you
see the indicator band, you must re-pump
the SeaSucker before the rack can be
safely used again.
Your Responsibility
You must inspect the indicator bands on all
SeaSuckers when entering and exiting your
vehicle. A quick glance will tell you if the
rack is at full power. If the indicator band is
visible, you must re-pump the SeaSucker
before the rack can be used. If any of your
SeaSuckers do not hold vacuum for at least
4 hours, they may need to be cleaned,
repaired, or replaced. Your rack comes with
an extra SeaSucker vacuum pump; keep it
with your rack in case you accidentally
damage one.
What's in the Box:
Talon
• Talon deck with three
vacuum mounts attached
• (1) standard 9mm fork mount
• (2) 1.25x1/4-20 hex head
bolts
• (2) 1/4-20 nyloc nuts
• (2) flat washers
• (1) Rear Wheel Strap
• (1) Crank Arm Strap
• (1) Spare vacuum pump
• 5g Lube Tube
• 7/16 box wrench
• 5/32 Allen wrench
• Do not mount bicycles backwards, sideways or
• Do not exceed the posted speed limit.
• Do not use if the indicator band is exposed on any
• Do not use if all of the rack's mounts cannot
• Check the indicator band during use.
• Clean the mounting surface before attaching.
• Clean SeaSuckers before attaching.
• Clean and lube your SeaSuckers' pumps regularly.
• Inspect screws, nuts, and bolts regularly and
• Do not use for bicycles over 45 pounds.
• Make sure the fork mount is fully clamped and
• Make sure the vacuum pads are fully seated in the
• The Falcon rack can not be used on roof top - it is
Mini Bomber
• Mini Bomber deck with four
vacuum mounts attached
• (2) standard 9mm fork
mounts
• (4) 1.5x1/4-20 hex head bolts
• (4) 1/4-20 nyloc nuts
• (4) flat washers
• (2) Rear Wheel Straps
• (2) Crank Arm Straps
• (1) Spare vacuum pump
• 5g Lube Tube
• 7/16 box wrench
• 5/32 Allen wrench
www.SeaSucker.com
WARNINGS
at an angle.
of your SeaSucker's pumps.
maintain a full vacuum seal for at least 4 hours.
retighten if necessary.
secure before you transport your bicycle.
protective covers when not in use.
for pickup truck back window use only.
Bomber
• Bomber deck with five
vacuum mounts attached
• (3) standard 9mm fork
mounts
• (1) 3/4" Riser Block
• (4) 1.5x1/4-20 hex head bolts
• (2) 2.25x1/4-20 hex head
bolts
• (6) 1/4-20 nyloc nuts
• (6) flat washers
• (3) Rear Wheel Straps
• (3) Crank Arm Straps
• (1) Spare vacuum pump
• 5g Lube Tube
• 7/16 box wrench
• 5/32 Allen wrench
SeaSucker, LLC
Bradenton, Florida
Falcon
• Falcon deck with two vacuum
mounts attached
• (1) standard 9mm fork mount
• (2) 1.25x1/4-20 hex head
bolts
• (2) 1/4-20 nyloc nuts
• (2) flat washers
• (1) Spare vacuum pump
• 5g Lube Tube
• 7/16 box wrench
• 5/32 Allen wrench
Advertisement

Related Manuals for SeaSucker HUSKE


Summary of Contents for SeaSucker HUSKE
- Page 1 SeaSucker’s pumps. see the indicator band, you must re-pump • Do not use if all of the rack’s mounts cannot the SeaSucker before the rack can be maintain a full vacuum seal for at least 4 hours. safely used again.
- Page 2 Assembly Place the HUSKE fork mount over the mounting holes in the rack deck and push the two mounting bolts through the fork mount and the deck. Place a flat washer over the Talon end of each bolt and then thread a locking nut onto the end of the bolt.
- Page 3 Avoid mounting your rack in the middle of your roof where it’s more flexible. Attach just behind the front windshield or just in front of the rear window. Where to Attach The Talon, Mini Bomber, and Bomber racks are designed to attach to a car’s roof top or the back glass of a hatchback, van, or or SUV.
- Page 4 SeaSucker rack. Place the Rear Wheel Strap under your bike’s rear tire after you mount the bike in your rack. Attach the SeaSucker as described above (To Attach Your Rack), then firmly pull one side of the Velcro strap through your spokes and over the rim and then smooth the second Velcro strap over the first.
- Page 5 Mounting surfaces must be free of ice, snow, dirt and any else that might prevent the vacuum pad from making a full seal. Rain and wet weather should not affect the performance of your SeaSucker rack. If rain or water gets inside any of your vacuum pumps, pull the plunger out and dry the inside of the pump cylinder with a paper towel.
-
Page 6: Warranty
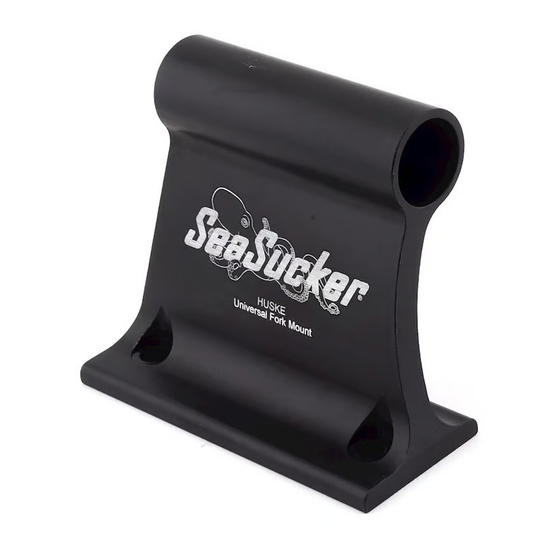
SeaSucker for replacement or repair (at SeaSucker’s option). Warranty claims must be accompanied by a sales receipt or other proof of purchase document. The cost of transportation to and from SeaSucker for the repair or replacement of any defective part or accessory is not covered by this warranty and is to be paid by the owner. This warranty does not apply to damage or failure resulting from normal use, routine wear and tear, lack of maintenance, user error, alteration of the product, accidents, abuse, or neglect. - Page 7 Inserting and Removing Plugs The HUSKE fork mount uses plugs to adapt to different hub sizes. Acquire the plugs you need for you bike’s hub and press them into the HUSKE base. Make sure the plugs are seated completely in the base by simultaneously pressing them in and turning them.
- Page 8 Consult your wheel or hub maker’s instructions for more information. Plugs for different hub sizes can be purchased on-line at www.SeaSucker.com. We love it when people share pics and videos of their SeaSucker racks on social media. Tag us on Instagram and Facebook: @seasucker...
Need help?
Do you have a question about the HUSKE and is the answer not in the manual?
Questions and answers