Table of Contents
Advertisement
Quick Links
Advertisement
Table of Contents

Related Manuals for Genfine Purifier 32


Summary of Contents for Genfine Purifier 32
- Page 1 GENFINE Purifier 32 User Manual V1.3 GENFINE Biotech (Changzhou) Co., Ltd.
-
Page 2: Table Of Contents
Contents Chapter 1: Product Introduction ....................... 1 Product Name ........................... 1 Model ............................... 1 Intended Use ............................ 1 Working Principle ..........................1 Chapter 2 Function Introduction ....................... 2 Main ..............................2 Magnetic Bead Processing Principle ....................4 Magnetic bead processing ........................ 4 Bind magnetic beads ........................ - Page 3 Production record certificate No....................34 Medical device record certificate/technical requirement No............34 Chapter 9 Order Information ........................35 Purifier 32 ............................35 List of accessories and consumables ....................35 List of kits ............................36 Appendix A Certificate of Decontamination ..................37...
-
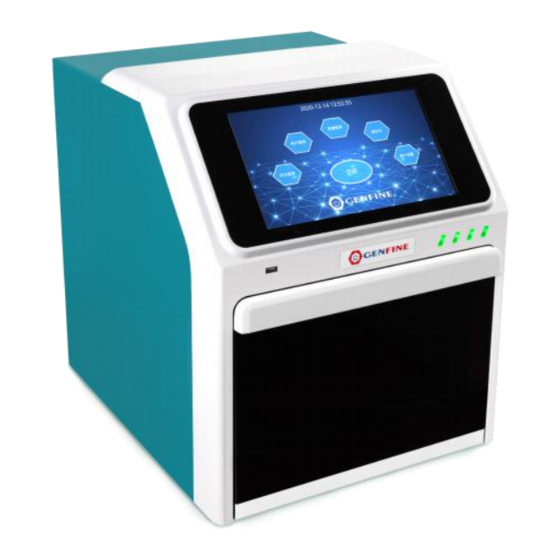
Page 4: Chapter 1: Product Introduction
(Figure 1-1) is designed for automatic transfer and processing of magnetic beads in standard microwell plates. The patented technology of the Purifier 32 system is based on the use of magnetic rods and microwell plates with disposable and specially designed magnetic tip combs. The instrument may work without any distribution or suction parts or devices. -
Page 5: Chapter 2 Function Introduction
Function Introduction Main It usually consists of a mechanical part and an electrical part. This Components section shows the front and back views of Purifier 32. See Figure 2-1 for the front view of Purifier 32. Front View Sample chamber door... - Page 6 See Figure 2-2 for the rear view of Purifier 32. Rear View Filter Main Label power connection Figure 2-2. Purifier 32 Rear View Purifier 32 (Figure 2-1) has 2 microwell plate positions. The magnetic tip combs match the microwell plate. During each step, the...
-
Page 7: Magnetic Bead Processing Principle
Magnetic Bead Processing Principle Figure 2- 3 MPP Magnetic bead processing can be divided into four separate steps: Magnetic ⚫ Bind magnetic beads ⚫ Release magnetic beads bead ⚫ Rinse magnetic beads ⚫ Concentration processing In the magnetic bead binding process, the magnetic rod is Bind completely inside the magnetic tip comb. -
Page 8: Rinse Magnetic Beads
There is a USB port on the front panel for updating the software of USB Port the touch screen and motherboard. See "Accessory and Consumables List" for details and ordering Consumables information about Purifier 32's plastic consumables, such as deep-well plates, magnetic tip comb, HEPA filters and UV lights. Page 5 of 38... -
Page 9: Chapter 3 Installation And Packaging
Open Purifier 32 and accessories carefully, with the arrow on the transport package upwards. Remove the instrument from the package and place it on a horizontal surface. -
Page 10: Environment Requirement
When installing Purifier 32, avoid placing it in the places where Environment there is a lot of dust, vibration, strong magnetic field, direct sunlight or ultraviolet radiation, airflow, high humidity or high temperature Requirement fluctuation. Please place the instrument on a regular experiment table to ensure that: ⚫... -
Page 11: Installation Settings
Do not put the Purifier 32 magnetic head near the computer monitor, as this may damage the monitor. Warning The product has a strong permanent magnet. This product should not be used by people wearing pacemakers or metal prostheses. - Page 12 After Figure 3-2.Schematic Diagram After Removing the Set Screw of Magnetic Rod Holder Installation of 96-well plate The circular bottom of the 96-well plate with square hole and circular bottom just fits with the concave clamping position of the heating tank; the heating tank is located under the 2/6 and 8/12 vertical row holes of the 96-well plate.
-
Page 13: Power Connection
3-4. Effect Diagram after Installation of 96-Well Plate and Magnetic Tip Comb Connect the power connector: Power Connection Warning Make sure that the power switch on the rear panel (Figure 2-2) is in the "O" position. Never connect an ungrounded power outlet. - Page 14 Instrument Packaging Put the instrument in a bag, fix eight corners with foam and put into a carton. Then put the carton into a big packaging box, and seal the packaging box for direct transportation. 3-5. Inside schematic diagram of packaging box Page 11 of 38...
-
Page 15: Chapter 4 Instructions For Use
Chapter 4 Instructions for Use Before turning on Purifier 32, make sure that the voltage on the Starting label which is on the left bottom of the back panel (Figure 2-2) matches the local voltage. Warning Never operate the instrument on an ungrounded electrical outlet. -
Page 16: Select File
Users can select any file in the table, for example, by clicking the Select File "DNA" button. Detailed file is as shown in the figure. No step or parameter can be edited and deleted. Click “Run” to start file running. Run File Click “Pause”... -
Page 17: Custom
Click “Continue” to resume file running. Click “Cancel” to stop and exit file running. There is a custom function module on the home page. Users can Custom create and manage their own accounts, create, modify, save and delete their own personal files. Click “Sign up”... -
Page 18: Log In
Use the keyboard to enter a name and password. A password is not required. When the account is signed up, it will be displayed in the file list. After the account is signed up, the user can directly log in the Log in original account. -
Page 19: New Program Creation
After log in, a “Creat new program” button appears at the bottom of the touch screen. Program Creation Click “Creat new program” to resume. The user can set the program name, icon and brief description and then click “Next”. This interface shows all details of the program, such as step and Program time. - Page 20 The user can set and select relevant parameters in this interface. The meaning of each button is as follows: The current step is set to work in plate position 1 Set the function of the current step Return to previous step Enter the next step Page 17 of 38...
-
Page 21: Function Details
Insert a new step before the current step Finish the current program Current step position The user can define the function of each step. Purifier 32 has 6 Function optional functions. Each function has several substeps. For example, by selecting the binding function, the user can see the Details following table and set the relevant parameters. - Page 22 to enter the next step. Other function settings After binding, click are similar to the binding function, except elution, which includes temperature settings. The user can set the heating temperature and duration Temperature range: room temperature -99°C. Click to complete program settings and return to the Program Details interface.
-
Page 23: Settings
The user may choose parameters of Purifier 32. After enter the Settings interface, the user can see the status of the UV light and HEPA filter, which can remind the user to replace the UV light and HEPA filter. -
Page 24: Shutting Down
Turn off Purifier 32: Shutting 1. Press the power switch (Figure 2-2) on the rear panel of the instrument to the OFF position to turn off Purifier 32. It is Down recommended to turn off the instrument at night and on weekends. -
Page 25: Emergencies
please clean them with 70% ethanol or other disinfectants (see "Cleaning Procedures” on Page 32). Warning Remove the deep-well plate and magnetic tip comb that are used in the instrument. Dispose of all deep-well plates and magnetic tip comb as biohazard waste. If an abnormal situation occurs during operation, such as liquid Emergencies spilling into the instrument, please follow the steps below:... -
Page 26: Chapter 5 Care And Maintenance
Although Purifier 32 is made of high-quality materials, you must remove the spilled salt solution, chemical solvent, acid or alkaline solution from the surface immediately to prevent damage to the instrument. -
Page 27: Platform Cleaning
Rods Cleaning Caution Do not place Purifier 32 near magnetic tapes, computer discs or other magnetic storage devices, such as credit cards, as they may be damaged by the strong magnetic field of the magnetic rod of Purifier 32. -
Page 28: Decontamination Procedure
Warning The sample may be potentially contaminated. Dispose of disposable deep-well plates, parafilm, magnetic tip comb, disposable gloves, syringes, and disposable pipette tips as biohazardous waste. If you have spilled out contaminant reagents, please perform a Decontamina decontamination procedure. tion Procedure Warning The decontamination procedure should be carried out by authorized trained personnel in a well-ventilated room, wearing... -
Page 29: Packaging For Repair
1. Wear disposable gloves to protect yourself. 2. Prepare the cleaning agent: 200ml 4% glutaraldehyde solution (or other reagents recommended by the security officer). 3. Empty the plate. 4. Turn off the power switch and disconnect the power cord. 5. Use a cloth moistened with 70% ethanol to disinfect the outside of the instrument. -
Page 30: Service Contract
Please refer to Appendix B: "System Log". You can copy the form as many times as you need, but keep the original blank form in the user manual. If Purifier 32 must be discarded, please follow the following Disposal guiding principles. - Page 31 Warning Disinfect the instrument before disposing of it. Please refer to “Decontamination Procedure” on Page 30. Follow the specific regulations of laboratories and the country for handling biological waste. The disposal of the instrument is carried out in accordance with the laws and regulations of the local authorities on the recycle of electronic equipment and waste.
-
Page 32: Chapter 6 Technical Parameters
Chapter 6 Technical Parameters As part of our continuous product development plan, the General manufacturer reserves the right to change any parameters without prior notice. Parameters General parameters are shown in Table 6-1. Table 6-1 General parameters General parameters Overall size - Device 330 mm (width) x44 mm (length) x4000 mm (height) -
Page 33: Safety Parameters
31 ℃ and the humidity drops linearly to 50% at 40℃. AC power fluctuation Not more than ±10% of the marked voltage Compliance Purifier 32 meets the following compliance YY 0505-2005/IEC 60601-1-2:2001 GB 4793.1-2007/IEC 61010-2:2001 Page 30 of 38... -
Page 34: Chapter 7 Other Information
Chapter 7 Other information See the label for details. Production date 5 years Service life Components List Item name Quantity Unit Automatic nucleic acid extractor Allen wrench Power cable Deep-well plate Magnetic tip comb Warranty Card Certificate of quality Manual Quality control report Warning for safety Interpretation... -
Page 35: Manual Revision Date
(Figure 2-1). ⚫ Do not force the microplate onto the plate. ⚫ Purifier 32 meets the Medical electrical equipment - Part 1-2: General requirements for safety. Please comply with Page 32 of 38... - Page 36 appropriate laboratory safety precautions, such as wearing protective clothing and certified laboratory safety procedures. ⚫ Strictly follow the preventive maintenance instructions to keep the instrument in its best condition and ensure maximum reliability. Poorly maintained instruments may cause abnormal test results. Warning The product has a strong permanent magnet.
-
Page 37: Chapter 8 Manufacturer And Medical Device Information
Chapter 8 Manufacturer and Medical Device Information GENFINE Biotech (Changzhou) Co., Ltd. Name of manufacturer Building E4, No.9, Changyang Road, West Taihu Technology Production Industrial Park, Changzhou City, Jiangsu Province address 0519-83761557 Contact information SCSYJXSCB 20180017 Production record certificate No. -
Page 38: Chapter 9 Order Information
Please contact your local agent for ordering and service information. The ordering information codes are shown in Table 7-1 to Table 7-4 below. Purifier 32 configuration is shown in Table 7-1 below. Purifier 32 Table 7.1 Product Item Item No. -
Page 39: List Of Kits
The following are the optimized kits used by Purifier 32 List of kits Table 7-4 Product information of nucleic acid purification magnetic beads New Item Catalog Product name FineMag Blood Spot Genomic DNA Kit FM101 M101 FineQuick Blood Genomic DNA Kit... -
Page 40: Appendix A Certificate Of Decontamination
Appendix A Certificate of Decontamination Name:______________________________________________________ Address:______________________________________________________ Telephone / Fax:_________________________________________________ Device:__________________ No.: __________________________ A) I confirm that the returned items are not contaminated with liquid, toxic, carcinogenic or radioactive substances or any other harmful substances. B) I confirm that the returned items have been decontaminated and can be processed without affecting the health of the personnel. -
Page 41: Appendix B System Log
Appendix B System Log Device name and number User Date Note Page 38 of 38... - Page 42 GENFINE Biotech (Changzhou) Co., Ltd. www.genfine.com marketing@genfine.com Page 39 of 42...
Need help?
Do you have a question about the Purifier 32 and is the answer not in the manual?
Questions and answers