Table of Contents
Advertisement
Quick Links
Advertisement
Chapters
Table of Contents

Related Manuals for Yamaha RY30


Summary of Contents for Yamaha RY30
- Page 1 YAMAHA ® AUTHORIZED PRODUCT MANUAL RHYTHM PROGRAMMER...
- Page 2 YAMAHA RHYTHM PROGRAMMER...
- Page 3 If these corrective measures do not produce satisfactory results, please contact the local retailer authorized to distribute this type of product. If you can not locate the appropriate retailer, please contact Yamaha Corporation of America, Electronic Service Division, 6600 Orangethorpe Ave, Buena Park, CA 90620 * This applies only to products distributed by YAMAHA CORPORATION OF AMERICA.
- Page 4 Name Plate on your Yamaha Digital Musical Instrument. The Model, Serial Number, Power requirements, etc., are indicated on this plate. * This applies only to products distributed by YAMAHA CORPORATION OF AMERICA.
- Page 5 Utilize only qualified service personnel. those carts, stands, or racks that have been designed for PLEASE KEEP THIS MANUAL FOR FUTURE REFERENCE! * This applies only to products distributed by YAMAHA CORPORATION OF AMERICA.
- Page 6 A wide range of editable parameters include filter frequencies, envelopes, volume, pitch, panning, and more. The RY30 allows the user to refine each voice to ideally fit specific musical requirements. On-board memory contains 128 voices, 100 preset pat- terns, 100 user patterns, 2 demo songs and 20 songs, while plug-in cards offer unlimited potential for expansion.
-
Page 7: Table Of Contents
CONTENTS TUTORIALS SECTION RECORDING, EDITING & PLAYING ABOUT THE MANUAL PRECAUTIONS SONGS THE CONTROLS & CONNECTORS Song Record Clearing the Entire Song Front Panel Rear Panel Song Play Tempo Control SETTING UP YOUR SYSTEM Song Edit Audio Connections Song Edit Jobs MIDI Connections Delete System Power-on Procedure... - Page 8 REFERENCE SECTION JOB 04: VOICE TRANSMIT CHANNEL PATTERN MODE JOB 05: VOICE NOTE ASSIGN TABLE ACCESSING THE PATTERN MODE SELECT FUNCTIONS JOB 06: VOICE NOTE ASSIGN TABLE 01: PATTERN SELECT SETUP 02: PATTERN CLEAR JOB 07: VOICE NOTE ASSIGN TABLE 03: PATTERN COPY COPY 04: PATTERN APPEND...
- Page 9 SPECIFICATIONS 14: VOICE NAME 15: VOICE COPY INDEX 16: VOICE INITIALIZE INITIALIZED VOICE DATA MIDI DATA FORMAT RY30 VOICE LIST MIDI IMPLEMENTATION CHART PAD BANK MODE ACCESSING THE PAD BANK MODE FUNCTIONS 01: PAD BANK SELECT 02: VOICE/PITCH ASSIGN 03: PAD BANK COPY...
-
Page 12: About The Manual
TUTORIALS Section RY30: 1. SETTING UP YOUR SYSTEM [page 13] Make basic audio and MIDI connections to the RY30 — and listen to the demos when you’re set up. THE PRESET VOICES [page 17] How to play the RY30 voices, and how to select different “pad banks” con- taining different sets of instruments. - Page 13 4. VOICE EDIT MODE [Page 79] 5. PAD BANK MODE [Page 97] Once you have become familiar with the way the RY30 works by going through the TUTORIALS section, you should only need to refer to the REFERENCE section from time to time to get details on functions you’ve never used before, or refresh your memory about functions that you don’t use very...
-
Page 14: Precautions
Yamaha dealer. Also, make sure that the adaptor you have is appropriate for the AC mains supply voltage in the area where you intend to use the RY30 (the correct INPUT voltage is marked on the adaptor). - Page 15 RAM memory even when the power is turned OFF. The backup battery should last for approximately 5 years. When the backup battery finally fails the contents of the RY30 memory will be lost. When this happens, have the backup battery replaced by qualified Yamaha service personnel. DO NOT ATTEMPT...
-
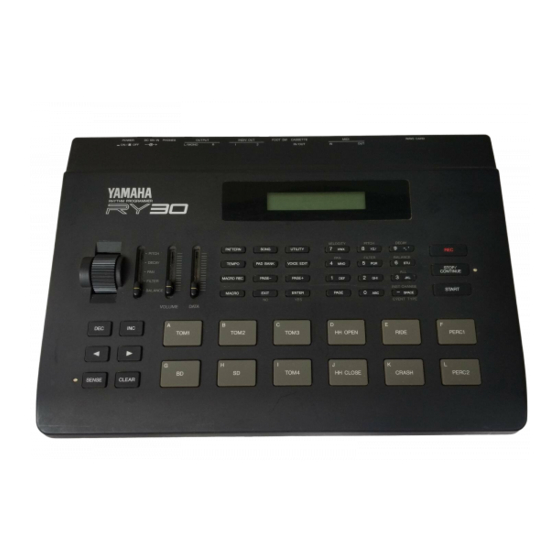
Page 16: The Controls & Connectors
RY30 with The wheel is used to modify timing when the optimum ease and efficiency. In the RY30, each clock move mode is used. -
Page 17: 01: Pad Bank Select
(pages 21 and 24), to reset parameters when ally edit parameter values in any of the RY30 using the parameter record mode (page 28), and modes. Either key can be pressed briefly for... - Page 18 [STOP/CONTINUE] Key [SONG] Key Stops playback or recording. If you press the Selects the RY30 song mode, in which songs [STOP/CONTINUE] key again after stopping a can be selected, played, recorded, and edited. pattern or song, playback will resume from the [UTILITY] Key point at which it was stopped.
- Page 19 [ENTER] Key [MACRO REC] & [MACRO] Keys The RY30 allows you to record up to 10 key The [ENTER] key is used to confirm execution “macros” that can make it quick and easy to ac- of certain operations that may change data in the...
-
Page 20: Rear Panel
Rear Panel [POWER] Switch OUTPUT L/MONO & R Jacks Press to turn the RY30 power ON or OFF. These are the main stereo outputs from the RY30. If a plug is inserted only into the DC 15V 500mA IN Jack... - Page 21 (page 74). CASSETTE IN/OUT Jack WAVE CARD Slot This jack allows the RY30 to be interfaced to a The WAVE CARD slot accepts pre-pro- standard cassette recorder via a mini-plug “y” grammed data cards containing wave, voice, and...
-
Page 22: Setting Up Your System
Setting Up Your System What you will connect the RY30 to, and what you will connect to the RY30, will depend entirely on your individual requirements, and it would be impossible to cover all possibilities here. The following are a few examples to help you get started. -
Page 23: Midi Connections
If your sequencer only has a single MIDI OUT, however, the most logical place for your RY30 is at the end of the MIDI chain, after the other tone gener- ators. If there will be more than about 3 or 4 devices in the chain, however, it is a good idea to use a MIDI parallel or distribution box to minimize the possibility of delays. -
Page 24: System Power-On Procedure
3. Turn on the sequencer (if used). 4. Turn on the RY30. 5. Turn on the sound system. 6. Raise the sound system volume to a reasonable level. 7. Gradually raise the RY30 [VOLUME] control while playing the pads to set the desired listening level. -
Page 25: Listen To The Demo
Listen to the Demo The RY30 is programmed with two demonstration songs that you might enjoy listening to after setting up your system. Take a short break and enjoy the demo: 1 . Press the [SONG] key to select the song mode, then use the [DATA] con- trol to select song number 20 or 21 (song numbers 20 and 21 are demo songs —... -
Page 26: The Preset Voices
The Preset Voices The RY30 has 96 preset voices that you can use in patterns and songs. The voices can be played via the RY30’s 12 instrument pads, or a MIDI keyboard or other MIDI instrument connected to the MIDI IN con- nector. - Page 27 Initial Pad Bank When the RY30 is initially shipped, the internal pad banks are set up as follows: Assignments *See the “RY30 VOICE LIST on page 94 for more information on the individual voices.
-
Page 28: Playing Patterns
Playing Patterns The RY30 has 100 preset rhythm patterns — pattern numbers 100 through 199 — that you can use “as is” or edit to create original variations. Here’s how you can select and listen to the various preset patterns: 1. -
Page 29: Tempo Control
Then pattern 101 will begin playing. Tempo Control The tempo can be changed at any time — while a pattern is playing or while playback is stopped — by pressing the [TEMPO] key and then using the [INC] and [DEC] keys, the [DATA] slider, or the numeric keys to select the desired tempo. -
Page 30: Recording & Editing Patterns
Real-time Record Real-time record allows you to enter patterns in “real time” via the RY30 instrument pads or a MIDI keyboard connected to the MIDI IN connector. Here’s an example of the real-time record procedure using the RY30 instrument pads. - Page 31 1/48 = 16th-note triplets. l 1/96 = the finest possible resolution. 7. Press [START] to begin recording. The RY30 will give you a 1-measure count-in during which nothing will be recorded. “Count” will appear in the brackets on the bottom display line.
-
Page 32: Switching Pad Banks While Recording
You can actually clear an entire part from a pattern by holding the [CLEAR] key and instrument pad for a complete pass through the pattern. Modifying Parameters As The RY30 control wheel can be used to modify any of the parameters described You Record below as you record. -
Page 33: Clearing The Entire Pattern
Overdubbing & Editing in Overdubbing simply means adding new instruments or parts to a previously Real Time Record recorded pattern without affecting the existing data. This can be done by engag- ing the real time record mode for a previously recorded pattern and entering the new material in the same way as if you were recording a new pattern. - Page 34 4. Press the [START] key to engage the step record mode. The bottom line of the display shows, from left to right, the measure, beat, and clock numbers corresponding to the current entry (cursor) location, and a graphic representation of all or part of the pattern to be entered. The various elements of the display are as follows: keys to move the cursor to the appro- 5.
-
Page 35: Check On Your Progress With The Monitor Mode
NOTE: Notes that do not fall precisely on the currently selected quantize incre- ments will be displayed as “x” rather than “ ”. This will happen, for example, if you record an instrument with 1/12 quantization and then switch to 1/16 quantization. 6. -
Page 36: Erasing Mistakes In Step Record
l DECAY Range: -63 . . . 00 . . . +63. Positive values lengthen the decay of the note at the cursor position, and negative values shorten the decay of the note at the cursor position. l PAN Range: -32 . . . 00 . . . +32. Positive values pan the note at the cursor position to the right, and negative values pan the note at the cursor position to the left. -
Page 37: Give Your Pattern A Name
In the parameter record mode, you can make subtle (or not-so-subtle) changes to pitch, decay, pan position, filter cutoff frequency, and wave balance by simply operating the RY30 control wheel while monitoring the results in real time. - Page 38 2. Press the [INC] key twice to select the parameter modify mode. 3 . Press the instrument pad corresponding to the instrument you want to modify (if the instrument is not in the current bank press the [PAD BANK] key, select the appropriate pad bank, and then press [EXIT] to return to the previous display).
-
Page 39: Change Click Volume During Parameter Modify Recording
The clock move mode lets you modify note timing to suit your own requirements by operating the RY30 control wheel while monitoring the results in real time. 1 . Select a pattern that has already been recorded, then press the [REC] key to engage the record-ready mode. -
Page 40: Change Click Volume During Clock Move Recording
3. Press the instrument pad corresponding to the instrument you want to move (if the instrument is not in the current bank press the [PAD BANK] key, select the appropriate pad bank, and then press [EXIT] to return to the pre- vious display). -
Page 41: Recording, Editing & Playing Songs
Recording, Editing & Playing Songs In the RY30 “songs” are created by first specifying a sequence of patterns in the song record mode, and then any necessary repeats, tempo changes, or velocity changes in the song edit mode. Obviously, the first step in creating any song is to record the patterns you need for introductions, breaks, choruses, verses, etc., in the pattern mode. -
Page 42: Clearing The Entire Song
6. When a pattern has been selected, press the [ENTER] key — the PART number will advance by one and you can select and enter the next pattern number in the same way. 7. Continue selecting and entering patterns in this manner until your pattern is complete. -
Page 43: Tempo Control
4. Press the [STOP/CONTINUE] key if you want to stop playback before the end of the song is reached. If you press the [STOP/CONTINUE] key again after stopping the song, playback will resume from the point at which it was stopped. The [START] key will always start the song from the beginning. -
Page 44: Song Edit Jobs
“Complete!” will appear on the display briefly when the operation is finished. The RY30 will automatically return to the song edit mode. Example: If you delete parts 3 through 5, all subsequent parts are moved back to take... -
Page 45: Insert
[ENTER] key again. This actually executes the insert operation and “Complete!” will appear on the display briefly when the operation is finished. The RY30 will automatically return to the song edit mode. Example: Here’s what happens when you insert at part 3:... -
Page 46: Copy
This actually executes the copy operation and “Complete!” will appear on the display briefly when the operation is finished. The RY30 will automatically return to the song edit mode. Example: Here’s what happens if you copy parts 4 through 5 to part 2: Of course you can also copy parts to the end of the current song. -
Page 47: Song Name
[PAGE+] keys to locate another job if necessary. l l Song Events In addition to pattern numbers, the RY30 provides the following events for use in songs. Normally you’ll use the Insert job described in the previous section to insert any of these events in the required location. -
Page 48: End Repeat
End Repeat An End Repeat event must be inserted immediately after a part or group of parts you want to repeat one or more times. An End Repeat event must always be accompanied by a Begin Repeat event (see above) which defines the begin- ning of the repeat segment. -
Page 49: Decrease Tempo
Decrease Tempo This event has the opposite effect to the Increase Tempo event described above. A Decrease Tempo event can be used to create a sudden or gradual de- — crease in tempo for a “ritardando” type effect. The number to the left of the slash is the amount by which the tempo is to be decreased in beats per minute (range: 00 ... -
Page 50: Voice Editing Fundamentals
RY30 voices can be based on a single waveform (“wave”), or a combination of two completely differ- ent waveforms “layered” for extra depth and tonal complexity. Such “2-layer” voices make it possible to produce extremely realistic voices by combining two essential components of a sound in the right propor- tions (e.g. - Page 51 In addition to assigning any one or two of these waveforms to a voice and adjusting their level, the RY30 lets you inde- pendently control panning, pitch, decay, digital filtering, velocity sensitivity, pitch envelope generator level and rate, and more parameters for each wave.
-
Page 52: Recording & Using Macros
Recording & Using Macros As you become more familiar with the RY30 and learn to use its many features and functions, you will no doubt find that you need to access certain functions more frequently than others, depending on your indi- vidual programming requirements. -
Page 53: Playing A Macro
5 . Press [ENTER] to begin recording. “M” will appear to the right of the upper display line to indicate that macro recording is active. If you started with the pattern mode selected the display might look something like this: 6. -
Page 54: Multi Channel Midi Drive
PLAY VOICES This is the “Standard” rhythm programmer MIDI capability. It allows an external keyboard, for example, to be used to play the RY30 voices with full keyboard touch response. Each key plays a different voice. This same capability allows the RY30 to be “played” by a MIDI sequencer or computer. -
Page 55: Multi-Channel Transmit
72, the “VOICE TRANSMIT CHANNEL job (page 72) allows different MIDI transmit channels to be assigned to the 96 internal and 32 internal/card voices. This means that up to 16 different RY30 voice or groups of voices can control separate external MIDI tone generators or other... - Page 57 PATTERN MODE PATTERN MODE ACCESSING THE PATTERN MODE FUNCTIONS 01: PATTERN SELECT 02: PATTERN CLEAR 03: PATTERN COPY 04: PATTERN APPEND 05: PATTERN DIVIDE 06: PATTERN MERGE 07: PATTERN JOB SELECT JOB 01: PATTERN INST COPY JOB 02: PATTERN INST DELETE JOB 03: PATTERN INST CHANGE JOB 04: PATTERN PARAMETER COPY JOB 05: PATTERN PARAMETER MODIFY...
- Page 58 PATTERN MODE ACCESSING THE PATTERN MODE FUNCTIONS From the pattern mode (selected by the [PATTERN] key), use the [PAGE–] and [PAGE+] keys to select the desired function “page.” Pattern jobs 1 through 6 are accessed through the PATTERN JOB SELECT page.
- Page 59 PATTERN MODE PATTERN SELECT Pattern mode/Page 01 Notes: More details on selecting and playing pat- terns are given in the TUTORIALS section, beginning on page 19. For pattern recording and editing procedures see page 21. Patterns 0 through 99 are in RAM memory and can be recorded and edited by the user.
- Page 60 PATTERN MODE RY30 PRESET PATTERN LIST Time Time P a t t e r n Pattern # Pattern Name #Bars Name # Bars Pattern # Signature Tempo Signature Tempo Funk1V 4 / 4 Shuf2F Funk1F 4 / 4 Shuf2C Funk1C...
-
Page 61: Pattern Mode
PATTERN MODE PATTERN CLEAR PATTERN MODE/PAGE 02 cancel the operation. “Complete!” will appear on the display briefly when the pattern has been cleared. Notes: This is the main method you’ll use to get rid of unwanted patterns. It’s also handy to be able Summary: Clears (erases) the selected pattern. - Page 62 PATTERN MODE PATTERN APPEND Pattern mode/Page 04 will appear on the display briefly when the pat- terns have been appended and stored. Notes: Since the maximum length of any pattern is 4 measures, the total length of the two patterns to be joined by the pattern append function must be no more than 4 measures.
-
Page 63: Job 01: Pattern Inst Copy
PATTERN MODE PATTERN MERGE Pattern Mode Page/ 06 them when they’re perfect. You could, for example, create a basic kick, snare, and hi-hat pattern in one pattern number, then use a sepa- rate pattern number to record percussion instru- ments such as timbales. This way you can work on the various parts without a lot of audio “clutter.”... -
Page 64: Job 02: Pattern Inst Delete
PATTERN MODE Settings: Source pattern number: 000 . . . 199 Procedure: Use the keys to move the Destination pattern number: 000 . . . 099 cursor to the pattern number or voice parameter Voice: Any voice used in the source pattern — (the voice number appears on the top line of the I00 . -
Page 65: Job 04: Pattern Parameter Copy
PATTERN MODE Press the [ENTER] key — “Sure” will keys, the [DATA] slider, or the numeric keys to appear on the display. Press the [ENTER] key set the parameters as required. The instrument again to change the voice or press [EXIT] to pads can be used to select the source and desti- cancel the operation. -
Page 66: Job 06: Swing
PATTERN MODE Procedure: Use the keys to move the Summary: Sets the amount of “swing” feel applied to the specified voice of the specified pattern. cursor to the desired parameter (the ‘‘>” and “<’’symbols at the ends of the display screens Settings: Source pattern number: 000 . -
Page 67: 08: Clear All Patterns
PATTERN MODE CLEAR ALL PATTERNS Pattern mode/Page 08 Notes: This function wipes out all 100 user patterns at once, so be sure there’s nothing you want to keep in the pattern memory before you go ahead and CLEAR ALL PATTERNS. For long-term Summary: Clears (erases) all user patterns (i.e. - Page 68 PATTERN MODE...
-
Page 69: Song Mode
SONG MODE SONG MODE ACCESSING THE SONG MODE FUNCTIONS ............ 01: SONG SELECT ................... SONG CLEAR ....................SONG COPY ....................CLEAR ALL SONGS ..................05: SONG USED MEMORY .................. - Page 70 SONG MODE ACCESSING THE SONG MODE FUNCTIONS From the song mode (selected by the [SONG] key), use the [PAGE-] and [PAGE+] keys to select the desired function “page.” Pressing the [SONG] key will always return you directly to page 01 (SONG SELECT).
-
Page 71: 01: Song Select
SONG MODE SONG SELECT Song mode/Page 01 The selected song can be played by pressing the [START] key and stopped by pressing the [STOP/CONTINUE] key. If you press the [STOP/CONTINUE] key again after stopping the song, playback will resume from the point at which it was stopped. -
Page 72: 03: Song Copy
SONG MODE SONG COPY Song mode/Page 03 Notes: The ability to copy songs is particularly use- ful when you want to create variations on exist- ing songs. Copy the song you want to modify to a new song number, then edit the song as described on page 34. -
Page 73: 05: Song Used Memory
SONG MODE SONG USED MEMORY Song mode/Page 05 Notes: A display of "000%" means that no memory is used "050%" means that about half the avail- able song memory is in use. When memory usage reaches “090%” or more you are reaching the Summary: Shows the amount of song memory cur- end of the available memory and may have to rently in use. - Page 74 SONG MODE...
-
Page 75: Utility Mode
UTILITY MODE UTILITY MODE ACCESSING THE UTILITY MODE FUNCTIONS ............6 8 01: CARD DATA LOAD ....................... 69 02: CASSETTE JOB SELECT..................... 69 JOB 01: CASSETTE SAVE .................... 69 JOB 02: CASSETTE VERIFY ..................7 0 JOB 03: CASSETTE LOAD ................... 70 03: MIDI JOB SELECT ...................... -
Page 76: Accessing The Utility Mode Functions
UTILITY MODE ACCESSING THE UTILITY MODE FUNCTIONS From the utility mode (selected by the [UTILITY] key), use the [PAGE–] and [PAGE+] keys to select the desired function “page.” Cassette jobs 1 through 3 are accessed through the CASSETTE JOB SELECT page. -
Page 77: 01: Card Data Load
WAVE CARD slot, data card is properly plugged into the RY30 or the card used is not compatible with the RY30. WAVE CARD slot, use the [INC] and [DEC] When the card data is loaded, the data in the keys to select “VOICE”... -
Page 78: Job 02: Cassette Verify
RY30 RY30 memory contents after saving the data [ENTER] key. “Cassette Saving Now!” will might be interpreted by the RY30 as a verify appear on the display while the data is being error. -
Page 79: 03: Midi Job Select
Multiple channels can be set to receive the same type of data. Unused channels should be JOB 01: CHANNEL MESSAGE turned OFF. Notes: The RY30 is capable of responding to MIDI note numbers received on the assigned channels in three different ways: VOICE:... -
Page 80: Job 03: Transmit Channel
“Sure” will appear on the display. Press Notes: Note assignments determine which MIDI [ENTER] again. “Complete!” will appear on the note number will play which of the RY30’s voices. display briefly when the operation is finished. The RY30’s four voice note assignment tables... -
Page 81: Job 07: Voice Note Assign Table Copy
UTILITY MODE Notes: The RY30 has four separate note assign Summary: Clears the currently selected voice note tables that can be selected by using the “VOICE assign table (i.e. all voice assignments are NOTE ASSIGN TABLE SELECT” job described turned “off”). -
Page 82: Job 10: Pattern Note Assign
“RECEIVE CHANNEL” func- another MIDI device (as long as an appropriate tion on page 71) will select the corresponding device number is set and the RY30 is not in the pattern. play or record mode). Settings: Type: PRG (program change number),... -
Page 83: Job 13: Control Change
See pages 106 through 110 for more details on these The BULK TRANSMIT function will not work parameters. if the RY30 MIDI device number is set to “off.” If the device number is set to “ALL” the data will be transmitted on channel 1. -
Page 84: Job 02: Pad Velocity Curve
Notes: “INTERNAL” is the normal setting when the Notes: While the “LEVEL” function described on RY30 is being used alone. If you are using the page 81 determines the overall level of each voice, RY30 with an external sequencer, MIDI computer, this function determines the voice levels —... - Page 85 UTILITY MODE Procedure: Press the [ENTER] key — “Sure” will Notes: Please note that any new voices you have appear on the display. Press the [ENTER] key created by editing the presets will be erased when again to load the preset voices or press [EXIT] the “LOAD PRESET VOICES”...
- Page 86 UTILITY MODE...
-
Page 87: Voice Edit Mode
10: POLY ON/OFF ......................... 11: ALTERNATE GROUP ....................89 12: OUTPUT ASSIGN ......................90 13: INDIVIDUAL LEVEL ....................90 14: VOICE NAME ........................91 15: VOICE COPY ........................16: VOICE INITIALIZE ....................... 92 INITIALIZED VOICE DATA ..................... 93 RY30 VOICE LIST ......................... -
Page 88: Accessing The Voice Edit Mode Functions
VOICE EDIT MODE ACCESSING THE VOICE EDIT MODE FUNCTIONS From the voice edit mode (selected by the [VOICE EDIT] key), use the [PAGE-] and [PAGE+] keys to select the desired function “page.” Filter jobs 1 through 4 are accessed through the FILTER JOB SELECT page. -
Page 89: 02: Wave Assign
Summary: Sets the level at which the selected voice will be output via the RY30’s stereo out- Notes: A setting of “00” produces no sound while a puts (i.e. the OUTPUT L/MONO and R jacks). - Page 90 VOICE EDIT MODE RY30 Wave List Comment Comment Name Name Analog kick Agogo Agogo bell BDAnlg Dry kick AnlgCIp Analog claps BDDryH Analog cowbell BDDryT1 Dry kick (heavy) AnlgCow Bongo Bongo BDDryT2 Dry kick (tight) Gated kick Cabasa Cabasa BDGate1...
-
Page 91: 03: Wave Level
VOICE EDIT MODE WAVE LEVEL Voice edit mode/Page 03 Procedure: Use the keys to move the cursor to the voice name, wave 1 level, or wave 2 level parameter. Use the [INC] and [DEC] keys, the [DATA] slider, or the numeric keys to set the wave levels. -
Page 92: 07: Filter Job Select
VOICE EDIT MODE PITCH Voice edit mode/Page 05 set the pitch values. The [INC] and [DEC] keys adjust the pitch on l-cent increments while the [DATA] slider adjusts the pitch in 100-cent increments. The [INC] and [DEC] keys, the [DATA] slider, or the instrument pads can be used to select the voice. -
Page 93: Job 01: Filter Type
VOICE EDIT MODE Procedure: Press [ENTER] and then use the The “HPF” (High Pass Filter) setting produces a filter response that allows only frequencies [PAGE-] and [PAGE+] keys to select the above desired job. the cutoff frequency to pass (see Press [EXIT] to exit from the filter job mode “CUTOFF”... -
Page 94: Job 03: Resonance
VOICE EDIT MODE Summary: Independently sets the envelope gener- JOB 03: RESONANCE ator level and rate values for waves 1 and 2 of the current voice. Settings: Wave 1 filter EG level: -63 . . . +63 Wave 1 filter EG rate: 0 . . . 63 Wave 2 filter EG level: -63 . -
Page 95: Job 02: Pitch Sensitivity
VOICE EDIT MODE SENSITIVITY JOB SELECT Voice edit mode/Page 08 JOB 02: PITCH SENSITIVITY Summary: Allows any of the four sensitivity jobs described below to be selected. Settings: None Procedure: Press [ENTER] and then use the Summary: Determines how the wave 1 and wave 2 [PAGE-] and [PAGE+] keys to select the de- pitches change in response to velocity changes sired job. -
Page 96: Job 04: Filter Sensitivity
VOICE EDIT MODE Settings: Wave 1 EG sensitivity: -7 . . . +7 Summary: Determines how the wave 1 and wave 2 Wave 2 EG sensitivity: -7 . . . +7 filter cutoff frequencies change in response to velocity changes (e.g. keyboard dynamics). Procedure: Use the keys to move the Settings: Wave 1 filter sensitivity: -7 . -
Page 97: 10: Poly On/Off
This also Alternate group mode mode: OFF, 1 . . . 7 means that you can play the open hi-hat, then “close” the hi-hat before the open hi-hat sound ends by playing the closed hi-hat key. The RY30... -
Page 98: 12: Output Assign
Summary: Sets the level at which the selected or the [DATA] slider to set as required. The voice will be output via the RY30’s individual instrument pads can be used to select the voice. outputs when the voice is assigned to the... -
Page 99: 14: Voice Name
Settings: Source voice number: I00 . . . I95 The RY30’s preset voices are available for (internal), C00 . . . C31 (card), P00 . . . P95 the source voice parameter so that a single voice... -
Page 100: 16: Voice Initialize
VOICE EDIT MODE VOICE INITIALIZE Voice edit mode/Page 16 Notes: This function is handy if you want to com- pletely reprogram all voice parameters from scratch. Here’s a list the initialized voice parameter values: Summary: Initializes all parameters of the selected voice except waves and the voice name to their “normal”... -
Page 101: Initialized Voice Data
VOICE EDIT MODE INITIALIZED VOICE DATA No Change VOICE NAME VOICE LEVEL WAVE SELECT No Change No Change LEVEL P A N P I T C H DECAY FILTER T Y P E THRU THRU C U T O F F —... -
Page 102: Ry30 Voice List
VOICE EDIT MODE RY30 VOICE LIST... - Page 103 VOICE EDIT MODE The following abbreviations are used in the "Touch Sens." column: L=Level; P=Pitch; E=EG; F=Filter Moving the wheel upward will have little or no effect with voices in which the decay or filter parameters are set to maximum.
- Page 104 VOICE EDIT MODE...
- Page 105 PAD BANK MODE PAD BANK MODE ACCESSING THE PAD BANK MODE FUNCTIONS ......01: PAD BANK SELECT ............02: VOICE/PITCH ASSIGN .
-
Page 106: Accessing The Pad Bank Mode Functions
PAD BANK MODE ACCESSING THE PAD BANK MODE FUNCTIONS From the pad bank mode (selected by the [PAD BANK] key), use the [PAGE-] and [PAGE+] keys to select the desired function “page.” Pressing the [PAD BANK] key will always return you directly to page 01 (PAD BANK SELECT). - Page 107 To enter the letter “H”, Summary: Selects one of the RY30’s 12 internal or for example, press the [2] key three times. The 4 internal/card pad banks (i.e. sets of pad-to- [CLEAR] key switches between upper and voice assignments), or the “pitch multi”...
- Page 108 PAD BANK MODE RY30 PAD BANK ASSIGNMENTS...
-
Page 109: 02: Voice/Pitch Assign
PAD BANK MODE VOICE/PITCH ASSIGN Pad Bank mode/Page VOICE ASSIGN PITCH ASSIGN Please note this function is selected only if pad Please note this function is selected only if pad bank bunk number 00 through 15 is selected using the number 16 (pitch multi) is selected using the “PAD “PAD BANK SELECT”... - Page 110 PAD BANK MODE Notes: This function makes it simple to set up a new Press the [ENTER] key — “Sure” will pad bank that is only slightly different from an appear on the display. Press the [ENTER] key existing pad bank. First copy the existing pad again to copy the bank or press [EXIT] to cancel bank to a new number, then make the required the operation.
- Page 111 ERROR MESSAGES Things do go wrong from time to time, and people do make mistakes. When an error occurs, the RY30 will usually display a message that describes the type of error so you can take steps to rectify the problem. The following are quick summaries of the RY30 error displays.
- Page 112 This can happen if sette data. Possible solutions are the same as for you’re driving the RY30 from a sequencer or MIDI the “Load Error !” message, above. computer. The solution is to simplify or slow down the data being transmitted.
- Page 113 SPECIFICATIONS SPECIFICATIONS Pad Banks: 12 internal, 4 card/internal, 1 pitch Tone Generator: 16-bit AWM2, 48 kHz sampling frequency, with digital filter multi MIDI Note Tables: 4 internal Polyphony: 15 notes Instrument Pads: 12 with velocity sensitivity Controllers: Realtime Parameter Wheel for filter, controlling filter, volume, EG, and pitch pitch, balance, decay, and pan, 33 func-...
- Page 114 INDEX INDEX Alternate group Filter Audio connections cutoff envelope generator job select parameter 23,27,29 resonance Balance parameter 23,27,30 sensitivity Begin repeat type Fixed velocity Footswitch jack Card data load Cassette in/out jack Increase tempo job select Increase velocity load Individual level save Initial tempo verify...
- Page 115 INDEX Phones jack voice transmit channel Monitor mode Pitch Multi-channel receive envelope generator note assign Multi-channel transmit parameter 23,26,29 sensitivity Poly on/off Power switch Numeric keys 10,19 Power-on procedure Output assign Quantize 22.23- 27 Output jacks Overdubbing Real-time record Rec key 9,21 Pad bank Reference section, what's in the...
- Page 116 INDEX Utility Wave assign k e y card slot mode l e v e l Wheel range Velocity curve parameter Voice copy edit key edit mode editing initialize l i s t name note assign table clear note assign table copy note assign table select note assign table setup Voice/pitch assign...
- Page 117 M I D I D A T A F O R M A T MIDI DATA FORMAT 1. Reception Conditions 1-1 Reception Data & Conditions SYNC : Internal or MIDI sync MODE : Song mode or not OPTION : optional parameter on/off : pattern select switch while pattern playing Note and P.C.
- Page 118 The following is included in the “data:” pattern data song data 3) Program Change voice data When a program change message is received, the RY30 responds system setup data as follows: pad bank data Receive channel = Pitch: The voice played via that channel is MIDI setup data switched.
- Page 119 MIDI DATA FORMAT ii) 1 voice bulk dump ii) 1 Voice Bulk Dump 0 11110000 F0 0 11110000 1 01000011 43 1 01000011 2 010nnnn nnnn - Device Number 2 0000nnnn nnnn - Device Number 3 01111010 7A 3 01111010 4 01001100 4C(ascii"L") 4 0bbbbbbb Number of bytes...
- Page 120 MIDI DATA FORMAT 2. Transmission Conditions 2-1. Transmission Data & Conditions ACTIVE SENSING START CONTINUE STOP TIMING CLOCK SONG SELECT NOTE ON/OFF CONTROL CHANGE PITCH BEND BULK DUMP SYNC : internal or MIDI sync OPTION : optional parameter on/off Ch msg : Channel message on/off Dev No = Device Number...
- Page 121 MIDI DATA FORMAT 2-2. Transmission Data Details PitchBend Transmitted when optional parameter ON. 2-2-l. System Realtime Messages Transmit data range = 4 . . . 124 TIMING CLOCK 1111 l000 Transmitted only when the pitch optional parameter is not set to START 1111 1010 the default.
- Page 122 YAMAHA [ Rhythm Programmer ] Date : 02/09, 1991 Model RY30 MIDI Implementation Chart Version : 1.0 +----------------------------------------------------------------------+ Remarks Transmitted Recognized Function . . . -------------------+-----------------+----------------+----------------- Basic Default l-16 memorized l - 16 Channel Changed l - 16 l - 16...
- Page 123 For details of software, please contact our nearest subsidiary/ our the authorized distributor listed below. SERVICE This product is supported by YAMAHA's worldwide network of factory trained and qualified dealer service personnel. the event of a problem, contact your nearest YAMAHA d e a l e r .
- Page 124 YAMAHA...
- Page 125 YAMAHA ® Yamaha Corporation of America 6600 Orangethorpe Avenue, P.O. Box 6600, Buena Park, CA 90622-6600 Recycled RY30 OM 8/26/98 29553...
Need help?
Do you have a question about the RY30 and is the answer not in the manual?
Questions and answers