Sign In
Upload
Download
Table of Contents
Contents
Add to my manuals
Delete from my manuals
Share
URL of this page:
HTML Link:
Bookmark this page
Add
Manual will be automatically added to "My Manuals"
Print this page
×
Bookmark added
×
Added to my manuals
Manuals
Brands
Epomaker Manuals
Keyboard
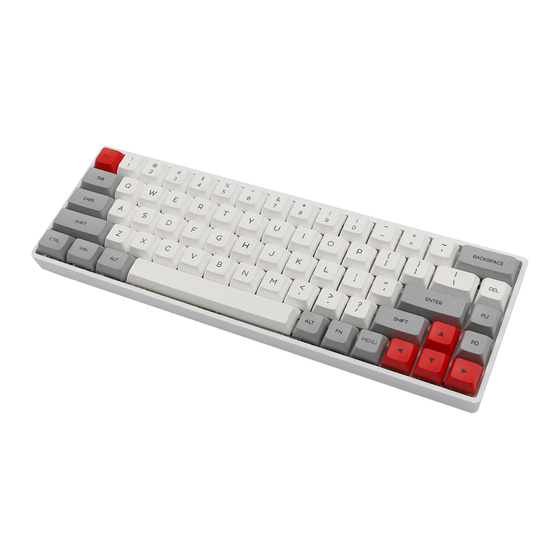
GK68
Extended manual
Epomaker GK68 Extended Manual
Hide thumbs
Also See for GK68
:
User manual
1
2
Table Of Contents
3
4
5
6
7
8
9
10
11
12
13
14
15
16
17
18
19
20
21
22
23
24
25
26
27
28
29
30
31
32
33
34
35
36
37
38
39
40
41
42
43
44
45
46
47
48
49
50
51
52
53
54
55
56
57
58
59
60
61
62
63
64
page
of
64
Go
/
64
Contents
Table of Contents
Bookmarks
Table of Contents
Comments by Epomaker
Table of Contents
Unboxing
What Is Included in the Box
Epomaker GK68XS (Plastic Version)
Epomaker GK68XS (Aluminium Version)
Item Descriptions
Epomaker Manual
Keyboard Information
Keyboard Specifications
Keyboard Dimensions
Keycap Dimensions
Setting up Keyboard/Bluetooth
Windows 10 Bluetooth
Ios Bluetooth Setup
Macos Bluetooth
Linux Bluetooth Pairing
Downloading Software for Your Epomaker GK68
Windows Download
Macos and Linux Download (GUI)
Lighting Section
Creating an Lighting (.LE) Files
Edit Driver Layer Colours
Add Onboard Lighting Effects
Uploading Lighting "LE" Files
Downloading Lighting "LE" Files
Creating Frame Based Lighting Effects
Layout Section
Changing Keyboard Language Settings
Windows
Macos
Remapping a Single Key
Remapping a Key Combination
Macros
Creating a New Macro Category
Creating a Macro
Recording a Macro
Editing a Macro
Assigning a Macro to a Key
Frequently Asked Questions
I See "Not Support Device
Combination of the FN Key + Another Key
My Mac Delete Key Is Not Working
My GK6X Plus Driver Is in Chinese
Advertisement
Quick Links
1
Epomaker Gk68Xs (Plastic Version)
2
Epomaker Manual
3
Keyboard Information
4
Setting up Keyboard/Bluetooth
5
Windows 10 Bluetooth
6
Lighting Section
7
Combination of the Fn Key + Another Key
Download this manual
Epomaker GK68 Extended Manual
10/07/20
Epomaker
GK68/GK6X
Extended Manual
Version 1.2
1
Table of
Contents
Previous
Page
Next
Page
1
2
3
4
5
Advertisement
Table of Contents
Need help?
Do you have a question about the GK68 and is the answer not in the manual?
Ask a question
Questions and answers
Related Manuals for Epomaker GK68
SKYLOONG GK68 / SK68 / AK68 - USB Wired Mechanical Keyboard Manual
(article)
Keyboard Epomaker SK61 Series Extended Manual
(60 pages)
Keyboard Epomaker SK61 Quick Start Manual
(18 pages)
Keyboard Epomaker GK61X Extended Manual
(60 pages)
Keyboard Epomaker GK61XS Extended Manual
(60 pages)
Keyboard Epomaker GK96S Extended Manual
(63 pages)
Keyboard Epomaker GS66 Extended Manual
(68 pages)
Keyboard Epomaker GK6X Extended Manual
(64 pages)
Keyboard Epomaker EP84 Quick Start Manual
80% hot-swap wired mechanical keyboard (18 pages)
Keyboard Epomaker EP84 Manual
80% hot-swap wired/wireless mechanical keyboard (18 pages)
Keyboard Epomaker TH66 Quick Start Manual
65% hot-swap wired/wireless mechanical keyboard (18 pages)
Keyboard Epomaker 680 GASKET KIT Quick Start Manual
65% hot swappable acrylic rgb wired mechanical gaming diy keyboard kit (18 pages)
Keyboard Epomaker TH80 Quick Start Manual
75 hot-swap wired/wireless mechanical keyboard (18 pages)
Keyboard Epomaker TH80 Quick Start Manual
(19 pages)
Keyboard Epomaker Everglide SK98 Manual
1800 compact 98 keys hot swappable wired/wireless mechanical gaming keyboard diy kit (18 pages)
Keyboard Epomaker TH100 Quick Start Manual
96% hot swappable triple-mode wired/wireless mechanical gaming keyboard (18 pages)
This manual is also suitable for:
Gk6x
Gk68x
Gk68xs
Table of Contents
Save PDF
Print
Rename the bookmark
Delete bookmark?
Delete from my manuals?
Login
Sign In
OR
Sign in with Facebook
Sign in with Google
Upload manual
Upload from disk
Upload from URL


Need help?
Do you have a question about the GK68 and is the answer not in the manual?
Questions and answers