Table of Contents
Advertisement
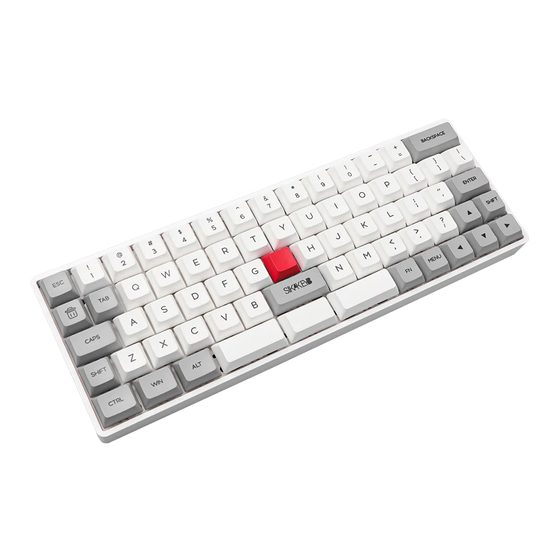
Quick Links
Advertisement
Table of Contents

Related Manuals for Epomaker GS66


Summary of Contents for Epomaker GS66
- Page 1 Epomaker GS66 Extended Manual Version 1.0 Epomaker GS66 Extended Manual...
-
Page 2: Comments By Epomaker
Epomaker GS66 Extended Manual Version 1.0 Comments by Epomaker If you think any part of this manual needs correction, adjustment or updating, sent the team a message at s upport@epomaker.com . You can also send a message there if you have any... -
Page 3: Table Of Contents
Changing Modes/Layers Setting Up Keyboard/Bluetooth Windows 10 Bluetooth iOS Bluetooth Setup MacOS Bluetooth Linux Bluetooth Pairing Downloading Software for your Epomaker GS66 Windows Download MacOS and Linux Download (GUI): Lighting Section Creating an Lighting (.LE) Files Edit Driver Layer Colours Add Onboard Lighting Effects Uploading Lighting “LE”... - Page 4 Epomaker GS66 Extended Manual Version 1.0 Recording a Macro Editing a Macro Assigning A Macro To A Key Frequently Asked Questions I see “Not Support Device” Combination of the FN key + Another key My Mac Delete key is not working My GK6X Plus Driver is in Chinese I can’t seem to press anything on my MacOS screen...
-
Page 5: Unboxing
What's included in the Box Note: This might change depending on availability 1. Epomaker GS66 2. Epomaker Keycap Set (Different profiles depending on your variant) 3. Epomaker GS66 Manual 4. USB A to USB C Braided Cable (1.5m / 4.9ft) 5. -
Page 6: Item Descriptions
Epomaker GS66 Extended Manual Version 1.0 Item Descriptions Epomaker Manual (GS66): Media Keys FN + A: P lay/Pause... - Page 7 Epomaker GS66 Extended Manual Version 1.0 FN + S: P revious FN + D: N ext FN + F: M ute FN + G: V olume - FN + H: V olume + Bluetooth Settings FN + Space: ...
- Page 8 Epomaker GS66 Extended Manual Version 1.0 FN + 8: F 8 FN + 9: F 9 FN + 0: F10 FN + -: F 11 FN++: F 12 Numpad Keys FN + U: P S FN + I: ...
-
Page 9: Keyboard Dimensions
Epomaker GS66 Extended Manual Version 1.0 Keyboard Dimensions... -
Page 10: Keyboard Information
Epomaker GS66 Extended Manual Version 1.0 Keyboard Information... -
Page 11: Keyboard Keycap Dimensions
Epomaker GS66 Extended Manual Version 1.0 Keyboard Keycap Dimensions The “units” of a keycap refer to a comparison between a one “unit” standard key. This is such that a 2u key will be two units of a 1u key. 1. The split spacebar is 2.25u, 1.75u and 2.25u. The non-split bar is 6.25u. -
Page 12: Quick Start Guide
Epomaker GS66 Extended Manual Version 1.0 Quick Start Guide Powering the GK66/SK66 Your device will come uncharged, or with low battery. In this case, it is required that you charge it before use. Your device requires a USB-A to USB-C connection with the cable that came in the box. - Page 13 Epomaker GS66 Extended Manual Version 1.0 Layer 2: Onboard memory layer, The “E” key will light up when this mode is selected. MacOS layer. This layer is the same as Layer 1 and 3, but by default has the keys rebinded to match a MacOS keyboard and the Backspace key will be binded to delete.
-
Page 14: Setting Up Keyboard/Bluetooth
Windows 10 Bluetooth 1. First, charge the keyboard via a USB port on your computer until it has decent charge. 2. Power on the keyboard using F N + Space . This will put your Epomaker GS66 in Bluetooth mode. - Page 15 Epomaker GS66 Extended Manual Version 1.0 6. Select “Add Bluetooth or other device” 7. Select “Bluetooth” from the add devices section.
-
Page 16: Ios Bluetooth Setup
Bluetooth Setup 1. First, charge the keyboard via a USB port on your computer until it has decent charge. 2. Power on the keyboard using F N + Space . This will put your Epomaker in bluetooth mode. - Page 17 Epomaker GS66 Extended Manual Version 1.0 5. Select “Bluetooth” from the Settings. Make sure it is on. 6. Make sure that your device is considered discoverable. 7. Press “GS66 KB” to connect to your Epomaker GS66.
- Page 18 Epomaker GS66 Extended Manual Version 1.0 When your device is connected to your iPhone, it should show as “Connected”. Note: If you want to disconnect the device, you can press the information icon on the side, and then select “Disconnect” or “Forget this device”. Your device will then be paired on that specific button.
-
Page 19: Macos Bluetooth
Epomaker GS66 Extended Manual Version 1.0 MacOS Bluetooth Note: make sure your device is discoverable and turned on. 1. Press Command + Space to open Search 2. Type “Bluetooth” into the Spacebar, select “Bluetooth” (Don’t select Bluetooth File Exchange). 3. Hold the desired pairing button you would like on your keyboard. You can connect up to three devices, so either hold ... - Page 20 Epomaker GS66 Extended Manual Version 1.0 4. You should see “GK66 KB” in the Bluetooth devices. Press “Connect” 5. You should see a keyboard symbol that is connected, and the Keyboard assistant pop...
-
Page 21: Linux Bluetooth Pairing
Fedora: Downloading Software for your Epomaker GS66 The keyboard has support for MacOS, Windows and Linux. Make sure when you’re installing the software that you have a ZIP manager. We suggest using the open sourced 7Zip. Download it here: ... - Page 22 Epomaker GS66 Extended Manual Version 1.0 2. Click the download button under the section “GK6X Keyboard Software”. 3. Extract the file to a temporary folder. Click the file and run. 4. Run through the installer and install to the location you would like - the default location...
-
Page 23: Macos And Linux Download (Gui)
Epomaker GS66 Extended Manual Version 1.0 5. Launch the software by searching “GK68Plus Driver” in the search bar. MacOS and Linux Download (GUI): https://github.com/pixeltris/GK6X In order for the keyboard to interface with the software, you’re going to need to have the keyboard in wired mode if you want to change the driver layer. - Page 24 Epomaker GS66 Extended Manual Version 1.0 2. Click to download the “Stable channel” 3. Click the file in your download folder, you should see an installer launch, run through the installer and install mono. 4. Head to h ttps://github.com/pixeltris/GK6X/releases...
- Page 25 Epomaker GS66 Extended Manual Version 1.0 5. Click the file to begin the download, and put this file somewhere where you can access it regularly via CLI. In this case, we will put it on the desktop. 6. Press Command + Space and type “Terminal” into the search bar. Press “Terminal”.
- Page 26 Epomaker GS66 Extended Manual Version 1.0 7. You want to make the current directory you put your driver folder you placed it in, in this case, we placed the GK68X folder on the desktop, so we type the command c d Desktop 8.
- Page 27 English. Software Tutorials This section will show you how to use your GS66 for changing colours, macros and binds. In order for your keyboard to be detected by the software, it needs to be connected with the given USB-A to USB-C cable that came with the keyboard.
-
Page 28: Lighting Section
I am going to show you how to create a lighting file that you can use, share with other users. You can use these lighting effects on either the onboard memory of your Epomaker, or by using it in driver mode. -
Page 29: Creating An Lighting (.Le) Files
Epomaker GS66 Extended Manual Version 1.0 for the driver to interface and detect the software. You can use a dongle to connect your keyboard to a USB-C connection on a Mac. 2. Launch the software and select “LE Files”, this is the section for creating lighting files. - Page 30 Epomaker GS66 Extended Manual Version 1.0 5. Click the Edit icon on the given lighting effect name you just made to start editing the RBG and effect. You should be welcomed by the editor. Here you can add a lighting option by clicking the “+”...
- Page 31 Epomaker GS66 Extended Manual Version 1.0 6. Select a setting and then change the colour using the colour wheel. Select the keys on the keyboard you want the colour to use, or select from the buttons All, Top Bar, Bottom, Fifth Line.
-
Page 32: Edit Driver Layer Colours
Epomaker GS66 Extended Manual Version 1.0 8. Go back to the configurations tab, and then select your LE File you created. 9. Click View, then Apply and Save. Edit Driver Layer Colours The driver layer will only work when the device is in wired mode, so in order to edit the colours in the driver layer you can’t use bluetooth. -
Page 33: Add Onboard Lighting Effects
Epomaker GS66 Extended Manual Version 1.0 2. Click Driver 1 from the layers you can see above to access the Driver layer. 3. Click the side panel above, you will see different lighting effect options which you can press. Press any or create your own. You can see how to do this in “Creating a Lighting (.LE) File”... - Page 34 Epomaker GS66 Extended Manual Version 1.0 1. Launch the software with the keyboard connected in wired mode. The keyboard must use the cable given, or a USB-C to USB-A cable. The USB-A connection gives the ability for the driver to interface and detect the software. You can use a dongle to connect your keyboard to a USB-C connection on a Mac.
-
Page 35: Uploading Lighting "Le" Files
5. Click the F N + ] until you find the desired effect you selected. Want more effects for your Epomaker keyboard? You can make one yourself, or join our Discord that has many created by the awesome community: ... -
Page 36: Downloading Lighting "Le" Files
Epomaker GS66 Extended Manual Version 1.0 2. Select the upload button from the LE File Management module. 3. Find the location where you saved your file, and select the file and press open. You should then see the file in the LE File Management Module. -
Page 37: Creating Frame Based Lighting Effects
Epomaker GS66 Extended Manual Version 1.0 1. Press the file you would like to download from the LE File Management Module and elect the download button as shown above. 2. Enter your desired location and the filename. 3. Click Save. The file will now be saved in that location and can be shared. - Page 38 Epomaker GS66 Extended Manual Version 1.0 1. Select the “LE Files” Tab. This is the location for editing all your lighting effects. The frames will be the timing that different layers of effects will happen on the keyboard. The parameter will adjust the length and duration of your lighting effect. So the higher the value is for the parameter, the longer it will take for the keyboard to change the colour.
- Page 39 Epomaker GS66 Extended Manual Version 1.0 2. We will first start by selecting our first frame, and setting the count. The count is for how long the colour will stay on the board. We then will select “First Line” as we want the...
- Page 40 Epomaker GS66 Extended Manual Version 1.0 1. We will then select the colour we want to add to that row. In this case, we will be using a single purple colour. But you can add multiple colours to your liking and layer them.
- Page 41 Epomaker GS66 Extended Manual Version 1.0 2. If you’re using a single colour, select your colour and then assign that colour to all the keys. We are going to be using frames to determine when those keys or specific rows...
- Page 42 Epomaker GS66 Extended Manual Version 1.0 3. We create our next frame and then rename it, we want to then select how long the frame is going to last by using the “count” variable. 4. Select what the next frame is going to do, since we’re going to be lighting up the rows on the keyboard sequentially, we’re then going to make a new frame, rename it, then select...
- Page 43 Epomaker GS66 Extended Manual Version 1.0 5. By the end you should have the frames you want, you want to click the tick button to save the configuration to your lighting file. This can then be used on your keyboard.
-
Page 44: Layout Section
Epomaker GS66 Extended Manual Version 1.0 6. Go back to the configuration file to enable your new lighting effect on your keyboard. Layout Section The layout section is here to help people understand how to remap keys, edit their language settings and also set up a Mac layout, restore to default settings, and also understand what the different layers are and how they work. -
Page 45: Windows
Epomaker GS66 Extended Manual Version 1.0 Windows 1. Start by pressing your Windows key and searching “Language Settings”... - Page 46 Epomaker GS66 Extended Manual Version 1.0 2. Select your default language and click options. This section is for configuring your keyboard layout. In this case, I will change to the United States-Dvorak 3. Click the “Add a keyboard” button...
-
Page 47: Macos
Epomaker GS66 Extended Manual Version 1.0 4. Select your desired keyboard layout from this section. You can then change between these layouts using W in + Space . MacOS In this case, we will be adding the Dvorak layout to our MacOS keyboard preferences. This Mac is running MacOS Catalina. - Page 48 Epomaker GS66 Extended Manual Version 1.0 2. When you are at the System Preferences screen, select “Keyboard”. 3. Select “Input Sources” when you are at the Keyboard settings.
- Page 49 Epomaker GS66 Extended Manual Version 1.0 4. Select the “+” Symbol to add a keyboard input...
-
Page 50: Remapping A Single Key
Epomaker GS66 Extended Manual Version 1.0 5. Select the keyboard layout you just decided to use - in this case we selected Dvorak. Remapping A Single Key Remapping keys is important, especially if you’re looking at remapping the split spacebar... - Page 51 Epomaker GS66 Extended Manual Version 1.0 1. Select the layer you would like the button to be mapped to. In driver mode, the layer will only work when the keyboard is in wired mode, but the Driver Layer will not work on MacOS.
- Page 52 Epomaker GS66 Extended Manual Version 1.0 Press the key on the animated keyboard that you would like to edit. In this case, We are going to be assigning the larger portion of the split spacebar as a Backspace button.
-
Page 53: Remapping A Key Combination
Epomaker GS66 Extended Manual Version 1.0 4. Press the key that you would like to assign to the keyboard, in this case, we are assigning the Backspace. You will then see the button flash with the name of the key you just assigned. - Page 54 Epomaker GS66 Extended Manual Version 1.0 1. Select your layer, in this case, we are going to be adding our Key Combination to Driver Press the key on the animated keyboard that you would like to edit. In this case, We are going to be assigning the larger portion of the split spacebar as the combination...
- Page 55 Epomaker GS66 Extended Manual Version 1.0 3. Select from this section what combination you would like to do. You need to select a main button from the dropdown and then a key from the virtual keyboard. 4. Click View from the Combination Section, then Save and Apply.
-
Page 56: Macros
Epomaker GS66 Extended Manual Version 1.0 Macro Tutorial Macros Creating a New Macro Category 1. Press the “Macros” tab at the top of the navigation bar to get to the Macro creator... - Page 57 Epomaker GS66 Extended Manual Version 1.0 2. Select the Plus Button by the Macro Category tag and give it a name. Then click confirm. You will now see your Macro Category.
-
Page 58: Creating A Macro
Epomaker GS66 Extended Manual Version 1.0 Creating a Macro 1. Click the “+” Button the the left and enter your desired Macro name, then press Confirm. - Page 59 Epomaker GS66 Extended Manual Version 1.0 2. You will now see the Macro appear in your selected Macro Category.
-
Page 60: Recording A Macro
Epomaker GS66 Extended Manual Version 1.0 Recording a Macro 1. Click the Recording setting, this will then listen to key pressed and save them to your macro. 2. Record your keypresses. In this case, we recorded the key presses “H E L L O”. You can... -
Page 61: Editing A Macro
Epomaker GS66 Extended Manual Version 1.0 Editing a Macro 1. Press the “Macros” tab at the top of the navigation bar to get to the Macro creator 2. Click the Macro you would like to edit, and click the pencil icon. -
Page 62: Assigning A Macro To A Key
Epomaker GS66 Extended Manual Version 1.0 Assigning A Macro To A Key 1. Head to the configuration tab in the software. 2. Head to the Macro section on the right and select the dropdown, in this section you will see the category you created. - Page 63 Epomaker GS66 Extended Manual Version 1.0 3. You will see the macro you created, press on the macro, and then press on the key you would like to use it with, in this case we will run the macro on Right Alt.
-
Page 64: Frequently Asked Questions
Epomaker GS66 Extended Manual Version 1.0 Troubleshooting Frequently Asked Questions This section will answer some general questions that I have seen coming up in support threads and on the Discord. You can contact us via s upport@epomaker.com if you’re still having issues I see “Not Support Device”... -
Page 65: My Mac Delete Key Is Not Working
Epomaker GS66 Extended Manual Version 1.0 My Mac Delete key is not working On MacOS, the “Delete” key is used as the Backspace Key. In this case, you need to make sure that your backspace isn’t binded to the Windows backspace because your Mac will not detect it. - Page 66 Epomaker GS66 Extended Manual Version 1.0 2. Select the Delete key in the keyboard, you should see it flashing on the animated keyboard that you binded it. 3. Press Save, Then Apply.
-
Page 67: My Gk6X Plus Driver Is In Chinese
Epomaker GS66 Extended Manual Version 1.0 My GK6X Plus Driver is in Chinese Sometimes, when the driver is launched, it will display in the default language which is Chinese. In this case, we can change it easily by going to the flag in the top right of the software and changing it to English. -
Page 68: How Do I Check My Battery And What Does The Indicator Mean
Epomaker GS66 Extended Manual Version 1.0 How do I check my battery and what does the indicator mean? You can check your battery using F N + LEFT Alt. The battery indicator works as follows: Flashing Red = Low battery, the Bluetooth will possibly not work to save power.
Need help?
Do you have a question about the GS66 and is the answer not in the manual?
Questions and answers