Table of Contents
Advertisement
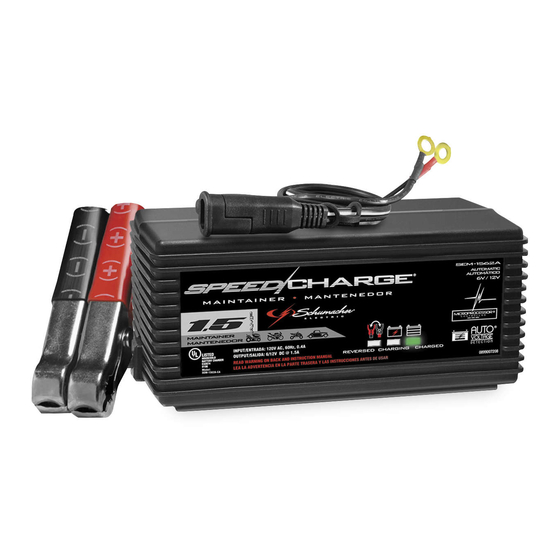
SEM-1562A-CA
Model:
Automatic Battery Charger
OWNERS MANUAL
PLEASE SAVE THIS OWNERS MANUAL AND READ BEFORE EACH USE.
This manual will explain how to use the battery charger safely and effectively.
Please read and follow these instructions and precautions carefully.
NO use el cargador de baterías hasta que haya leído y comprendido
completamente el manual del usuario. Si usted desea una versión
en español de esta edición, visite nuestra página en la red localizada en
www.batterychargers.com así podrá obtener un instructivo del cargador de
baterías en español. Si usted no tiene acceso a la red y necesita asistencia,
llame Servicios al Cliente al (800) 621-5485.
Voltage: 6, 12
Amperage: 1.5
0099001459-01
Advertisement
Table of Contents

Related Manuals for Schumacher SEM-1562A-CA


Summary of Contents for Schumacher SEM-1562A-CA
- Page 1 SEM-1562A-CA Model: Automatic Battery Charger OWNERS MANUAL Voltage: 6, 12 Amperage: 1.5 PLEASE SAVE THIS OWNERS MANUAL AND READ BEFORE EACH USE. This manual will explain how to use the battery charger safely and effectively. Please read and follow these instructions and precautions carefully.
-
Page 2: Table Of Contents
CONTENTS IMPORTANT SAFETY INSTRUCTIONS ..................3 PERSONAL SAFETY PRECAUTIONS ..................4 PREPARING TO CHARGE ......................4 CHARGER LOCATION ........................5 DC CONNECTION PRECAUTIONS ....................5 FOLLOW THESE STEPS WHEN BATTERY IS INSTALLED IN VEHICLE ........5 FOLLOW THESE STEPS WHEN BATTERY IS OUTSIDE VEHICLE ..........6 GROUNDING AND AC POWER CORD CONNECTIONS ............6 ASSEMBLY INSTRUCTIONS ......................7 FEATURES............................7 CONTROL PANEL ..........................7... -
Page 3: Important Safety Instructions
1.2 Keep out of reach of children. 1.3 Do not expose the charger to rain or snow. 1.4 Use of an attachment not recommended or sold by Schumacher Electric ® Corporation may result in a risk of fire, electric shock or injury to persons. -
Page 4: Personal Safety Precautions
PERSONAL SAFETY PRECAUTIONS 2.1 Consider having someone close enough by to come to your aid when you work near a lead-acid battery. 2.2 Have plenty of fresh water and soap nearby in case battery acid contacts skin, clothing, or eyes. 2.3 Wear complete eye protection and clothing protection. -
Page 5: Charger Location
3.5 Study all battery manufacturer’s specific precautions while charging and recommended rates of charge. 3.6 Determine voltage of battery by referring to car owner’s manual and make sure that output voltage selector switch is set at correct voltage. If charger has adjustable charge rate, charge battery initially at lowest rate. -
Page 6: Follow These Steps When Battery Is Outside Vehicle
6.6 For positive-grounded vehicle, connect NEGATIVE (BLACK) clip from battery charger to NEGATIVE (NEG, N, –) ungrounded post of battery. Connect POSITIVE (RED) clip to vehicle chassis or engine block away from battery. Do not connect clip to carburetor, fuel lines, or sheet-metal body parts. Connect to a heavy gauge metal part of the frame or engine block. -
Page 7: Assembly Instructions
8.3 USING AN EXTENSION CORD The use of an extension cord is not recommended. If you must use an extension cord, follow these guidelines: • Pins on plug of extension cord must be the same number, size, and shape as those of plug on charger. -
Page 8: Operating Instructions
12. OPERATING INSTRUCTIONS IMPORTANT: Do not start the vehicle with the charger connected to the AC outlet, or it may damage the charger and your vehicle. NOTE: This charger is equipped with an auto-start feature. Current will not be supplied to the battery clamps until a battery is properly connected. The clamps will not spark if touched together. - Page 9 USING THE QUICK-CONNECT CABLE CONNECTORS Connect either of the two (2) output cable leads to the charger. Make sure to place the charger on a dry, non-flammable surface. WARNING: Never connect the clamp and ring terminal connectors together for use in other applications, such as external battery or other power source charging, or to extend the output cable length, as reverse polarity and/or overcharge conditions will occur.
- Page 10 If there are, remove them. If there are none, have the battery checked or replaced. MAINTAINING A BATTERY The SEM-1562A-CA maintains both 6 and 12 volt batteries, keeping them at full charge. NOTE: The maintain mode technology allows you to safely charge and maintain a healthy battery for extended periods of time.
-
Page 11: Maintenance And Care
13. MAINTENANCE AND CARE A minimal amount of care can keep your battery charger working properly for years. • Clean the clamps each time you are finished charging. Wipe off any battery fluid that may have come in contact with the clamps, to prevent corrosion. •... -
Page 12: Before Returning For Repairs
1-800-621-5485, Monday-Friday 7:00am to 5:00pm CST For REPAIR OR RETURN, contact Customer Service at 1-800-621-5485. DO NOT SHIP UNIT until you receive a RETURN MERCHANDISE AUTHORIZATION (RMA) number from Customer Service at Schumacher Electric Corporation. 16. SPECIFICATIONS Input Voltage ..............120V AC 60Hz, .40A... -
Page 13: Limited Warranty
Manufacturer does not provide any warranty for any accessories used with this product that are not manufactured by Schumacher Electric Corporation and approved for use with this product. This Limited Warranty is void if the product is misused, subjected to careless handling, repaired, or modified by anyone other than Manufacturer or if this unit is resold through an unauthorized retailer. -
Page 15: Warranty Card
WARRANTY CARD SAVE ON POSTAGE! ACTIVATE YOUR WARRANTY ONLINE – THE QUICK AND EASY WAY! Go to www.batterychargers.com to register your product online. (No internet access? Send in the completed warranty card.) • 15 •...
Need help?
Do you have a question about the SEM-1562A-CA and is the answer not in the manual?
Questions and answers