Hoshizaki KM-280MAH-E Service Manual
Modular crescent cuber
Hide thumbs
Also See for KM-280MAH-E:
- Instruction manual (32 pages) ,
- Parts list (29 pages) ,
- Service manual (358 pages)

Related Manuals for Hoshizaki KM-280MAH-E


Summary of Contents for Hoshizaki KM-280MAH-E
- Page 1 MODULAR CRESCENT CUBER SERVICE MANUAL FOR QUALIFIED SERVICE PERSON NUMBER: 89/336 ISSUED: December 17, 2004 73/23 KM-280MAH-E KM-500MAH-E KM-630MAH-E HOSHIZAKI 73125...
- Page 2 No service or maintenance should be undertaken until the technician has thoroughly read this Service Manual. HOSHIZAKI provides this manual primarily to assist qualified service technicians in the service and maintenance of the icemaker. Should the reader have any questions or concerns which have not been satisfactorily addressed, please call HOSHIZAKI CARE for assistance.
-
Page 3: Table Of Contents
1. KM-280MAH-E ... 28 2. KM-500MAH-E, KM-630MAH-E ... 29 B. Wiring Diagrams... 30 1a. KM-280MAH-E (auxiliary codes L-0 through M-1) ... 30 1b. KM-280MAH-E (auxiliary codes M-2 and later) ... 31 2a. KM-500MAH-E (auxiliary codes L-0 through M-1) ... 32 2b. - Page 4 IV. Service Diagnosis ... 41 A. No Ice Production ... 41 B. Evaporator is Frozen Up ... 45 C. Low Ice Production ... 46 D. Abnormal Ice ... 46 E. Other ... 46 V. Removal and Replacement of Components ... 47 A.
-
Page 5: Specifications
I. Specifications A. KM-280MAH-E (air-cooled) AC SUPPLY VOLTAGE AMPERAGE MAXIMUM FUSE SIZE APPROXIMATE ICE PRODUCTION PER 24 HR. lbs./day ( kg/day ) Reference without *marks FOR THE EUROPEAN MARKET ICE CAPACITY SHAPE OF ICE ICE PRODUCTION PER CYCLE APPROXIMATE STORAGE CAPACITY ELECTRIC &... -
Page 6: Km-500Mah-E (Air-Cooled)
B. KM-500MAH-E (air-cooled) AC SUPPLY VOLTAGE AMPERAGE MINIMUM CIRCUIT AMPACITY APPROXIMATE ICE PRODUCTION PER 24 HR. lbs./day ( kg/day ) Reference without *marks FOR THE EUROPEAN MARKET ICE CAPACITY lbs./day ( kg/day ) SHAPE OF ICE ICE PRODUCTION PER CYCLE APPROXIMATE STORAGE CAPACITY ELECTRIC &... -
Page 7: Km-630Mah-E (Air-Cooled)
C. KM-630MAH-E (air-cooled) AC SUPPLY VOLTAGE AMPERAGE MINIMUM CIRCUIT AMPACITY APPROXIMATE ICE PRODUCTION PER 24 HR. lbs./day ( kg/day ) Reference without *marks FOR THE EUROPEAN MARKET ICE CAPACITY lbs./day ( kg/day ) SHAPE OF ICE ICE PRODUCTION PER CYCLE APPROXIMATE STORAGE CAPACITY ELECTRIC &... -
Page 8: General Information
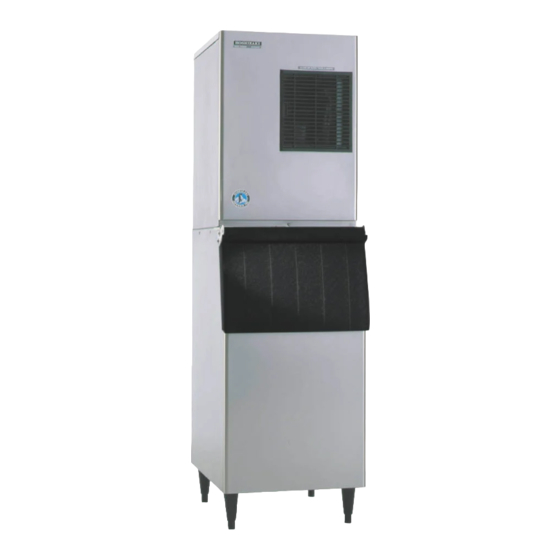
II. General Information A. Dimensions 1. KM-280MAH-E... -
Page 9: Km-500Mah-E
2. KM-500MAH-E... -
Page 10: Km-630Mah-E
3. KM-630MAH-E... -
Page 11: Construction
B. Construction 1. KM-280MAH-E Spray Tube Control Switch Bin Control Thermostat (except models with Mechanical Bin Control) Expansion Valve Compressor Float Switch Water Pump Mechanical Bin Control (except models with Thermostat) Transformer Water Supply Inlet Condenser Hot Gas Valve Fan Motor,... -
Page 12: Km-500Mah-E
2. KM-500MAH-E Spray Tubes Control Switch Bin Control Thermostat (except models with Mechanical Bin Control) Expansion Valve Compressor Float Switch Water Pump Mechanical Bin Control (except models with Thermostat) Transformer Water Supply Inlet Condenser Hot Gas Valve Fan Motor Condenser Drier Control Box... -
Page 13: Km-630Mah-E
3. KM-630MAH-E Transformer Spray Tubes Control Switch Bin Control Thermostat (except models with Mechanical Bin Control) Expansion Valve Compressor Float Switch Water Pump Mechanical Bin Control (except models with Thermostat) Water Supply Inlet Condenser Hot Gas Valve Fan Motor Condenser Drier Control Box... -
Page 14: Controller Board
C. Controller Board 1. Solid-State Control a) A HOSHIZAKI exclusive solid-state control is employed in Modular Crescent Cubers. b) A printed circuit board (hereafter called “controller board”) includes a stable and high quality control system. c) All models are pretested and factory-adjusted. - Page 15 c) High Temperature Safety — 53 ± 4°C The temperature of the suction line in the refrigerant circuit is limited by the high temperature safety. During the defrost cycle the evaporator temperature rises. The thermistor senses 9°C and starts the defrost timer. After the defrost timer counts down to zero, the normal freeze cycle begins.
- Page 16 The green LEDs 1-4 represent the corresponding relays and energize and sequence 5 seconds from initial startup as follows: Sequence Step 1 Minute Fill Cycle Harvest Cycle 1, 4, and 2 2 minutes Freeze Cycle Reverse Pump Out 1, 3, and 2 10 seconds 20 seconds factory setting {LED 1 –...
- Page 17 The Output Test switch “S3” provides a relay sequence test. With power OFF, place S3 ON and switch power to ICE. The correct lighting sequence should be none, 2, 3, 4, 1, & 4, normal sequence every 5 seconds. (The LEDs are not in numerical order on the board. See the diagram on the next page for the location and numbering of LEDs).
- Page 18 (Control Products HOS-001A Board)
-
Page 19: Sequence
3. Sequence 1st Cycle 1. Unit energized and control switch to “ICE” position. Water supply cycle starts. 2. After 1 minute, defrost cycle starts. 5. After the first 5 minutes in freeze cycle. Ready to complete freeze cycle when float switch circuit opens. - Page 20 2nd Cycle and after with pump drain IMPORTANT Freeze cycle time is limited by the freeze timer factory setting even if the float switch does not open. 1. Float switch opens and signals to complete freeze cycle. Drain timer starts counting. 5.
- Page 21 2nd Cycle and after with no pump drain IMPORTANT Freeze cycle time is limited by the freeze timer factory setting even if the float switch does not open. 1. Float switch opens and signals to complete freeze cycle. 4. After the first 5 minutes in freeze cycle. Ready to complete freeze cycle when float switch circuit opens.
-
Page 22: Controls And Adjustments
The dip switch is factory-adjusted to the positions outlined below. For models with mechanical bin control. Dip Switch No. KM-280MAH-E ON OFF OFF OFF OFF OFF ON OFF ON OFF KM-500MAH-E OFF OFF OFF OFF OFF OFF ON OFF ON OFF... - Page 23 a) Defrost Control A thermistor (semiconductor) is used for a defrost control sensor. The resistance varies depending on the suction line temperatures. The thermistor detects the temperature of the evaporator outlet to start the defrost timer. No adjustment is required. If necessary, check for resistance between thermistor leads, and visually check the thermistor mounting, located on the suction line next to the evaporator outlet.
- Page 24 c) Drain Timer The drain timer is factory-adjusted and no adjustment is required. Dip Switch Setting No. 3 No. 4 T1: Time to drain the water tank T2: Time to restrain defrost completion d) Drain Counter Do not adjust the drain counter, or the evaporator may freeze up. The drain counter is factory-adjusted to drain the water tank every 10 cycles, and no adjustment is required.
-
Page 25: Checking The Controller Board
f) Bin Control (1) Models with Thermostat When the ambient temperature is below 7°C, the bin control thermostat operates to stop the icemaker even if the ice storage bin is empty. When the thermostat is set in the prohibited range, the icemaker operates continuously even if the ice storage bin is filled with ice. -
Page 26: Mechanical Bin Control
(ii) After the above step (i), disconnect the float switch leads (K5) from the controller board within the first 5 minutes of the freeze cycle. The unit should go into the defrost cycle after the first 5 minutes ± 20 seconds of the freeze cycle. -
Page 27: Troubleshooting (Mechanical Bin Control Only)
b) During operation, the controller board will only shut down the machine if a 15.8 KΩ signal is received from the bin control during the first 5 minutes of the freeze cycle. (1) If ice pushes the lever to the right after the first five minutes of the freeze cycle, the controller board will allow the machine to complete the freeze cycle and the following harvest cycle before shutting down the machine. -
Page 28: Technical Information
III. Technical Information A. Water Circuit and Refrigerant Circuit 1. KM-280MAH-E... -
Page 29: Km-500Mah-E, Km-630Mah-E
2. KM-500MAH-E, KM-630MAH-E... -
Page 30: Wiring Diagrams
B. Wiring Diagrams 1a. KM-280MAH-E (auxiliary codes L-0 through M-1) Pressure Switch Cut-out 28.4 Cut-in 327 ± 21 psig 22.5 ± 1.5 bar psig +1.5... -
Page 31: 1B. Km-280Mah-E (Auxiliary Codes M-2 And Later)
1b. KM-280MAH-E (auxiliary codes M-2 and later) Pressure Switch Cut-out psig +1.5 28.4 Cut-in 327 ± 21 psig 22.5 ± 1.5 bar... -
Page 32: 2A. Km-500Mah-E (Auxiliary Codes L-0 Through M-1)
2a. KM-500MAH-E (auxiliary codes L-0 through M-1) Pressure Switch Cut-out psig +1.5 28.4 Cut-in 327 ± 21 psig 22.5 ± 1.5 bar... -
Page 33: 2B. Km-500Mah-E (Auxiliary Codes M-2 And Later)
2b. KM-500MAH-E (auxiliary codes M-2 and later) Pressure Switch Cut-out psig +1.5 28.4 Cut-in 327 ± 21 psig 22.5 ± 1.5 bar... -
Page 34: 3A. Km-630Mah-E (Auxiliary Codes L-0 Through M-1)
3a. KM-630MAH-E (auxiliary codes L-0 through M-1) Pressure Switch Cut-out psig +1.5 28.4 Cut-in 327 ± 21 psig 22.5 ± 1.5 bar... -
Page 35: 3B. Km-630Mah-E (Auxiliary Codes M-2 And Later)
3b. KM-630MAH-E (auxiliary codes M-2 and later) Pressure Switch Cut-out psig +1.5 28.4 Cut-in 327 ± 21 psig 22.5 ± 1.5 bar... -
Page 36: Timing Chart
C. Timing Chart *1 Mechanical Bin Control Only—The bin control will only shut off the ice machine during the first five minutes of the freeze cycle. *2 The icemaker does not complete a defrost cycle in the first 2 or 3 minutes. See “II.C.4. Controls and Adjustments.”... - Page 37 *1 Mechanical Bin Control Only—The bin control will only shut off the ice machine during the first five minutes of the freeze cycle. *2 The pump motor waits for 2 seconds before starting a drain cycle. See “II.C.4. Controls and Adjustments.” *3 The icemaker does not complete a defrost cycle in the first 2 or 3 minutes.
-
Page 38: Performance Data
D. Performance Data 1. KM-280MAH-E APPROXIMATE ICE AMBIENT TEMP. PRODUCTION PER 24 HR. lbs./day kg./day APPROXIMATE ELECTRIC CONSUMPTION watts APPROXIMATE WATER CONSUMPTION PER 24 HR. gal./day /day FREEZING CYCLE TIME min. HARVEST CYCLE TIME min. HEAD PRESSURE PSIG kg/cm SUCTION PRESSURE... -
Page 39: Km-500Mah-E
2. KM-500MAH-E APPROXIMATE ICE AMBIENT TEMP. PRODUCTION PER 24 HR. lbs./day kg./day APPROXIMATE ELECTRIC CONSUMPTION watts APPROXIMATE WATER CONSUMPTION PER 24 HR. gal./day /day FREEZING CYCLE TIME min. HARVEST CYCLE TIME min. HEAD PRESSURE PSIG kg/cm SUCTION PRESSURE PSIG kg/cm TOTAL HEAT OF REJECTION Note: Pressure data is recorded at 5 minutes into freeze cycle. -
Page 40: Km-630Mah-E
3. KM-630MAH-E APPROXIMATE ICE AMBIENT TEMP. PRODUCTION PER 24 HR. lbs./day kg./day APPROXIMATE ELECTRIC CONSUMPTION watts APPROXIMATE WATER CONSUMPTION PER 24 HR. gal./day /day FREEZING CYCLE TIME min. HARVEST CYCLE TIME min. HEAD PRESSURE PSIG kg/cm SUCTION PRESSURE PSIG kg/cm TOTAL HEAT OF REJECTION Note: Pressure data is recorded at 5 minutes into freeze cycle. -
Page 41: Service Diagnosis
IV. Service Diagnosis A. No Ice Production Problem Possible Cause The icemaker will not a) Power Supply start. b) Fuse (Inside fused disconnect, if any) c) Control Switch Bin Control Thermostat (For mechanical bin control, see II.D.3.) e) High Pressure Control f) Transformer g) Wiring to Controller Board... - Page 42 Problem Possible Cause [1] Continued from j) Water Supply Line previous page. k) Water Solenoid l) Controller Board Water continues to a) Float Switch be supplied, and the icemaker will not start. b) Controller Board Compressor will not a) Wash Switch start or stops operating.
- Page 43 Problem Possible Cause Continued from c) Overload Protector previous page. d) Starter e) Start Capacitor or Run Capacitor f) Magnetic Contactor g) Compressor h) Controller Board Water continues to a) Water Solenoid Valve be supplied in freeze cycle. b) Controller Board No water comes from a) Water Supply Line spray tubes.
- Page 44 Problem Possible Cause Continued from d) Pump Motor previous page. e) Controller Board Fan motor will not a) Fan Motor start, or is not operating. b) Controller Board All components run, a) Refrigerant but no ice is produced. b) Compressor c) Hot Gas Solenoid Valve Remedy...
-
Page 45: Evaporator Is Frozen Up
B. Evaporator is Frozen Up Problem Possible Cause Freeze cycle time is a) Float Switch too long. b) Water Solenoid Valve c) Controller Board All ice formed on a) Evaporator evaporator does not b) Water Supply Line fall into bin in harvest cycle. -
Page 46: Low Ice Production
C. Low Ice Production P roblem P ossible Cause Freez e c y c le tim e is S ee c hart A .[3] and c hec k high pres s ure c ontroller. long. S ee c hart B .[1] and c hec k float s witc h, water s olenoid v alv e and c ontroller board. -
Page 47: Removal And Replacement Of Components
V. Removal and Replacement of Components Ensure all components, fasteners and thumbscrews are securely in place after the equipment is serviced. 1. The Polyol Ester (POE) oils used in R-404A units can absorb moisture quickly. Therefore it is important to prevent moisture from entering the system when replacing or servicing parts. -
Page 48: Brazing
5) Disconnect the vacuum pump, and attach a refrigerant service cylinder to the high-side line. Remember to loosen the connection, and purge the air from the hose. See the nameplate for the required refrigerant charge. Hoshizaki recommends only virgin refrigerant or reclaimed refrigerant which meets ARI Standard No. 700-88 be used. -
Page 49: Removal And Replacement Of Compressor
C. Removal and Replacement of Compressor Always install a new drier every time the sealed refrigeration system is opened. Do not replace the drier until after all other repair or replacement has been made. Note: When replacing a compressor with a defective winding, be sure to install the new start capacitor and start relay supplied with the replacement compressor. -
Page 50: Removal And Replacement Of Drier
16) Connect the terminals, and replace the terminal cover in its correct position. 17) Replace the panels in their correct positions. 18) Plug in the icemaker. Turn on the power supply. D. Removal and Replacement of Drier Always install a new drier every time the sealed refrigeration system is opened. -
Page 51: Removal And Replacement Of Expansion Valve
E. Removal and Replacement of Expansion Valve Sometimes moisture in the refrigerant circuit exceeds the drier capacity and freezes up at the expansion valve. Always install a new drier every time the sealed refrigeration system is opened. Do not replace the drier until after all other repair or replacement has been made. -
Page 52: Removal And Replacement Of Hot Gas Valve
F. Removal and Replacement of Hot Gas Valve Always use a copper tube of the same diameter and length when replacing the hot gas lines; otherwise performance may be reduced. Always install a new drier every time the sealed refrigeration system is opened. Do not replace the drier until after all other repair or replacement has been made. -
Page 53: Removal And Replacement Of Evaporator
13) Replace the panels in their correct positions. 14) Plug in the icemaker. Turn on the power supply. G. Removal and Replacement of Evaporator Always install a new drier every time the sealed refrigeration system is opened. Do not replace the drier until after all other repair or replacement has been made. -
Page 54: Removal And Replacement Of Thermistor
H. Removal and Replacement of Thermistor 1. Fragile, handle very carefully. 2. Always use a recommended sealant (high thermal conductive type), Model KE4560RTV manufactured by Shinetsu Silicone, Part Code 60Y000-11, or Part Code 4A0683-01, or equivalent. 3. Always use a recommended foam insulation (non-absorbent type) or equivalent. -
Page 55: Removal And Replacement Of Fan Motor
I. Removal and Replacement of Fan Motor Note: When replacing a fan motor with defective winding, it is recommended that a new capacitor be installed. 1) Turn off the power supply. Unplug the icemaker. 2) Remove the panels. 3) Remove the closed end connectors from the fan motor leads. 4) Remove the fan motor bracket and fan motor. -
Page 56: Removal And Replacement Of Water Valve
J. Removal and Replacement of Water Valve 1) Turn off the power supply. Unplug the icemaker. 2) Close the water supply line shut-off valve. 3) Remove the top panel and front panel. 4) Remove the valve outlet tubing by releasing the clamp. 5) Remove the bracket from the unit. -
Page 57: Removal And Replacement Of Float Switch
8) Remove the pump housing and check the impeller. 9) If the impeller is defective, install a new impeller. 10) Install the new motor or new parts, and replace the removed parts in the reverse order of which they were removed. 11) Plug in the icemaker. -
Page 58: Removal And Replacement Of Spray Tubes
M. Removal and Replacement of Spray Tubes 1) Turn off the power supply. Unplug the icemaker. 2) Remove the front panel and the insulation panel. 3) Remove the rubber hoses from the spray tubes (water supply pipe). 4) Release the clamps and disconnect the rubber hoses. 5) Remove the spray tubes by squeezing the side tabs. -
Page 59: Cleaning And Maintenance Instructions
VI. Cleaning and Maintenance Instructions Ensure all components, fasteners and thumbscrews are securely in place after any maintenance or cleaning is done to the equipment. A. Preparing the Icemaker for Long Storage When shutting off the icemaker for an extended time, drain out all water from the water tank and remove the ice from the storage bin. -
Page 60: Cleaning And Sanitizing Procedures
6. Wipe off any splashed or spilt cleaner/sanitizer immediately. 1. Cleaning Procedure 1) Mix 3 gallons (11.4 l) of water with Hoshizaki “Scale-Away” (or “LIME-A-WAY,” Economics Laboratory, Inc.) or Hoshizaki Cleaner (Rector Seal Corp.) using a mixing rate as recommended on the package. - Page 61 8) Pour the cleaning solution into the water tank. 9) Move the control switch on the control box to the “WASH” position. 10) Refit the insulation panel and the front panel in their correct positions. 11) Turn on the power supply, and start the washing process. 12) Turn off the power supply after 30 minutes.
-
Page 62: Sanitizing Procedure - Following Cleaning Procedure
2. Sanitizing Procedure - Following Cleaning Procedure 1) Mix 3 gallons (11.4 l) of water and 1.5 fl. oz. (44.4 ml) of a 5.25% sodium hypochlorite solution (chlorine bleach). 2) Complete steps 2) through 7) as detailed in “1. Cleaning Procedure.” 3) Pour the sanitizing solution into the water tank. -
Page 63: Maintenance
C. Maintenance This icemaker must be maintained individually, referring to the instruction manual and labels provided with the icemaker. 1. Stainless Steel Exterior To prevent corrosion, wipe the exterior occasionally with a clean and soft cloth. Use a damp cloth containing a neutral cleaner to wipe off oil or dirt build up. 2.
Need help?
Do you have a question about the KM-280MAH-E and is the answer not in the manual?
Questions and answers