
Related Manuals for Avonic AV-REC200


Summary of Contents for Avonic AV-REC200
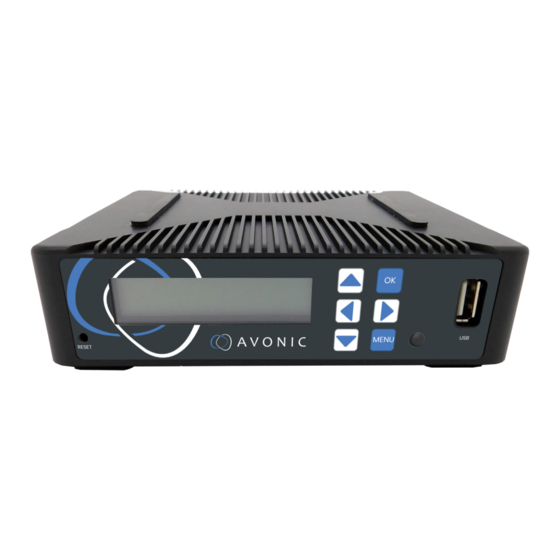
- Page 1 USER MANUAL Recorder & Encoder with HDMI & SDI input AV-REC200 www.avonic.com • © July 2022 • Version 1.5...
-
Page 2: Disclaimer, Contact And Ce Marking
“look and feel” and arrangement of such Content, contained in this Manual is owned, controlled or licensed by or to Avonic, and is protected by trade dress, copyright, patent and trademark laws, and various other intellectual property rights and unfair competition laws. -
Page 3: Eu Declaration Of Conformity
4. The object of the declaration described in point 1 is in conformity with the EMC2014/30/EU 5. Standards: EN 55032: 2015 EN 61000-3-2: 2014 EN 61000-3-3: 2013 EN 55035: 2017 6. Signed for and on behalf of Avonic: Delfgauw, 25th of April, 2019 Martijn van Bodegom, Product Manager... -
Page 4: Important Information
IMPORTANT INFORMATION Liability Avonic will NOT be held responsible for any damage or injury caused by unqualified persons carrying out these tasks, or by not following the instructions in this Manual. Intended Use and Non-Intended Use Installation The following applies to the installation of the camera: •... -
Page 5: Acronyms
Symbol Meaning Description Listed Caution should be exercised related to the information listed in the user manual. Not following this information or instructions may lead to injury and/or damage to the product. Important The information associated with this symbol requires special attention. -
Page 6: Table Of Contents
Contents DISCLAIMER, CONTACT AND CE MARKING..................ii EU DECLARATION OF CONFORMITY....................iii IMPORTANT INFORMATION........................iv Liability............................iv Intended Use and Non-Intended Use..................iv Installation......................... iv Operation..........................iv Important Precautions..................... iv Symbols Used in This Manual....................iv Acronyms............................. v INTRODUCTION............................8 Purpose of This Manual......................8 Target Audience.........................8 Document Structure........................ - Page 7 MAINTENANCE............................ 42 Maintenance..........................42 Usage Precautions........................42 TRANSPORT AND STORAGE....................... 43 DISPOSAL AND RECYCLING.......................44 TROUBLESHOOTING..........................45 General............................45 Power Issues..........................45 WebGUI............................45 Cannot enter WebGUI....................45 Cannot stream, record or playback................45 Firmware update failed....................45 API Commands...........................46 How to use the API........................46 API Data............................
-
Page 8: Introduction
This Manual describes the safety precautions and the instructions for safe unpackaging, installation, operation, maintenance and disposal of the Avonic REC-200. In this Manual, the Avonic REC-200 are referred to as the 'Product'. Target Audience This Manual is developed for installation technicians who install the Product at client sites, and for IT professionals who are responsible for operating the Product. -
Page 9: Safety
Product. Keep the Manual in a safe place for future reference or download it from www.avonic.com. Failure to follow the SAFETY NOTES as described in this chapter could result in fire, electric shock, injury, or damage to this Product or other property. -
Page 10: Ventilation
• Don’t open this Product and don’t attempt to repair it yourself. Disassembling the Product may damage it or may cause injury to you. • If this Product is damaged, malfunctioning, or if it comes into contact with liquid, contact Avonic or an Avonic Authorized Service Provider. -
Page 11: Product Overview
PRODUCT OVERVIEW Description The Avonic REC200 is the ideal standalone USB/ SD Card recorder and web/streaming device. Users can simply connect an HDMI or SD/HD-SDI input and in a few simple steps they will be streaming and/or recording. With support for UDP/HLS/RTMP/RTSP live output and USB/SD card recording the REC200 enables corporate streaming, live streaming to various platforms and live high bitrate full HD 1080P60 recording. -
Page 12: Unpacking
1. Package Contents 2. Unpacking the Camera 3. Return Procedure Package Contents The following tables contains an overview of the package contents of the Product. Quantity Description Avonic SKU 1 pc Device AV-REC200 1 pc Power Supply AV-PSU200 Each item is visualized below and referenced by the associated number in the table above:... -
Page 13: Unpacking The Recorder
The REC200 should be in its protective foam as follows: Figure 4: REC200 in Foam 3. Verify that the REC200 is in its protective foam. If this is NOT the case, contact Avonic and stop here. 4. Take the REC200 out of the protective foam and the box. -
Page 14: Mounting And Installation
• Set up this Product on a hard, stable surface, or mount it to a wall or ceiling. • ONLY use an Avonic mount for mounting to a wall or ceiling. • Ensure the mounting construction is capable of supporting four times the weight of the Product. (See 'General Specifications >... -
Page 15: Audio Connection
Audio Connection It is possible to connect an audio device to the REC200 to use audio for live streaming and recording. This can be done in two ways: 1. Connect a cable with a jack male plug to the REC200 and the other side to a line-level audio (input) device such as a audio transmitter with a connection to a microphone. -
Page 16: Operation
WebGUI All of the features of the AV-REC200 can be accessed through the webinterface. Since the webinterface is much easier to use than the front buttons and the LCD screen, it is recommend to use the webinterface to control the REC200. -
Page 17: Start
1. Click on the Menu icon next to AV-REC200 in the left upper corner of the screen. The icon changes in a cross and the page will slide out from the left. Here you can see the menu of the WebGUI consisting of the following tabs: 1. -
Page 18: Status Page
Status Page In this tab, you can see a preview of the camera video output that is connected with the REC200. Below you can see that the Status Page of the REC200 is divided into three tabs: • Live Streaming Status •... -
Page 19: Live Service/ Streaming Setting
Live Service/ Streaming Setting Here you can access the "Live Service / Streaming Setting" page. 1. Click the AV-REC200 menu button on the top left of the webpage. The main menu will slide out. 2. Click Live Service/ Streaming Setting. - Page 20 Streaming Connection 1. Click the green START STREAMING button. See Basic Settings on page 19. It will take one or two minutes before the little antenna symbol in the center of the screen turns green, indicating that the REC200 is live and streaming to the platform. 2.
- Page 21 Manual connection using RTSP, HLS, UDP It is also possible to stream (or play back) video from the REC200 by using RTSP, HLS and UDP. To do this, a software application is needed that can stream video by using these protocols. To provide an example, a description of instructions is given for setting up a live stream in VLC Media Player.
- Page 22 Figure 14: Advanced Preferences > demuxer Manual Connection to Youtube (or Facebook) via RTMP It is possible to set up manually a stream to Youtube. This procedure can also be used in some cases where Google security will prevent the automatic authorization to take place. Follow the steps below for a connection with Youtube.
- Page 23 Figure 17: Youtube > Stream Key and Url Follow the instructions below to connect manually to your Youtube or Facebook page: 1. Go to the Basic Setting page as is described under Live Service/ Streaming Setting on page 19 2. Select the correct input 3.
- Page 24 Advanced Settings The advanced tab opens an expanded range of options for recording and streaming. INPUT: Audio Source “HDMI/SDI Audio”, or enable “audio line IN” to embed audio on stream and/ or recording. Note that you need a camera with audio input when you want to use the HMDI/SDI audio. For the Audio line IN an audio device with a jack connection is required.
-
Page 25: Record Page / Ftp Upload Settings
If you want to change the video resolution and Bitrate, you need to set the Basic Settings > Video Profile to User-Defined. Read carefully the article Choose Live Encoder Settings on Youtube and the Video format guideliness for live streaming on Facebook to set up a correct stream. - Page 26 Here you can select a specific time how long the recording should take. Note the following: • You can select a specific time, but you should know that the REC200 can record a file of max 4 GB. Check always Recording time table below before you start to record! •...
- Page 27 4 Gb FTP Upload The Avonic REC200 has been equipped with an FTP client to upload recordings to a FTP server. The now following steps will describe how to install and use this functionality: 1. Fill in the Upload Path. For example: FTP://192.168.178.64/ on port 21 (standard FTP port).
-
Page 28: Playback Settings
Anonymous Login If you have set up an user ‘anonymous’ without a password in your FTP server, you can use this option in the REC200 to upload its files without authentication. Upload recording file to FTP automatically Select this option if the REC200 must automatically upload its recordings to the FTP server. Older recordings can be uploaded to the FTP server while the REC200 is still recording new ones. -
Page 29: Overlay Settings
Output Settings Mode Youtube or manual Authorize your device Basic Settings on page 19 Privacy Status Public or Private: Change it to public to play back the file to your audience Apply and Start Playback Click on apply to save the settings and make them effective. After that click on Start Playback Figure 22: WebGUI >... - Page 30 Figure 23: WebGUI > Picture Overlay Text Settings From top to bottom the settings for the text and picture overlay are as follows: Overlay Mode Text only, off Overlay Text Fill in the overlay text to be displayed Overlay Color White, Yellow, Green Font Size Size of the text shown...
- Page 31 How to create transparent BMP file for overlay A short guide to create a usable BMP file as transparent overlay using Adobe Photoshop: 1. Create workspace according to the size width and height of the picture for overlay. 2. Select your imagefile with transparent background (use format PNG or delete the background in the picture).
-
Page 32: System Settings
System Settings The last page on the menu is the System Settings page, where you can find all the settings regarding licenses, network settings, firmware upgrades etc. 1. Version information Shows the software and hardware version of the REC200. Figure 24: WebGUI > Version 2. - Page 33 3. License information Here you can see if you have access (authorized) to H265, CC, SDI and AC3. Figure 26: WebGUI > License Information 4. Network Settings For connection with a DHCP server. In absence of a DHCP server you can manually set IP Address, Subnet Mask, Default Gateway etc.
- Page 34 5. NTP (Network Time Protocol) The Network Time Protocol (NTP) is a networking protocol for clock synchronization between computer systems to synchronize their internal clocks with each other. System Time Shows day, date and time Time Zone Choose the time zone you want NTP Server Fill in the name of the NTP server Auto Sync...
- Page 35 Figure 29: WebGUI > Language 7. System operation Upgrade, import or export license if available. Import or export a configuration file. Figure 30: WebGUI > System Operation 8. Other Operation Reboot, Restore Factory Settings, Export logfile and Clear all logs. Figure 31: WebGUI >...
-
Page 36: Front Panel Operation
Front Panel Operation The front panel can be accessed by pushing the [MENU] Button on the REC200. 1. Use the arrow buttons to move the cursor to the item to be set. 2. Press the [OK] button to enter the corresponding sub-menu, or save the configuration. Press [Menu] to go back. -
Page 37: Live
Live Under Live you can live stream video. The screen Live is divided into: 1. Setting 2. Encoding 3. Live Output Encoding and Live Output Follow the instructions below to stream video live: 1. Select first Encoding and Live Output to configure the settings for streaming. See the picture and description below. -
Page 38: Playback
• If you see the "live paused" screen, live streaming is paused. Press [OK] to start live playing. • If you see "live playing" screen, the REC200 is live streaming. Press [OK] to pause/ stop the video. Live Streaming is paused - > [OK] - > start live REC200 is live streaming video - >... -
Page 39: Record
Playback Setting Follow the instructions below to start playing back recorded video's: 1. Press [MENU] and select with the cursor buttons “Playback”. 2. Press [OK] to enter the menu. 3. Select “Setting” and press [OK] to enter. 4. Select [OK] to start playing back. 5. - Page 40 Record Setting Follow the instructions below to record a video: 1. Press [MENU] and select with the cursor buttons “Record”. 2. Press [OK] to enter the menu. 3. Select “Setting” and press [OK] to enter. 4. Select [OK] to start playing recording. 5.
-
Page 41: System
System Under system it is possible to change network settings and recover or reboot to default settings. • Use the arrow buttons to change the numbers of the port settings and to go to the next number in the address of the port. •... -
Page 42: Maintenance
MAINTENANCE Maintenance Take the following actions to maintain the REC200: • If you will not be using the REC200 for a long time, turn off the power switch and disconnect the AC powercord of the AC adaptor to the outlet. •... -
Page 43: Transport And Storage
TRANSPORT AND STORAGE The REC200 must be transported in its original packaging box. Inside the box, it is recommended to wrap the REC200 in the original plastic bag and to place it in the protective foam. Specific guidelines apply to the environmental temperature and humidity when operating and storing the REC200. -
Page 44: Disposal And Recycling
In general, the term 'E-Waste' applies to items of all types of electrical and electronic equipment and its parts that have been discarded by the owner as waste without the intention of re-use. Avonic outsources the disposal and recycling of its E-Waste camera materials to the Stichting Open. https://stichting-open.org/... -
Page 45: Troubleshooting
TROUBLESHOOTING General 1. Turn the REC200 off and on again and check if the problem persists. 2. If it does, restore to the factory default. Power Issues If the REC200 does NOT perform a self-test and / or if the power LED is OFF: 1. -
Page 46: Api Commands
API Commands The API can be used to control the REC200 using a TCP/IP connection. To make this work, you need a TCP/IP supported application like Hercules Setup Utility or Packet Sender. How to use the API The API has the functionality to send text commands to the REC200. The camera will in return send you its feedback. -
Page 47: Api Data
Y = 1 ~ 20 (Select picture) OverlayTxtSw X X = ON, OFF, sta OverlayTxtSw ON OverlayTxtSw ON OverlayTxt X X = Text content, sta OverlayTxt Avonic OverlayTxt Avonic Network X X = sta Network sta Network sta Reboot X... -
Page 48: Appendix B - Input Resolutions
(quality of the light conditions in the room, the optics of the camera, and sensor of the camera). For an optimal quality of the stream and/ or the recording made with the REC200 (using Avonic PTZ... - Page 49 Recorder & Encoder with HDMI & SDI input AV-REC200 © July 2022 • Version 1.5 Exportweg 11a • 2645 ED Delfgauw • The Netherlands +31(0)15 7112 712 • info@avonic.com • www.avonic.com...
Need help?
Do you have a question about the AV-REC200 and is the answer not in the manual?
Questions and answers