Table of Contents
Advertisement
Quick Links
Weight Limit: 25 Lb / 11.34 Kg
V.C. - 4/27/2021
© 2021 Dorel Home Products All Rights Reserved
DA9005509 (Walnut), DA9005309 (Gray),
Thank you for purchasing from Dorel!
DO NOT RETURN TO THE STORE !
If parts are missing or damaged, we will gladly ship your
replacement parts free of charge.
Visit
www.dhpfurniture.com/eng/replacement-parts
or call Toll-Free
You can also chat with us at www.dhpfurniture.com
Date of Purchase
THIS INSTRUCTION BOOKLET CONTAINS IMPORTANT SAFETY
INFORMATION. PLEASE READ AND KEEP FOR FUTURE REFERENCE.
DA9005109 (White),
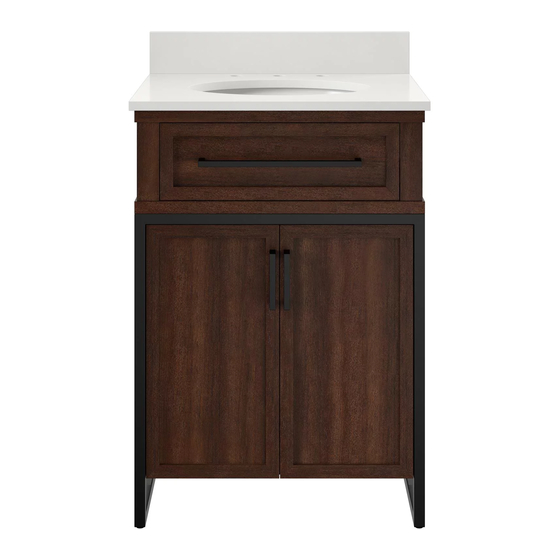
Bathroom Vanity
24 inch
1-800-267-1739
Lot Number
(TAKEN FROM CARTON)
B34DA900550900-254808
1
Advertisement
Table of Contents

Related Manuals for Dorel Home Products DA9005509


Summary of Contents for Dorel Home Products DA9005509
- Page 1 You can also chat with us at www.dhpfurniture.com Lot Number Date of Purchase (TAKEN FROM CARTON) THIS INSTRUCTION BOOKLET CONTAINS IMPORTANT SAFETY INFORMATION. PLEASE READ AND KEEP FOR FUTURE REFERENCE. V.C. - 4/27/2021 B34DA900550900-254808 © 2021 Dorel Home Products All Rights Reserved...
-
Page 2: Limited 1-Year Warranty
Limited 1 year Warranty Read Before Beginning Assembly • Work in a spacious area and near where the unit will be used, preferably on a Dorel warrants this product to be free from defects in material and workmanship and agrees to remedy any such defect. This warranty covers carpet, or use a piece of the cardboard packaging to protect your floor and one year from the date of original purchase from authorized retailers. -
Page 3: Top View
PARTS TOP VIEW BACK VIEW 610 [24"] 102 [4"] 102 [4"] DIMENSIONS: MILIMETERS [INCHES]... -
Page 4: Parts List
PARTS LIST VANITY BACKSPLASH PART NUMBERS PART DA9005509 DA9005309 DA9005109 LABELS (Walnut) (Gray) (White) T711550 T711590 T711570 T711560 T711580 T711580 Each part has a unique part number. Please reference the appropriate part number when contacting customer service for replacement parts. - Page 5 Step 1 Locate wall studs and use this rail to secure vanity to the wall Place the vanity in the desired location. Ensure the vanity is level. Shim legs, if necessary. Locate the wooden studs in the wall and secure the vanity to the wall using wood screws (not provided).
- Page 6 Step 2 Make sure to apply the silicone to the rough edge Apply a line of silicone to the bottom edge of of B and that the smooth side is facing forward. the backsplash B and secure it to the vanity Wipe away any excess silicone immediately.
- Page 7 Step 3 The door alignment was set at the factory, but it might have shifted during transport. Floors can also be uneven, causing doors to be misaligned. If needed, adjust the hinges as shown.
- Page 8 Step 4 The drawer(s) can be removed if needed. Locate the spring clip on both sides on the drawer glide. At the same time, press the Spring clip clips and pull the drawer out. To reinsert, simply align the 2 sides of the drawer glides and slide in until the drawer is fully inserted.
-
Page 9: Helpful Hints
Helpful Hints CAUTION: This unit is intended for use only with the products and/or maximum weights indicated. Use with other products and/or products heavier than the maximum weights indicated may result in instability or cause possible injury. • Ensure all building & plumbing codes are respected. - Page 10 DA9005509 (Nogal), DA9005309 (Gris), DA9005109 (Blanco) ¡NO LO REGRESE A LA TIENDA! Si le faltan piezas o las que se incluyen están dañadas, con mucho gusto le enviaremos sus piezas de reemplazo sin cargo extra. Tocador de baño de 24”...
- Page 11 Antes de deshacerse de las cajas de cartón, asegúrese de que estén vacías. También confirme que ha recibido todos los componentes necesarios para el ensamblaje al compararlos con la tabla de piezas indicadas en la sección en inglés. NÚMERO DE PIEZAS ETIQUET DA9005509 DA9005309 DA9005109 DESCRIPCIÓN AS DE (Nogal)
-
Page 12: Consejos Útiles
Instrucciones Límites de peso: 25 lb / 11.34 Kg Consejos útiles Paso 1 Coloque el tocador en la ubicación deseada. • Asegúrese de que se respeten todos los códigos de construcción y Asegúrese que el tocador esté nivelado. Ajuste con cuñas, si es plomería. - Page 13 NE PAS RETOURNER CE PRODUIT AU MAGASIN ! DA9005509 (Noyer), DA9005309 (Gris), DA9005109 (Blanc) Si une pièce est manquante ou endommagée, nous vous expédierons avec plaisir vos pièces de remplacement gratuitement. Visitez www.dhpfurniture.com/fre/replacement-parts Meuble-lavabo de 24 po ou appelez au 1-800-267-1739 CE FEUILLET CONTIENT DES INFORMATIONS DE SÉCURITÉ...
- Page 14 Avant de jeter les boîtes en carton, assurez-vous qu'elles soient vides. Vérifiez que vous avez reçu tous les composants nécessaires à l'assemblage en les comparant avec le tableau des pièces (illustrations disponibles dans la section en anglais). LISTE DES PIÈCES DA9005509 DA9005309 DA9005109 ÉTIQUETTE...
-
Page 15: Conseils Utiles
Instructions Limite de Poids: 25 lb / 11.34 Kg Étape 1 Conseils utiles Placez la vanité à l'emplacement souhaité. • Assurez-vous que le meuble repose horizontalement. Placez des cales Assurez-vous que tous les codes du bâtiment et de la plomberie soient respectés.
Need help?
Do you have a question about the DA9005509 and is the answer not in the manual?
Questions and answers