Advertisement
Quick Links
Electrode Placement Guide
Neck
Ankle/Foot
Shoulder
Elbow
Upper Back
Lower Back/
Lumbar
Wrist/Hand
Knee/Joint
Note:
• Do not place electrodes on both legs or feet at the same time.
Only treat 1 at a time.
• Only place electrodes according to Electrode Placement Guide.
Ankle/Foot
Etekcity warrants all products to be of the highest
quality in material, craftsmanship, and service,
effective from the date of purchase to the end of
the warranty period. Warranty lengths may vary
between product categories.
Upper Arm
Customer Support
If you encounter any issues or have any questions
about your new product, please contact our
helpful Customer Support Team. Your satisfaction
is our goal!
Hip
Distributed by Etekcity Corporation
1202 N. Miller St., Suite A
Email: support@etekcity.com
Toll-Free: (855) 686-3835
Calf
Mon–Fri, 9:00 am–5:00 pm PST/PDT
*Please have your order invoice and order ID
ready before contacting Customer Support.
Warranty
Anaheim, CA 92806
Support Hours
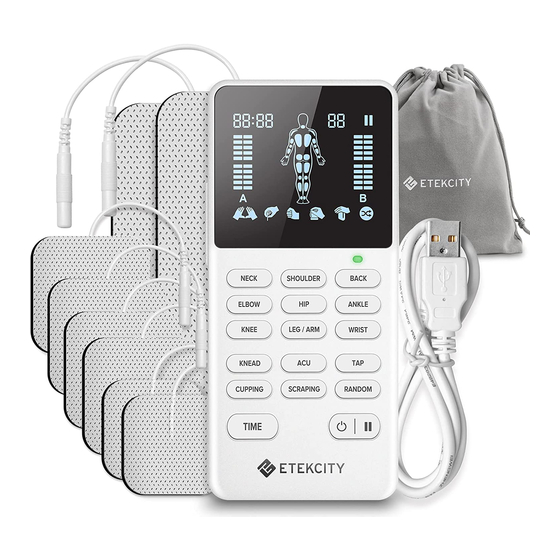
TENS Unit
QUICK START GUIDE
A
F
B
C
D
L M
K
J
I
E
A.
Display
I.
A1 Output
B.
A Channel Intensity
J.
A2 Output
Increase/Decrease
K.
Micro USB Port
C.
Therapy Modes [15]
L.
B1 Output
D.
Time Button
M.
B2 Output
Lead Wires
E.
Electrode Pad
N.
F.
Battery Indicator
O.
Micro USB Cable
G.
B Channel Intensity
Increase/Decrease
H.
Power/Pause Button
ETU-134
G
H
N
O
Advertisement

Related Manuals for ETEKCITY ETU-134

Summary of Contents for ETEKCITY ETU-134
- Page 1 QUICK START GUIDE Neck Ankle/Foot Ankle/Foot Etekcity warrants all products to be of the highest quality in material, craftsmanship, and service, effective from the date of purchase to the end of the warranty period. Warranty lengths may vary between product categories.
- Page 2 Using the TENS Unit Note: Note: Before first use, fully charge the TENS unit. Insert the lead wire plugs into the sockets on the TENS unit. You can use up to 4. • Intensity can be adjusted independently for A and B channels.