
Subscribe to Our Youtube Channel
Related Manuals for Austin Hughes Infra Power PPS-03-S


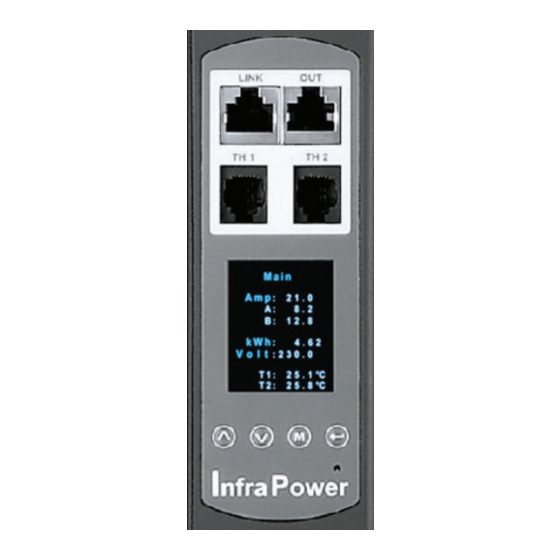
Summary of Contents for Austin Hughes Infra Power PPS-03-S
- Page 1 Inspired by Your Data Center User Manual PPS-03-S, IP dongle GUI & SNMP InfraPower Intelligent PDU 1-Phase 1-Phase 3-Phase Dual Feed Designed and manufactured by Austin Hughes UM-PPS-03-S-Q421V5 www.austin-hughes.com...
- Page 2 Legal Information First English printing, December 2021 Information in this document has been carefully checked for accuracy; however, no guarantee is given to the correctness of the contents. The information in this document is subject to change without notice. We are not liable for any injury or loss that results from the use of this equipment.
-
Page 3: Table Of Contents
Contents < 1.1 > IP Dongle Specifi cation < 1.2 > IP Dongle Installation & Meter ( PDU ) Cascade < 1.3 > Meter ( PDU ) Level Setting < 1.4 > IP Dongle Confi guration < 1.5 > Remote PDU Level & ID Setting <... -
Page 4: Ip Dongle Specifi Cation
< 1.1 > IP Dongle Specifi cation IP Dongle Access to 32 PDU Levels Patented IP Dongle provides IP remote access to the PDUs by a true network IP address chain. Only 1 x IP dongle allows access to max. 32 Part no. - Page 5 < 1.1 > IP Dongle Specifi cation Dual LAN Network Failover > Auto failover to a 2nd Ethernet-connection in the event of network interruption > Ensuring 100% iPDU uptime reporting Connectivity > Access your iPDU on two independent networks or VLANs >...
-
Page 6: Ip Dongle Installation & Meter ( Pdu ) Cascade
< 1.2 > IP Dongle Installation & Meter ( PDU ) Cascade IP dongle installation steps : - slide the IP dongle on the plate above the meter - plug the RJ-45 connector of IP dongle into the LINK port of the 1st level PDU meter - use the CAT. -
Page 7: Meter ( Pdu ) Level Setting
< 1.3 > Meter ( PDU ) Level Setting ( I ) For 1.8″ LCD Meter ( No touchscreen function ) Step 1 - Press the & button to display no.9 and press to confi rm Step 2 - Press the &... -
Page 8: Ip Dongle Confi Guration
< 1.4 > IP Dongle Confi guration The following steps show the static IP setting only. For DHCP setting, please refer to < 1.14 > DHCP Setting After the completion of IP dongle connection, please take the following steps to confi gure the IP dongle : Step 1. -
Page 9: Remote Pdu Level & Id Setting
< 1.5 > Remote PDU Level & ID Setting InfraPower Manager PPS-03-S provides a convenient way to set the PDU level. You can set the PDU level remotely via the IP Dongle WEBUI. Please follow the steps below to complete the Remote PDU level setting. ONLY PDU with 2.8”... - Page 10 < 1.5 > Remote PDU Level & ID Setting Step 5. After the searching is completed, the following screen will display UM-PPS-03-S-Q421V5 www.austin-hughes.com...
- Page 11 < 1.5 > Remote PDU Level & ID Setting Step 6. Assign a unique “ Level “ , “ Name “ and “ Location “ to each PDU and ensure to check the register box. Then Click “ Apply “. UM-PPS-03-S-Q421V5 www.austin-hughes.com...
- Page 12 < 1.5 > Remote PDU Level & ID Setting Step 7. After the PDU level setting is complete, “ Status “ page will display the PDU with proper level. UM-PPS-03-S-Q421V5 www.austin-hughes.com...
-
Page 13: Pps-03-Sip Dongle Gui
< 1.6 > PPS-03-S IP Dongle GUI Each IP dongle ( IPD-03-S ) provides a FREE built-in GUI , PPS-03-S, which allows user, via a web browser, to see PDU’s data and remotely manage the PDU over a TCP / IP Ethernet network. Each web browser window supports only one IP dongle ( IPD-03-S ). - Page 14 < 1.6 > PPS-03-S IP Dongle GUI In < Details >, - Change “ Name ” and “ Location ” of PDU & Click “ Apply ” - Change “ Alarm amp. ” & “ Low alert amp. ” of PDU’s circuits & Click “ Apply ” - Click “...
- Page 15 < 1.6 > PPS-03-S IP Dongle GUI In < Outlet setting >, - Change PDU’s outlet name - Change “ Power up sequence delay ” of PDU’s outlet ( Switched PDU only ) - Change “ Alarm amp. ”, “ Rising Alert amp.” & “ Low alert amp. ” of PDU’s outlet ( Outlet Measurement PDU only ) Click “...
- Page 16 < 1.6 > PPS-03-S IP Dongle GUI In < Sensor Status >, - View status, location, latest reading & alarm setting of Temp. & Humid sensors. - View status & location of Door sensor & Smoke sensor The GUI will not show the status / reading if sensors are NOT installed & activated. UM-PPS-03-S-Q421V5 www.austin-hughes.com P.13...
- Page 17 < 1.6 > PPS-03-S IP Dongle GUI In < Sensor Setting >, - Default Sensor setting : Deactivate - “ Activate ” sensors ONLY when they are connected - Change “ Location ” , “ Rising alert Setting “ & “Alarm Setting ” of Temp. & Humid sensors - Change “...
-
Page 18: System
< 1.7 > System In < System >, - Change IP dongle name & location - Change temperature unit displayed in UI - Set the “ Date & Time “ of the IP dongle ( by “ Manually “ or “ NTP server “ ). Default is “ Manually “ - Tick “... -
Page 19: Network
< 1.8 > Network In < Network >, IP dongle can be confi gured to operate as Dual Lan or failover mode. Default is “ Dual Lan mode ” Dual Lan mode : - Enter LAN 1 “ IPv4 address ”, “ IPv6 address ”, “ Subnet mask ”, “ Gateway ”. ( For static IP setting only) - Enter LAN 2 “... -
Page 20: Wifi Network Confi Guration
< 1.9 > Wifi Network Confi guration < Preparation > Make sure the network meet the security WPA2 - Personal or WPA2 - Enterprise. PDU dongle IPD-03-S is well connected to the iPDU and powered on. Login IPD-03-S web UI via LAN 1/ LAN 2 to confi gure the WIFI network. 3rd party WIFI kit is not compatible to InfraPower. - Page 21 < 1.9 > Wifi Network Confi guration Step 3. Select the appropriate network from the pull down menu of “ ESSID “ Step 4. Select the security type ( NONE / WPA2-Personal / WPA2-Enterprise ) UM-PPS-03-S-Q421V5 www.austin-hughes.com P.18...
- Page 22 < 1.9 > Wifi Network Confi guration Step 5. Enter “ Username “ ( For security type : WPA2-Enterprise ONLY ) Step 6. Enter “ Password “ Step 7. Select “ DHCP “ to “ OFF “. Default is “ ON “ Step 8.
- Page 23 < 1.9 > Wifi Network Confi guration ( II ) Wifi DHCP setting Step 1. Take out the membrane from the IP dongle and the Wifi USB port will be found. Then, connect the USB wireless adapter to the IP dongle. ( Details please refer to <...
- Page 24 < 1.9 > Wifi Network Confi guration Step 3. Select the appropriate network from the pull down menu of “ ESSID “ Step 4. Select the security type ( NONE / WPA2-Personal / WPA2-Enterprise ) UM-PPS-03-S-Q421V5 www.austin-hughes.com P.21...
- Page 25 < 1.9 > Wifi Network Confi guration Step 5. Enter “ Username “ ( For security type : WPA2-Enterprise ONLY ) Step 6. Enter “ Password “ Step 7. Select “ DHCP “ to “ ON “. Default is “ ON “ Step 8.
- Page 26 < 1.9 > Wifi Network Confi guration Step 10. Record the “ MAC address “ of the Wifi kit Step 11. Assign an IP address of the Wifi kit from your DHCP server. UM-PPS-03-S-Q421V5 www.austin-hughes.com P.23...
-
Page 27: Login
< 1.10 > Login In < Login >, you can login the IP dongle WEBUI by “ Local User ” or “ Domain/LDAP ” login. ( Default login : “ Local User ” ) Local User : - Change “ Login name ” OR “ Password ” - Re-enter password in “... - Page 28 < 1.10 > Login In “ Domain Users Setting ”, - Click “ Update domain data ” to update domain user list. - Assign access right ( No access / Allow / Deny ) to “ Domain Users ” and click “ Apply ” . - The Domain User assigned “...
- Page 29 < 1.10 > Login Domain/LDAP : - Default LDAP Authentication is “ Disable “ - Enable “ LDAP Authentication ” only when you want to login the IP dongle WEBUI by LDAP server - Enter “ LDAP Server ”, - Select “ Protocol ”( LDAP / LDAPS ). Default is “ LDAP “ - Enter “...
- Page 30 < 1.10 > Login In “ LDAP Access Setting ”, - Click “ Update domain data ” to update domain user list. - Assign access right ( No access / Allow / Deny ) to “ LDAP User ” and click “ Apply ” . - The LDAP User assigned “...
-
Page 31: Snmp Setup
< 1.11 > SNMP Setup The IP dongle can manage the connected single & three phase intelligent PDUs in a single daisy- chain up to 32 levels via SNMP v1/v2 or v3 ( Simple Network Management Protocol ) ( I ). Accessing MIB Files Step 1. - Page 32 < 1.11 > SNMP Setup Step 5. Select the SNMP from the left navigation pane Step 6. The SNMP Settings window appears as below: Step 7. Click “ Enable “ in “ SNMP agent “ to start the SNMP agent service Step 8.
- Page 33 < 1.11 > SNMP Setup The following steps summarize how to enable the IP Dongle for SNMP v3 support. Step 1. Connect the IP dongle to a computer. ( Please refer to < 1.4 > IP dongle confi guration ) Step 2.
- Page 34 < 1.11 > SNMP Setup Step 7. Click “ Enable “ in “ SNMP agent “ to start the SNMP agent service Step 8. Select “ v3 “ in “ SNMP version “ & the SNMP v3 settings window appears as below : Step 9.
- Page 35 < 1.11 > SNMP Setup ( III ). SNMP Traps Setting After enable SNMP, you can click “ SNMP Traps “ to go to the “ SNMP Traps Setting “ page Below is the default setting for each PDU SNMP trap. You can set the SNMP trap option and Click “...
-
Page 36: Notifi Cation
< 1.12 > Notifi cation In < Notifi cation > , you can confi gure the alarm email server & max. 5 email recipients to receive alarm notifi cations from the IP dongle. Default is “ Disable ”. Step 1. “ Enable ” alarm email Step 2. -
Page 37: Syslog
< 1.13 > Syslog In < Syslog > , you can view the latest 2000 device and system log UM-PPS-03-S-Q421V5 www.austin-hughes.com P.34... -
Page 38: Ip Dongle Firmware Upgrade
< 1.14 > IP Dongle Firmware Upgrade < Firmware Upgrade > For function enhancement of IP dongle WEBUI, please take the following steps to remotely up- grade the IP Dongle fi rmware : Step 1. Click the following link to go to the mangement software download page : http://www.austin-hughes.com/resources/infrapower/software Step 2. - Page 39 < 1.14 > IP Dongle Firmware Upgrade Step 8. The fi rmware upgrade window appears as below : Step 9. Click “ Browse ” and select the fi rmware fi le ( xxx.zip for fi rmware version IPD-03-FW-v1 / xxx.enc for fi rmware version IPD-03-FW-V1.1 or above ) from the specifi c path in the pop up window and Click “...
-
Page 40: Dhcp Setting
< 1.15 > DHCP Setting Step 1. Connect the IP dongle to the computer ( Please refer to < 1.4 > IP dongle confi guration ) Step 2. Open the MS Edge Step 3. Enter the confi gured IP Dongle address into the address bar. Default IP address of LAN 1 is “... - Page 41 < 1.15 > DHCP Setting Step 7. Select “ Firmware “ from the left navigation pane Step 8. Record the “ MAC address “ of LAN 1 & LAN 2. Step 9. Assign an IP addressof LAN 1 & LAN 2 of to the IP Dongle from your DHCP server. UM-PPS-03-S-Q421V5 www.austin-hughes.com P.38...
- Page 42 < 1.15 > DHCP Setting Step 10. Failover Mode: Select “ ON “ from “ DHCP “ & Click “ Apply “ to save the settings Step 11. Select “ Firmware “ from the left navigation pane Step 12. Record the “ MAC address “ Step 13.
-
Page 43: Command Line Interface Access
< 1.16 > Command Line Interface ( CLI ) Access Command Line Interface ( CLI ) allows you access the IP dongle via Telnet or Secure Shell ( SSH ) to confi gure the system settings and login settings. If the IP dongle is in factory default setting or pass- word is “... -
Page 44: Optional Accessories - Wifi Kit
< 1.17 > Optional Accessories - Wifi Kit Part I. Package and Technical Specifi cation WIFI Kit ( IPD-WIFI ) - Antenna x 1 - USB wireless adapter x 1 - Magnetic stand with 1M antenna wire x 1 Unpacking The equipment comes with the standard parts shown on the package contents. - Page 45 < 1.17 > Optional Accessories - Wifi Kit Part II. Hardware Connection Antenna + USB Wireless Adaptor Step < 1 > ■ Inset and screw the antenna to the USB wireless adapter. Fix the antenna in place & lift it up. Step <...
- Page 46 < 1.17 > Optional Accessories - Wifi Kit Antenna + USB Wireless Adaptor + Magnetic Stand with Antenna Wire Step < 1 > ■ ■ Inset and screw the antenna to the magnetic Inset and screw the 1M antenna wire to stand, and fix the antenna in place.
- Page 47 Intentionally Left Blank UM-PPS-03-S-Q421V5 www.austin-hughes.com P.44...
- Page 48 The company reserves the right to modify product specifi cations without prior notice and assumes no responsibility for any error which may appear in this publication. All brand names, logo and registered trademarks are properties of their respective owners. Copyright 2021 Austin Hughes Electronics Ltd. All rights reserved. UM-PPS-03-S-Q421V5 www.austin-hughes.com...
Need help?
Do you have a question about the Infra Power PPS-03-S and is the answer not in the manual?
Questions and answers